
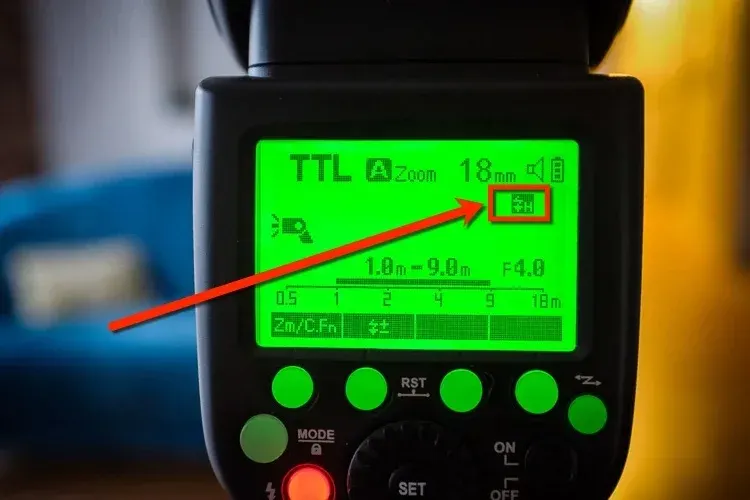
TTL vs manual flash is a choice between automatic and fixed power. In TTL the camera fires a pre-flash, measures the light through the lens and sets the flash output for you, while in manual you choose the power yourself. TTL suits changing scenes, and manual gives repeatable results when conditions stay the same.
Why It Matters
Flash exposure can feel mysterious, and the mode you choose changes how much control you have. Choosing wisely saves time at events and gives consistent images in studio work.
Understanding both modes also helps you diagnose problems. When flash looks inconsistent, the cause is often TTL reacting to a change in the scene rather than a fault with the flash.
Beginner How TTL And Manual Flash Differ
In TTL, short for through the lens, the camera fires a quick pre-flash just before the exposure, measures the reflected light with its metering sensor, calculates the power needed and then fires the main flash. In manual mode, you set the power in fractions from full to 1/128, and the flash fires exactly that amount every time, regardless of the subject. TTL is fast and adaptive, while manual is stable and predictable.
Quick Comparison
- TTL adjusts power for each shot, so exposure follows distance and subject changes.
- Manual gives the same output every time, so brightness stays consistent from shot to shot.
- TTL can be fooled by very bright or dark subjects, reflective surfaces and framing changes.
- Manual needs a test shot or a flash meter, and more thinking.
- Flash exposure compensation adjusts TTL results by plus or minus stops.
When To Choose Each Mode
| Situation | Better Mode | Reason |
|---|---|---|
| Wedding reception with moving guests | TTL | Distances change constantly |
| Studio portraits | Manual | Consistent output between frames |
| Product photography on a tripod | Manual | Repeatable lighting and precise control |
| Event candids | TTL | Speed and flexibility |
| Multiple off camera flashes | Manual (or TTL groups for quick setups) | Predictable ratios |
Getting Good Results In Each Mode
- In TTL, set the camera to aperture priority or manual, choose the flash mode and take a test shot.
- Use flash exposure compensation: plus for dark or backgrounds that fool the meter, minus for bright subjects.
- In manual, set the aperture and ISO for the background, then choose a flash power based on distance and the guide number.
- Take a test shot, check the histogram and adjust the power by one stop at a time.
- Lock the settings when the scene is stable, so every frame matches.
Common Mistakes
- Changing framing between shots in TTL and getting uneven exposure.
- Expecting TTL to handle white wedding dresses and dark suits without compensation.
- Using full power manual flash at close range, which overexposes.
- Mixing modes on several flashes without understanding the resulting ratios.
A Worked Example
At a party, you photograph people at distances from 1 to 4 meters. TTL keeps faces correctly exposed as people move, and a plus one third flash compensation keeps skin bright. Later, in a portrait session against a gray backdrop, you switch to manual at 1/16 power for consistent images, because the distance never changes and any variation would be unwanted.
Why TTL Can Be Inconsistent
The pre-flash is measured against the whole scene, so a shift in background brightness or a large reflective object changes the calculation. Two nearly identical frames can come out with different flash power. This is not a defect but a result of how the meter reads each scene.
Using Flash Exposure Lock
Many cameras offer a flash exposure lock button. Aim at the subject, press the button to fire a pre-flash and store the power, then recompose. This reduces TTL variation when you change the framing, and combines the speed of TTL with some of the stability of manual exposure.
Testing Your Own Flash
Photograph a gray card at several distances in both modes, and note how exposure changes. This takes a few minutes and teaches how your flash and camera combination behaves. Keep notes of which compensation settings worked for common scenes, and revisit them when changing equipment.
Choosing For A Whole Event
Many photographers start an event in TTL, then switch to manual once the room is understood. Walk the space, test a few distances and note the settings that give clean skin tones. Once the ceiling height, wall color and typical distance are known, manual flash gives consistent results for hundreds of frames without the surprises that TTL sometimes brings in changing conditions.
Battery And Recycle Time
Power choice affects battery life and recycle speed. A flash at 1/32 power recycles almost instantly and can fire for hundreds of shots, while full power drains batteries and slows down bursts. In TTL, the flash chooses power for you, so a bright scene may use more than needed. Keep spare batteries and consider lowering ISO or opening the aperture to reduce the power required.
Learning Curve Tips
If you are new to flash, begin with TTL and aperture priority to get acceptable results quickly. As you notice patterns, such as faces that always come out too bright, apply compensation and learn why it helped. Later, move to manual with a simple routine: set the aperture, pick a power, take a test shot and adjust. This gradual path builds understanding without discouraging early efforts.
Handy for this: Speedlight Flash — add light anywhere. (affiliate link)
Advanced Power Control, Sync And Wireless
Understanding Flash Power
Manual flash power is expressed in fractions, each step being one stop. Knowing the maximum range is useful, as shown in the flash guide number. Lower power reduces flash duration, which helps freeze motion, as discussed in flash duration. Higher power recycles more slowly, so plan for bursts.
Balancing With Ambient Light
Shutter speed affects ambient light, and aperture affects both ambient and flash. Use this to balance the subject and background, as covered in ambient and flash. Beyond the normal sync speed, high-speed sync allows faster shutters, as described in high speed sync, at the cost of power.
Off Camera And Wireless Flash
Off camera setups are easier to control in manual mode, because the output of each flash stays the same. TTL still works wirelessly, but accuracy can vary. See off camera flash and flash triggers for options, and bounce flash for softer light that works well in TTL.
Meters And Tools
A flash meter measures the actual light at the subject, giving exact exposure values for manual flash, as described in flash meters. In practice, many photographers use test shots and the histogram. Whichever you choose, record the settings for repeatable results.
Try It
- Photograph a friend at three distances using TTL and note the exposure.
- Switch to manual, set a power that fits the middle distance and shoot the same positions.
- Compare how brightness changes in each mode.
- Try flash exposure compensation in TTL and note the effect.
Common Questions
Is TTL or manual flash better?
Neither is better in every case. TTL is faster for changing scenes, and manual is better for consistent, repeatable results.
Why is my TTL flash exposure inconsistent?
The camera meters each scene separately, so changes in background, framing or reflective objects change the result.
Can I use TTL with off camera flash?
Yes, with compatible triggers or wireless systems, though manual mode is usually more predictable.
What is flash exposure compensation?
A control that adds or subtracts power from the TTL result, in stops, to correct the exposure.
Related Lessons
- Flash Guide Number to calculate manual power.
- Off Camera Flash to use either mode off the camera.
- High Speed Sync for faster shutter speeds with flash.
- Bounce Flash for softer light in TTL.
- Ambient And Flash to balance light sources.
Gear That Helps With This
Hand-picked kit that makes this lesson easier to put into practice.
Some links are affiliate links: if you buy through them we may earn a small commission at no extra cost to you. How this works.