
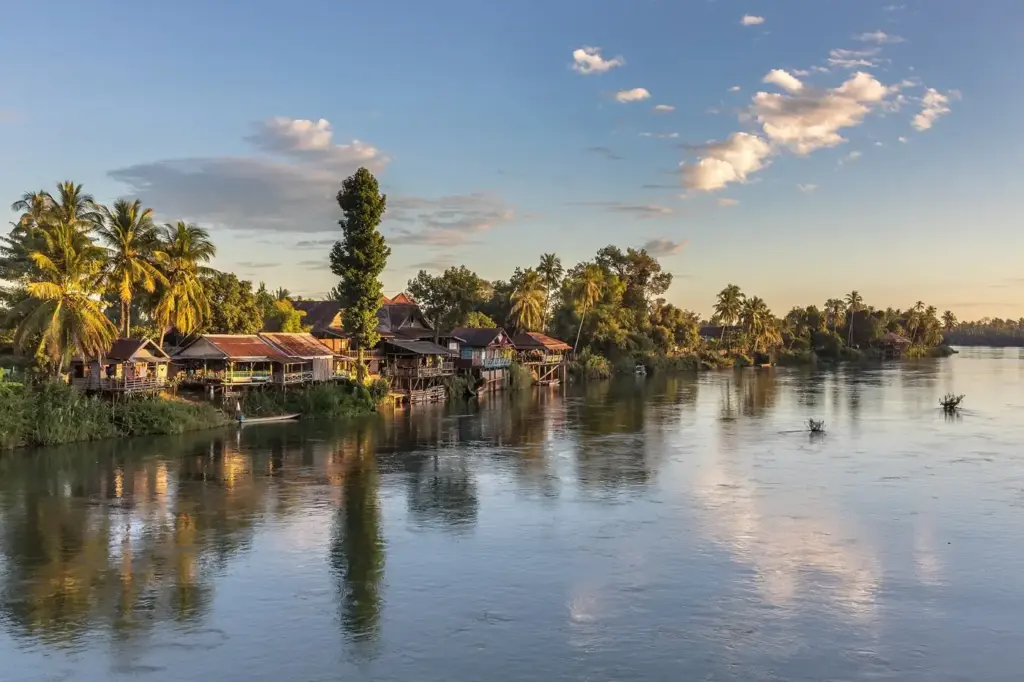
Golden hour photography is shooting during the period shortly after sunrise or before sunset, when the sun sits low in the sky. The light is warm, soft and directional, so shadows stretch out and skin and landscapes glow. The effect is strongest when the sun is roughly between the horizon and 6 degrees above it.
Why It Matters
Low sun gives you color, soft contrast and long shadows without any extra gear. Even an ordinary scene can look rich in the first or last hour of daylight, which is why so many portraits, landscapes and architecture shots are planned around it.
The window is short and changes every day, so a little planning means you arrive ready instead of watching the best light disappear while you set up.
Beginner Finding The Light And Shooting It
The name is not an exact hour. How long the warm light lasts depends on your latitude and the season. Near the equator it is brief, while far from the equator in summer it can last well over an hour. Weather also matters: thin cloud can soften the light, and a heavy bank on the horizon can end it early.
Plan The Time
- Check sunrise and sunset times for your location the day before, using a weather app or a sun-position app.
- Arrive 30 to 45 minutes early to find your spot, because light changes fast once the sun nears the horizon.
- Note which way the light will fall. Walk the scene and decide where the sun will be and which side of your subject it will light.
- Stay after sunset. The sky often turns pink and orange for several minutes after the sun is gone.
Basic Settings
Start in Aperture Priority with your lowest comfortable ISO. For landscapes, try f/8 to f/11. For portraits, try f/2 to f/4 to separate the subject from the background. If the shutter speed drops below what you can handhold, raise ISO a stop at a time rather than letting the picture blur. Set white balance to Daylight or Cloudy if you want to keep the warm tone. Auto white balance may cool the picture to neutral and remove the golden look.
Ways To Use The Light
- Front light on a landscape gives rich, saturated color on every surface.
- Side light on rocks, trees and buildings adds long shadows and texture.
- Back light on a portrait adds a glowing edge on hair, but needs extra exposure on the face.
- Reflected light from windows and pale walls creates warm bounces that can fill shadows.
Common Mistakes
- Arriving when the sun is already down and the best light is over.
- Letting auto white balance neutralize the warmth.
- Leaving exposure on the sky, so a backlit person turns into a dark shape.
- Packing up at sunset and missing the colorful sky afterward.
A Simple Shooting Routine
Begin with wide scene-setting frames while the sun is still a few degrees above the horizon, then move closer for details such as glowing grass, backlit leaves or long shadows across a path. When the sun touches the horizon, switch to silhouettes and sky colors. Review the screen every few minutes, because the light drops by about a stop every few minutes near sunset, and your shutter speed or ISO must keep up. Keep a spare battery warm in a pocket on cold evenings.
Handy for this: Monitor Calibrator — colors you can trust. (affiliate link)
Advanced Solar Elevation, Scattering And Backlit Exposure
Why The Light Turns Warm
Sunlight passes through more atmosphere when the sun is low. At the zenith the path is one air mass, while near the horizon it can be about 10 or more times longer. Air molecules scatter short blue wavelengths far more than long red ones, an effect known as Rayleigh scattering, so by the time the direct beam reaches you, much of the blue has been removed. What remains is warmer, typically somewhere near 3000 to 4000 kelvin, compared with about 5500 kelvin at midday. See color temperature in kelvin for how these numbers relate to white balance.
Why The Light Looks Soft And Directional
The low sun is the same size in the sky as it is at noon, so it is not truly a softer source. The softness comes from dust and haze scattering part of the light into broader fill, and the directional look comes from the shallow angle across surfaces. Long shadows and a raking angle create the texture that makes golden hour pictures feel three-dimensional. This is the same geometry covered in direction of light.
Exposing Backlit Scenes
Backlit scenes often exceed what the sensor can record in one frame, so you must choose what to protect. The sun disk itself is thousands of times brighter than the foreground. A reasonable approach is to expose so the sky just below the sun does not clip, check the highlight warning and histogram, and recover the shadows later from a raw file. Alternatively, meter off the subject’s face, let the sky go brighter, or bracket three frames two stops apart and blend them. For the tools, see reading histograms and highlight warnings.
White Balance And Grading
Shooting raw lets you change white balance after the fact without damage, so you can decide later how much warmth to keep. A common trap is correcting the color to look neutral, which turns the scene dull. A better habit is to use a daylight or cloudy preset in camera, then adjust only to taste. Shadows lit by the blue sky stay cool while sunlit areas stay warm, and that natural color contrast is a large part of why the light looks appealing.
Planning With Sun Position Tools
Sun apps and almanac tables list the azimuth, the compass bearing of the sun, and its elevation for any date and place. Use them to learn where the sun will set relative to a landmark days ahead. Because the sun moves along the horizon through the year, a spot that works in June may not work in December. Scouting in daylight with this data saves you from guessing at the moment the light peaks.
Weather forecasts help too. Broken cloud near the horizon often gives the most dramatic color, while a solid gray layer low in the west can shut the show down completely.
Try It
- Look up tomorrow’s sunset time and the direction the sun will set.
- Arrive 40 minutes early and photograph the same subject every 10 minutes until after the sun is down.
- For one frame, shoot with auto white balance and for another use Cloudy, and compare how the warmth changes.
- Make one backlit frame metered on the subject and another metered on the sky, then check which shows more usable detail.
Common Questions
How long does golden hour last?
It varies by latitude and season. Near the equator it may last 20 to 30 minutes, while at higher latitudes it can stretch beyond an hour. Plan to be ready 30 minutes before sunset and keep shooting afterward.
What camera settings work for golden hour photography?
Use a low ISO, aperture f/8 to f/11 for landscapes or f/2 to f/4 for portraits, and a daylight or cloudy white balance. Check your histogram often, because the light changes quickly.
Do I need a tripod?
Not always. You can often keep shutter speeds fast enough handheld by raising ISO. A tripod helps in the last minutes after sunset or when you want to bracket exposures for backlit scenes.
Is the hour after sunset also good?
Yes. The sky often glows with soft pink and orange tones after the sun drops below the horizon, and the light is very even. It merges into blue hour, which has its own look.
Related Lessons
- Blue Hour Photography for the cool light right after the sun sets.
- Direction Of Light to see how angle shapes shadows and texture.
- Color Temperature In Kelvin to understand why low sun looks warm.
- White Balance Science to keep or change the warmth in your files.
- Rim Light And Silhouettes for backlit sunset techniques.
Gear That Helps With This
Hand-picked kit that makes this lesson easier to put into practice.
Some links are affiliate links: if you buy through them we may earn a small commission at no extra cost to you. How this works.