
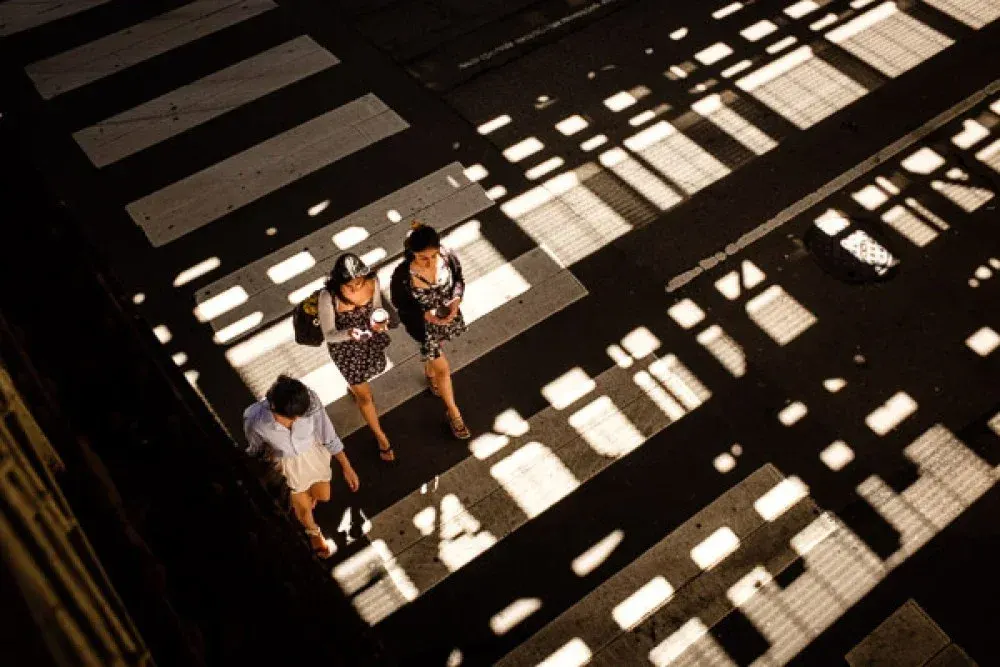
Harsh midday sun is hard, high-contrast light that creates dark eye sockets, bright highlights and deep shadows. You can handle it by moving to open shade, adding fill light with a reflector or flash, diffusing the sun with a scrim, or using it for bold graphic scenes where contrast is the point.
Why It Matters
Most people take photographs when they are outdoors and awake, which means a lot of pictures happen at noon. Overhead sun is the worst case for portraits, with shadows under the nose and eyes, and for landscapes, where colors look flat and highlights clip.
Having a plan for noon lets you keep shooting instead of waiting for golden hour, and it makes travel days and events much more productive.
Beginner Beginner Fixes For Harsh Sunlight
The sun is a small source in the sky, so its light is hard. Overhead it also shines straight down, creating shadows where you want light. The easiest fix is to change either the light or the position.
Simple Steps
- Move your subject into open shade, such as the side of a building or under a tree with a bright sky behind you.
- Turn the subject so the sun is behind them, then add fill light from the front with a reflector or flash.
- Meter for the face, not the bright background, or use exposure compensation.
- Tilt the head slightly upward so the shadows from the brow shrink.
- Wear a hat or move around to get rid of squinting.
Quick Choices
| Problem | Fix |
|---|---|
| Dark eye sockets | Reflector under the face or fill flash |
| Squinting | Use open shade or turn subject away from the sun |
| Blown highlights on skin | Move to shade or diffuse with a scrim |
| Washed out landscape | Add a polarizer and shoot at different times |
| Harsh shadow on a product | Use a diffuser panel between sun and subject |
Common Mistakes
- Posing people in direct sun with eyes closed or squinting.
- Using a pop-up flash at full power, which looks flat.
- Metering on the sky and turning faces into silhouettes by accident.
- Shooting with the sun directly overhead and no plan to fill shadows.
A Simple Practice
Photograph a friend at noon three ways: in direct sun, in open shade, and with their back to the sun with a white card to bounce light into the face. Compare the three frames, and you will see why the second and third are used by professionals.
Handy for this: ND And Polarizing Filters — control light and glare. (affiliate link)
Advanced Lighting Tools And Creative Approaches For Noon Light
Open Shade And Reflected Light
Open shade is a large, soft source: the sky above, lit surfaces around. Move the subject just inside the edge of the shade, facing the open light, and catchlights appear naturally in the eyes. A white wall or sidewalk next to the shadow adds warm bounce. Beware of colored reflections, such as a green wall that tints skin. See open shade light and catchlights.
Scrims And Diffusers
A large diffuser panel between the sun and the subject turns hard sun into a soft source. The bigger the panel and the closer to the subject, the softer the light. Even a translucent white umbrella or a sheet held by an assistant can help. For small items, a 40 inch panel will do, and for people you want a 6 foot panel or larger. This is covered in reflectors and diffusers and the physics of hard and soft light.
Fill Flash In Sunlight
Fill flash balances the shadows. Set exposure for the background in Aperture Priority or Manual, then add flash at minus 1 to minus 2 stops so it looks natural. Above your camera’s sync speed, often 1/200 or 1/250 second, you need high speed sync to use wide apertures in bright light. A neutral density filter is an alternative. See high speed sync, ambient and flash and off camera flash.
Use The Sun As A Backlight
Placing the sun behind the subject creates a rim of light on hair and shoulders and avoids squinting. Meter for the face, and add fill from a reflector. Lens hoods and clean glass reduce flare, though some flare may look attractive. A gentle haze can be added in editing. See rim light and silhouettes and lens flare.
Graphic And High-Contrast Subjects
Noon sun is excellent for architecture, shadows, street scenes, and black and white, where strong contrast creates pattern and shape. Look for repeating shadows, deep doorways and bright walls. Underexpose slightly to protect highlights and retain color. See architecture photography and black and white photography.
Camera And Editing Tips
Shoot RAW and use the histogram or highlight warnings to keep highlights from clipping, as explained in highlight warnings. In editing, lower highlights, raise shadows and add contrast in the midtones, but avoid lifting shadows too far or noise will appear. A polarizing filter deepens skies and reduces glare on water and leaves, particularly when the sun is at 90 degrees to your lens. See camera filters guide.
Choosing Subjects And Locations For Noon
Some places handle overhead light better than others. Narrow streets, covered markets, forest edges and building arcades all give natural shade with bright surroundings for bounce. Water, sand and pale pavement act as giant reflectors and fill shadows from below, which can rescue portraits when the sun is high. Scenes with deep color, such as market stalls, painted buildings and flowers, hold up well because bright light increases saturation. Avoid wide shots of featureless sky and flat landscapes, which look washed out at noon, and use the time to scout, edit or rest instead.
Exposure Strategy For Extreme Contrast
When a scene has both bright sunlit areas and deep shadows, the range may exceed what a sensor can capture in a single frame, which is often around 12 to 14 stops of dynamic range on modern cameras. Decide which part matters. For a portrait, expose for the face and let the background brighten. For a landscape, protect highlights and recover shadows later. Bracketing three frames, one stop apart, gives you a safety net for HDR merging, covered in exposure bracketing. Set Auto ISO limits carefully so bright conditions do not push shutter speed beyond what the sensor can handle with a mechanical shutter.
Try It
- Find a spot at noon where one side of a wall is in shade.
- Photograph a subject in direct sun, in shade near the edge, and with a white reflector below the chin.
- Check the eyes and shadows at 100 percent in each version.
- Add fill flash at minus 1.5 stops to the direct sun shot and compare it.
Common Questions
What is the best time to avoid harsh midday sun?
Early morning and late afternoon give lower, softer light. Overcast days and shade help the rest of the day. If you must shoot at noon, plan for shade, diffusion or fill light.
Do I need a flash to shoot portraits at noon?
Not necessarily. A reflector or open shade can solve most problems. Flash provides more control and works in places where a reflector cannot reach, but it requires practice.
What exposure compensation works for bright sun?
It depends on the metering mode. For a bright sunny scene with a backlit person, add plus 1 stop to meter for the face. For landscapes, minus a third to minus one stop protects highlights.
Can a polarizer help with harsh sun?
Yes, for skies, foliage and water. It cannot soften shadows on a person, but it reduces glare and increases color saturation, which helps landscapes look richer at noon.
Related Lessons
- Open Shade Light for finding the best shadow edges.
- Reflectors And Diffusers to shape sunlight cheaply.
- High Speed Sync for fill flash in bright conditions.
- Golden Hour Photography for the better light at the day’s edges.
- Hard Vs Soft Light Physics to understand why the sun looks harsh.
Gear That Helps With This
Hand-picked kit that makes this lesson easier to put into practice.
Some links are affiliate links: if you buy through them we may earn a small commission at no extra cost to you. How this works.