
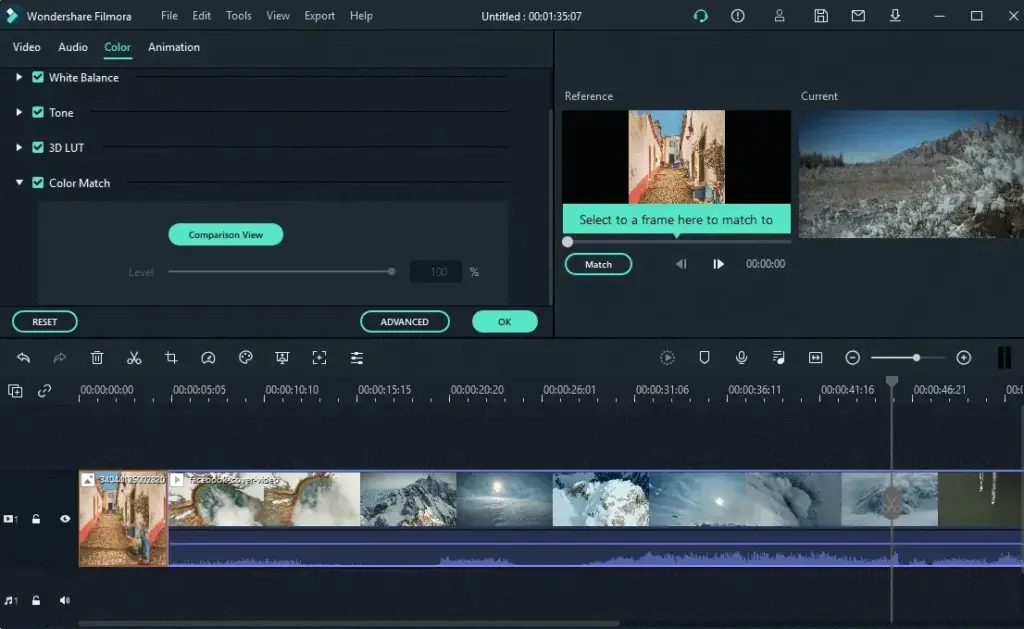
Filmora color correction is the process of fixing exposure, white balance, contrast and saturation so clips look natural, and Color Match is a tool that copies the look of one clip onto others so a sequence looks consistent. Correct first, then match, then add a creative look if you want one.
Why It Matters
Clips from different times, angles or cameras rarely match. One shot looks warm, another cool, one bright and another dark. When they play in sequence, the changes distract the viewer from the story.
Correcting and matching clips makes your edit feel polished. It is one of the quickest ways to improve ordinary footage, and Filmora provides simple tools for it.
Beginner Basic Color Correction In Filmora
Where To Find The Tools
Double click a clip in the timeline and open the Color tab, then the Basic or Adjust section. There you find sliders for temperature, tint, exposure, contrast, highlights, shadows, whites, blacks and saturation. Filmora also has a Color Match option and extra tools such as HSL and curves in newer versions.
A Simple Correction Order
1. Set white balance first with Temperature and Tint, using a neutral object as a guide.
2. Adjust Exposure so the overall brightness looks right.
3. Set Contrast to add or reduce punch.
4. Lower Highlights if bright areas are clipped, and raise Shadows if dark areas are muddy.
5. Adjust Saturation last, usually with small changes.
Using Color Match
Color Match samples the colors of a reference clip and applies a similar balance to a target clip. Choose the clip you want to change, select Color Match, pick the reference frame and apply. Then fine tune with sliders. It works best when the two clips show similar scenes and lighting.
Checking Your Work
Look at skin tones first, since people notice them. Compare to a neutral gray or white in the frame. Use the preview at full size, and flip between the corrected and original version to see the change. If your computer lags, use proxies, as in proxy editing.
Common Mistakes
– Pushing saturation too high so skin turns orange.
– Correcting exposure before white balance.
– Matching clips that show very different lighting.
– Judging color on a screen that is too bright.
Handy for this: Camera Gimbal — smooth handheld footage. (affiliate link)
Advanced A Reliable Filmora Color Correction Workflow
Start With Good Footage
The best correction starts with a good capture. Setting white balance in camera, as in custom white balance, and exposing evenly makes editing much easier. If you shoot in a flat or log profile, apply a conversion first with a LUT, as covered in LUTs explained and log footage. Then correct on top.
Use Scopes And References
Your eyes adapt, so a meter helps. Use any available waveform or histogram to keep exposure within range, and check that blacks are not crushed and whites are not clipped. For a full explanation, read video scopes. A gray card or white object recorded at the start of a shoot gives a reliable reference for neutral color.
Color Matching Across Cameras
When mixing cameras, correct each to a neutral base first, then match. Adjust exposure and white balance to a shared target, and then use Color Match for fine similarity. Differences in saturation and contrast may remain, so adjust by eye. Keep notes on settings so future projects start closer.
Using Masks And Local Corrections
Sometimes only part of a frame needs fixing, such as a bright window or a face in shadow. Use masks to isolate the area, and apply the changes there. See Filmora masks for shapes and feathering. Keep adjustments subtle, with soft edges, so the effect is invisible.
Copying Settings Between Clips
After correcting one clip, copy the adjustments and paste them onto similar clips. This saves time on interview footage or a scene shot in one place. Fine tune each clip after pasting, since lighting changes through the day. You can also apply adjustments to an adjustment layer to treat many clips at once.
Creative Looks After Correction
Once clips match, add a look with a filter, LUT or color grade. Keep it consistent across the video, and use a moderate strength so skin stays natural. Learn more in color grading basics. Avoid applying a strong look before fixing exposure, since it can hide problems you will later regret.
Export Considerations
Check the project and export settings so color is not changed unexpectedly. Preview on more than one device if possible, including a phone. See Filmora project settings and export settings for details.
Skin Tones
Skin tones are the most important color in most videos. After correction, skin should sit in a natural range from warm beige to deep brown without green or magenta casts. If skin looks orange, lower saturation or shift the temperature slightly cooler. If it looks pale, raise exposure gently or add warmth.
Mixed Lighting
Mixed light, such as daylight from a window and warm lamps, creates color casts that are hard to fix. Correct for the main light on the subject and accept some variation in the background. Using a mask for the background lets you adjust it separately.
Consistent Workflow
Do your correction in a consistent order for every project. Name your adjustment presets, and save useful ones for reuse. When you collaborate, share the settings so everyone matches.
Review Before Export
Watch the sequence from start to finish with fresh eyes. Look for flashes where colors jump between clips. Fix them by matching, and then export a short test to confirm the colors look right after rendering.
Try It
- Pick two clips of the same location with different color and brightness.
- Correct the first clip using white balance, exposure and contrast in that order.
- Use Color Match to apply its look to the second clip and fine tune with sliders.
- Play both in sequence and check that skin and neutral tones look alike.
Common Questions
What is Color Match in Filmora?
It is a tool that samples the color and tone of a reference clip and applies a similar look to another clip, so shots in a sequence look consistent.
What order should I correct color in?
Set white balance first, then exposure, then contrast, highlights and shadows, and finish with saturation. Fixing basics first makes later changes easier.
Can I copy color settings to other clips?
Yes. Copy the adjustments from one clip and paste them onto others, then fine tune each clip, or use an adjustment layer for a group of clips.
Why do my clips still look different after Color Match?
The scenes may have different lighting or the footage may come from different cameras. Use sliders to fine tune, and correct each clip to a neutral base first.
Related Lessons
- Color Grading Basics for creative looks after correction.
- LUTs Explained to convert flat footage.
- Video Scopes for checking exposure and color.
- Filmora Masks to correct only part of a frame.
- Filmora Export Settings for delivering the final video.
Gear That Helps With This
Hand-picked kit that makes this lesson easier to put into practice.
Some links are affiliate links: if you buy through them we may earn a small commission at no extra cost to you. How this works.