
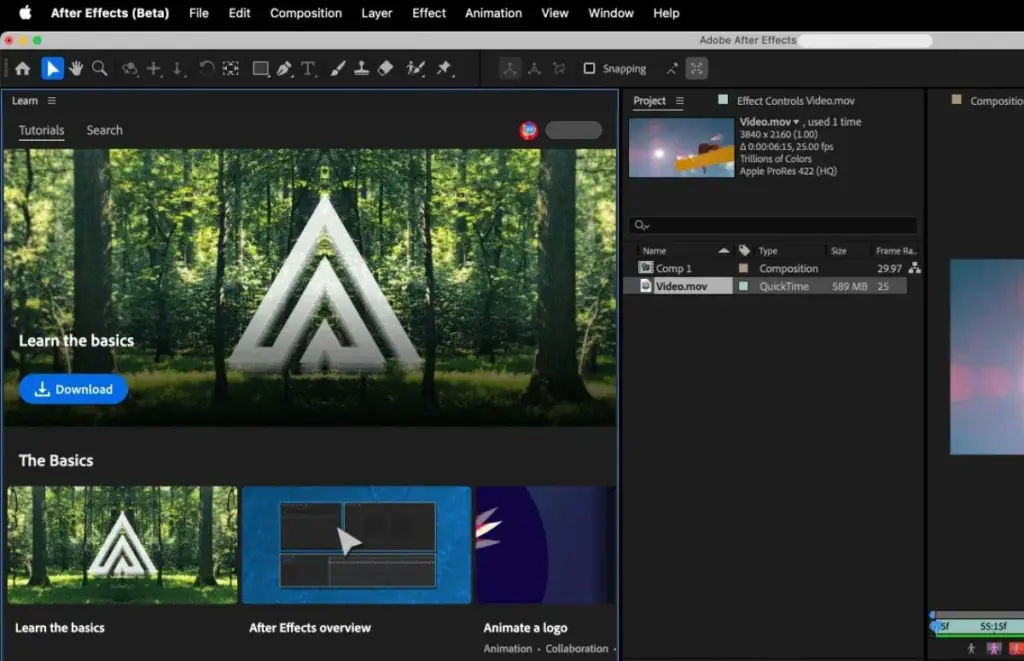
After effects basics begin with two ideas: the workspace is a set of panels arranged around the Timeline, and every project is built from compositions. A composition is a container with its own width, height, frame rate and duration, and layers inside it are what you animate and render.
Why It Matters
After Effects looks crowded the first time you open it, and most beginner frustration comes from not knowing which panel does what. Once you can name the main panels and know where a composition gets its settings, the rest of the program becomes a matter of adding layers and changing properties.
Composition settings also lock in decisions that are painful to change later. A wrong frame rate or size can cause stutter, soft text, or a full rebuild when you discover it at export time.
Beginner After Effects Basics: Panels And Your First Composition
The default Standard workspace has five areas you will use constantly. The Project panel lists imported files and compositions. The Composition panel shows the picture. The Timeline panel holds layers and their properties. The Tools bar sits across the top, and the Effects and Presets panel on the right lets you search for any effect by name.
Setting Up A Composition
- Choose Composition, then New Composition, or press Ctrl+N (Cmd+N on a Mac).
- Pick a preset such as HDTV 1080 29.97, or type the width and height yourself. Common sizes are 1920 by 1080 and 3840 by 2160.
- Set the frame rate to match where the video will play: 24 for film style, 25 for PAL regions, 29.97 or 30 for most web video in North America.
- Set the duration. Ten seconds is plenty for practice, and you can extend it later.
- Click OK, then drag a video, image or text layer into the Timeline.
What Each Panel Does
| Panel | Purpose |
|---|---|
| Project | Stores imported footage, stills, audio and compositions |
| Composition | Shows the current frame and lets you move layers directly |
| Timeline | Stacks layers, shows properties, and holds keyframes |
| Effects and Presets | Searchable list of effects and animation presets |
| Info and Audio | Shows color values under the cursor and audio levels |
| Preview | Controls playback, including RAM Preview |
Keys Worth Learning First
- Spacebar plays and stops, and 0 on the number pad starts a RAM Preview.
- P, S, R, T and A reveal Position, Scale, Rotation, Opacity (T) and Anchor Point for a selected layer.
- Ctrl+K opens Composition Settings again if you need to change something.
- B and N set the beginning and end of the work area so you render only part of the timeline.
Common Mistakes
- Dragging footage into the Project panel and forgetting that nothing appears until it is placed in a composition.
- Starting with a default 30 frames per second when the footage is 24 or 25.
- Leaving duration at the default of five seconds and wondering why layers vanish.
- Closing a panel by accident instead of using Window, Workspace, Reset to Saved Layout.
A Simple First Project
Create a 1920 by 1080 composition, add a solid layer for the background, add a text layer, and press P to reveal Position. Click the stopwatch, move the playhead, and move the text. You have made your first keyframed animation using only the panels above.
Handy for this: Wide-Angle Zoom Lens — take in the whole scene. (affiliate link)
Advanced Composition Settings, Frame Rate And Resolution
Choosing Frame Rate For The Deliverable
Set the composition frame rate to the final delivery rate, not the rate of whichever clip you import first. Mixed frame rates are common, and After Effects will interpret each clip according to its own rate or conform it, depending on settings. If the delivery is 23.976 and a clip is 29.97, the clip will drop or repeat frames unless you retime it. For the theory behind this, see conforming frame rates and video frame rates.
Resolution, Preview Quality And Render Size
The composition size is the size of the final render. Resolution in the Composition panel, set to Full, Half, Third or Quarter, only changes preview speed. Working at Half resolution gives roughly four times fewer pixels to compute, which helps on slower machines. If the project may be cropped or reframed for vertical formats, building at 4K and delivering at 1080 gives you room to punch in without softness. See vertical video framing for the reframing side.
Bit Depth And Color
Project Settings lets you pick 8, 16 or 32 bits per channel. Eight bit is fine for simple titles. Sixteen bit reduces banding in gradients and heavy color correction, and 32 bit float with linear blending is for compositing glows and light effects realistically. Higher bit depth uses more memory and is slower. Also check the working color space, so the colors you see in the viewer match the source footage. A deeper treatment is in 8 bit vs 10 bit video.
Pixel Aspect And Timecode
Almost all modern work uses square pixels, with a pixel aspect ratio of 1.0. Older standard definition formats and some anamorphic sources use non-square pixels, and After Effects can compensate in the viewer. For NTSC rates like 29.97, timecode may be drop frame or non-drop frame; choose to match the editor you are working with so cuts line up.
Renderers And Performance
Under Project Settings and Preferences you can choose how After Effects draws frames, and the choice affects speed. GPU acceleration speeds up many effects, while multi-frame rendering uses several processor cores at once during final output. Keep an eye on the disk cache too, since After Effects stores previously rendered frames there so repeat previews play instantly. If memory runs low, purge the cache or reduce the preview resolution. These settings do not change the look of the final render, only how long it takes to arrive.
Nesting And Organization
Large projects become manageable by pre-composing groups of layers into their own compositions, naming layers clearly, and sorting footage into folders in the Project panel. A nested composition inherits nothing automatically, so check that its frame rate and size match the parent comp, or you may see unexpected scaling.
Try It
- Create a new 1920 by 1080 composition at 24 frames per second and ten seconds long.
- Import any photo, drag it into the Timeline, and scale it to fill the frame with S.
- Add a text layer, then reveal its Opacity with T and keyframe it from 0 to 100 percent over one second.
- Switch Resolution to Half, play a RAM Preview, then switch back to Full and note the difference in speed.
Common Questions
What is a composition in After Effects?
A composition is a container with its own size, frame rate and duration. It holds layers such as video, images, text and shapes, and it is what you preview and render. One project can contain many compositions, and compositions can be nested inside each other.
Can I change composition settings after I start?
Yes. Press Ctrl+K to reopen Composition Settings and change size, frame rate or duration. Layers keep their position, but they may no longer fill the frame if you change size, so check the result and rescale where needed.
What resolution should I work at?
Work at the size you will deliver, such as 1920 by 1080 for standard HD. If you may crop or reframe, work larger, such as 3840 by 2160. Use the Resolution menu in the viewer, rather than a smaller composition, to speed up previews.
Why is my preview choppy?
Previews play from RAM, so the first pass must render frames. Lower the preview resolution, shorten the work area, close other programs, and use RAM Preview. Choppy playback is not the same as a bad export, which renders every frame regardless.
Related Lessons
- Keyframes And The Graph Editor for animating properties once your composition is ready.
- Shape Layers to build graphic elements directly in a composition.
- Pre-Composing for organizing complicated layer stacks.
- Render Queue to export your finished composition.
- Video Frame Rates for choosing the correct rate in the first place.
Gear That Helps With This
Hand-picked kit that makes this lesson easier to put into practice.
Some links are affiliate links: if you buy through them we may earn a small commission at no extra cost to you. How this works.