
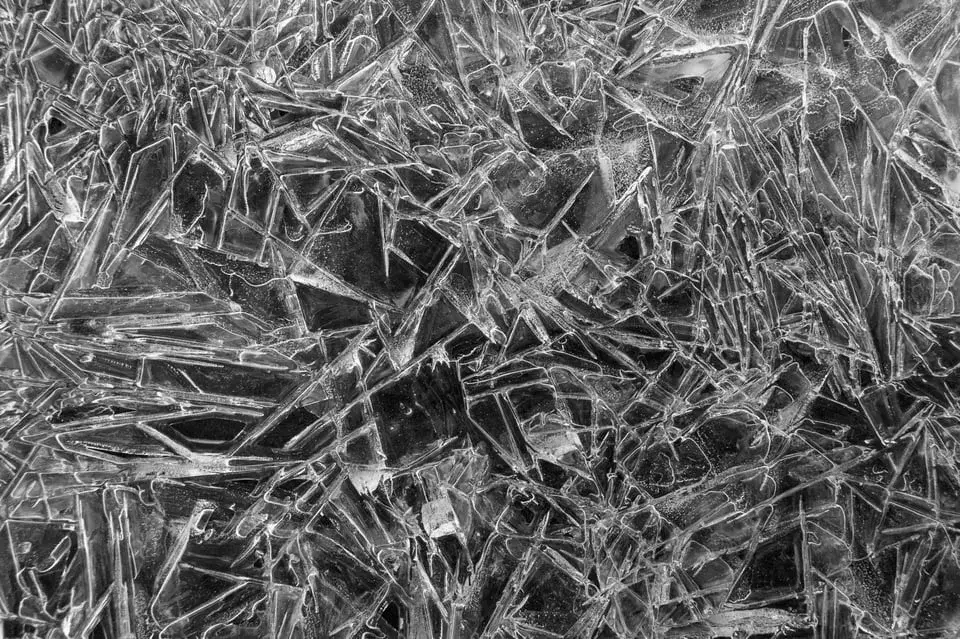
Texture in photography is the visible surface quality of a subject, such as rough bark, soft fabric or weathered stone, and it makes an image feel tactile. Side lighting at a low angle, close framing and sharp focus emphasize texture, while flat front light and heavy smoothing hide it.
Why It Matters
Photographs are flat, yet viewers can almost feel a rough wall or a wet stone. Texture adds depth, realism and emotion, and can be the main subject in abstract and detail photography.
It also supports other compositional tools. A textured foreground draws attention, repeating surface patterns create rhythm and a smooth subject against a rough background gains emphasis through contrast.
Beginner Texture In Photography Basics
Texture is created by tiny differences in height and tone across a surface. Light revealing those differences makes texture visible. When light skims across a surface from the side, each bump casts a small shadow, and the contrast between lit and shadowed areas shows the roughness. When light comes straight on, shadows disappear and the surface looks flat. The direction and quality of light are the main controls.
Ways To Reveal Texture
- Use side or low-angle light, such as the sun near the horizon.
- Move closer or use a macro lens to fill the frame with surface detail.
- Choose hard light for rough surfaces and soft light for gentle ones.
- Focus accurately, because soft focus loses fine detail.
- Use a polarizer to cut glare on wet or shiny surfaces and reveal color and detail.
Texture And Light
| Surface | Best Light | Why |
|---|---|---|
| Rough stone or bark | Low, hard side light | Strong shadows reveal roughness |
| Fabric and skin | Soft side light | Gentle shading keeps detail without harshness |
| Wet surfaces | Overcast or polarized light | Reduces glare and keeps color |
| Sand and snow | Low sun at an angle | Ripples and ridges become visible |
| Metal and glass | Large soft source | Controls reflections and shows form |
Photographing Texture Step By Step
- Find a surface with interesting detail, such as bark, a brick wall or old paint.
- Walk around it and watch how the light changes the appearance of the texture.
- Position yourself so light comes from the side at a low angle.
- Fill the frame, focus on the area of strongest detail and use an aperture such as f/8 for depth.
- Check the picture at full size and adjust angle or exposure.
Common Mistakes
- Shooting rough surfaces in flat midday light.
- Over-sharpening and clarity adjustments, which create halos and artificial texture.
- Ignoring color, when a small accent color can strengthen texture.
- Using too wide an aperture, so only part of the detail is in focus.
A Worked Example
A weathered wooden door looks dull at noon. Returning in the late afternoon, the sun skims across the door at a low angle, and each crack and nail becomes visible. A close crop with a polarizer reduces the sheen on the paint, and the image now feels rough, warm and old, which tells a story about the building.
Texture As A Subject
In abstract photography, texture alone can carry an image. Peeling paint, rusted metal, ripples in sand and frost on glass all work. Look for patterns, contrasts and lines within the surface, and use simple compositions so that the texture is the main event.
Using Texture For Contrast
A smooth subject against a rough background draws the eye, such as a polished stone in gravel or a glass bottle against rough wood. This contrast creates interest and guides attention. Consider both the shape and the surface when choosing a background.
Equipment And Lens Choices
Sharp lenses reveal more texture, and a medium aperture such as f/5.6 to f/8 gives the best sharpness on most lenses. A macro lens lets you move close, while a telephoto compresses distant surfaces such as rock faces or hillsides into patterns. Use a tripod for low-light detail work, and a remote release to keep fine detail crisp.
Texture In Portraits
Skin texture is a delicate matter. Hard side light shows every pore, which can suit a character portrait of an older person, while soft light is kinder for beauty and family work. Hair, clothing and background materials add supporting texture that can frame the face, so choose wardrobe and backdrop with that in mind.
Building A Texture Collection
Collect surfaces on walks: walls, doors, leaves, sand, ice, paper and fabric. A folder of texture photographs becomes a valuable resource for backgrounds and overlays, and the habit trains your eye to see detail. Photograph each from several angles, and record the light conditions so that you can reproduce them later.
Handy for this: Carbon Fiber Tripod — sharp at slow shutter speeds. (affiliate link)
Advanced Editing And Technical Control
Local Contrast And Clarity
In editing, small increases of local contrast bring out texture, as explained in texture, clarity and dehaze. Use texture on surfaces and avoid skin, where a negative setting softens detail. Overuse produces halos and noise, so apply modest values and check at 100 percent. Masks help limit the effect to areas where it helps, as in Lightroom masks.
Black And White Treatment
Without color, texture becomes more dominant, because tone and detail carry the image. See black and white photography and black and white in Lightroom. Increase contrast gradually and use dark-to-light tonal range to emphasize depth.
Light Direction And Mood
Direction of light controls how much texture appears, as outlined in direction of light. Grazing light creates strong texture and drama, while diffuse light gives soft, subtle results. Match the light to the mood: rough and dramatic or smooth and calm.
Combining With Other Composition Tools
Texture works well with negative space, where a smooth area balances a rough one, and with color harmony, where limited colors keep attention on the surface. Use subject isolation to separate textured subjects from busy backgrounds, and maintain consistent sharpness across the area of interest.
Try It
- Choose a textured surface and photograph it at three times of day or from three light directions.
- Compare how side light and front light change the look.
- Add a polarizer and observe the difference on a shiny surface.
- Edit one image with modest texture and clarity and compare with the original.
Common Questions
What light is best for texture?
Low, hard side light usually shows texture best, because it creates small shadows across surface detail.
Does texture need a macro lens?
No. Texture appears at any scale, from a close-up of bark to a distant rocky hillside, as long as light and detail are visible.
How do I avoid over-processing texture?
Use small adjustments, check at 100 percent and mask the effect so that it does not affect skin or smooth areas.
Can texture be the main subject?
Yes. Abstract and detail photographs often focus entirely on the pattern and feel of a surface.
Related Lessons
- Direction Of Light to control how texture appears.
- Texture Clarity Dehaze for editing detail.
- Black And White Photography to emphasize tone and surface.
- Negative Space to balance rough and smooth.
- Subject Isolation to separate textured subjects.
Gear That Helps With This
Hand-picked kit that makes this lesson easier to put into practice.
Some links are affiliate links: if you buy through them we may earn a small commission at no extra cost to you. How this works.