
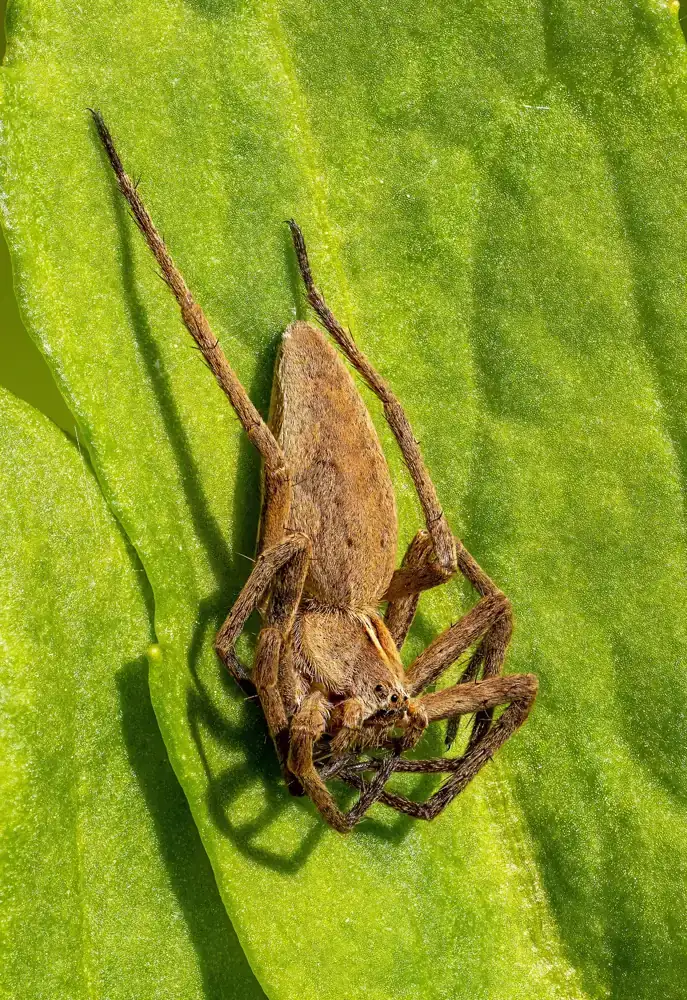
Focus stacking is a technique where you take several photos of the same scene, each focused at a slightly different distance, then merge them in software so that every part of the subject is sharp. It overcomes the thin depth of field of macro and close-up photography without needing very small apertures.
Why It Matters
At close distances, depth of field becomes very thin. At 1:1 magnification and f/8, the sharp zone is about one millimeter deep. Stopping down further does not help much, because diffraction softens the whole image. A single frame often cannot render an entire insect, flower or product sharply.
Stacking solves this by combining the sharpest parts of many frames. It is also used by landscape photographers to keep a nearby rock and distant mountain sharp in the same picture.
Beginner Shooting A Basic Focus Stack
You need a stable setup and a subject that does not move. Indoor objects, flowers on a still day, coins and jewelry are good first subjects.
Step By Step
- Mount the camera on a tripod and frame the subject, leaving a little room around it.
- Set Manual mode with a middle aperture such as f/5.6 or f/8, a low ISO and a steady shutter speed.
- Switch to manual focus or turn off autofocus so the camera does not refocus between frames.
- Focus on the nearest part of the subject and take a picture.
- Turn the focus ring slightly, take another, and repeat until you have focused on the farthest part.
- Merge the images in software.
How Many Frames
| Subject | Typical frames |
|---|---|
| Small flower from 30 cm | 5 to 10 |
| Jewelry or coin | 8 to 15 |
| Insect at 1:1 magnification | 20 to 60 |
| Landscape with foreground and background | 3 to 6 |
What You Need
- A sturdy tripod or a macro rail for precise movement.
- A remote release or two second timer to avoid shake.
- Constant light, or strobes that recycle quickly.
- Stacking software such as Photoshop, Helicon Focus, Zerene Stacker or Affinity Photo.
Common Mistakes
- Moving the tripod or subject between shots, which causes ghosting.
- Skipping the front or back of the subject, leaving soft areas.
- Using autofocus, which can vary the focus step unpredictably.
- Changing exposure between frames because of auto settings or changing light.
Quick Test
Photograph a small flower or a stack of coins from a close distance, taking eight frames while moving the focus a small amount each time. Merge them and compare to the best single frame.
Handy for this: Macro Lens — fill the frame with detail. (affiliate link)
Advanced Planning Steps, Software, And Fixing Artifacts
Choosing The Step Size
The ideal step is smaller than the depth of field, so that each frame overlaps with the next. For a rough estimate, the total depth of field in millimeters is about 2 times the f-number times the circle of confusion times one plus the magnification, divided by the magnification squared. At 1:1 and f/8 on a full frame camera, that comes to roughly one millimeter. Steps of half that give a comfortable overlap. For general theory, see circle of confusion and hyperfocal distance.
In-Camera Focus Bracketing
Many modern cameras include focus bracketing. You choose the number of shots and the step size, and the camera moves the focus itself between frames. This is more consistent than turning a ring by hand and is useful for landscapes and macro. Some also offer in-camera stacking, though the result may be a JPEG with less control. Read focus bracketing for settings.
Merging In Software
In Photoshop, load the files as layers, select all, choose Edit then Auto-Align Layers, then Edit then Auto-Blend Layers with Stack Images selected. Dedicated programs such as Helicon Focus and Zerene Stacker give more algorithm choices and better handling of difficult edges. Retouch artifacts afterward by painting from individual frames with a layer mask. Shooting in RAW and applying identical edits before stacking gives the best results.
Aperture And Diffraction
It might seem logical to stop down to f/16 and need fewer frames, but diffraction reduces sharpness at small apertures. A mid aperture such as f/5.6 to f/8 produces sharper individual frames, and stacking compensates for the thin depth of field. See lens diffraction limit for more on why.
Focus Breathing And Alignment
Some lenses change their field of view as they focus, so the image grows or shrinks between frames. This effect, called focus breathing, can cause edges to misalign, and stacking software must scale the layers. Macro lenses and tripod rails reduce the problem. See focus breathing for a deeper look. Using a macro rail moves the whole camera in small steps, which avoids breathing altogether.
Landscape And Product Uses
For landscapes, focus on the foreground, the middle ground and the distance, then blend, with care at overlapping edges like branches. For product photography, stacking allows a wide-open aperture look with edge-to-edge sharpness. Learn lighting and setup in product photography and macro photography.
Moving Subjects And Wind
Anything that moves between frames will create ghosting. Shield flowers from wind, work indoors, or use flash to freeze movement. For insects, use a quick burst while the subject is still, or stack fewer frames at a slightly smaller aperture. Where movement is unavoidable, take extra frames and blend only the cleanest layers.
Lighting Consistency Across The Stack
Frames in a stack must match in brightness and color. Use manual exposure and a fixed white balance so the camera does not change settings between shots. Under daylight, clouds passing overhead can shift the exposure partway through a sequence, so a cloudy day or indoor continuous light is easier than shifting sun. With flash, set a lower power so the units recycle fast enough to keep up with the shooting speed, and leave a short pause between frames if the light flickers.
Reviewing The Stack Before You Merge
Look through the frames before processing. Delete any that are blurred by vibration or have a different exposure, and make sure the first and last frames really cover the nearest and farthest edges of the subject. Missing coverage at either end is the most common reason for soft spots in the final image. If a frame in the middle is bad, it is usually better to remove it and rely on its neighbors, since the overlap tends to cover the gap.
Cleaning Up The Final Image
Merged results sometimes show halos around bright edges or soft zones where the software chose a poor layer. Inspect the image at 100 percent, then use a layer mask to paint in a sharper area from one of the source frames. Apply sharpening and noise reduction after stacking rather than before, as sharpening each frame can exaggerate small differences between layers.
Try It
- Place a small object on a table in steady light and mount your camera on a tripod.
- Focus manually on the closest edge, then take six pictures, moving focus slightly each time.
- Merge them using Auto-Align and Auto-Blend in Photoshop or free software.
- Compare the stacked result against a single frame at f/16.
Common Questions
What is focus stacking used for?
It is used to get more depth of field than a single frame allows, mainly in macro, product and landscape photography. It combines the sharp parts of several frames into one image.
Can I focus stack handheld?
You can, using a burst and software alignment, but results are less reliable. A tripod gives much better alignment. For very close work, a rail is better still.
What aperture is best for stacking?
Use the sharpest aperture of your lens, often f/5.6 to f/8. Avoid very small apertures because of diffraction. Use more frames if you need to.
Is focus stacking the same as HDR?
No. HDR merges frames of different exposures to extend dynamic range. Focus stacking merges frames of different focus distances to extend depth of field. Both use multiple frames and alignment.
Related Lessons
- Focus Bracketing to automate the frame sequence in camera.
- Macro Photography for close-up technique and gear.
- Hyperfocal Distance for landscape depth without stacking.
- Focus Breathing to understand lens changes while focusing.
- Lens Diffraction Limit for choosing the best aperture.
Gear That Helps With This
Hand-picked kit that makes this lesson easier to put into practice.
Some links are affiliate links: if you buy through them we may earn a small commission at no extra cost to you. How this works.