
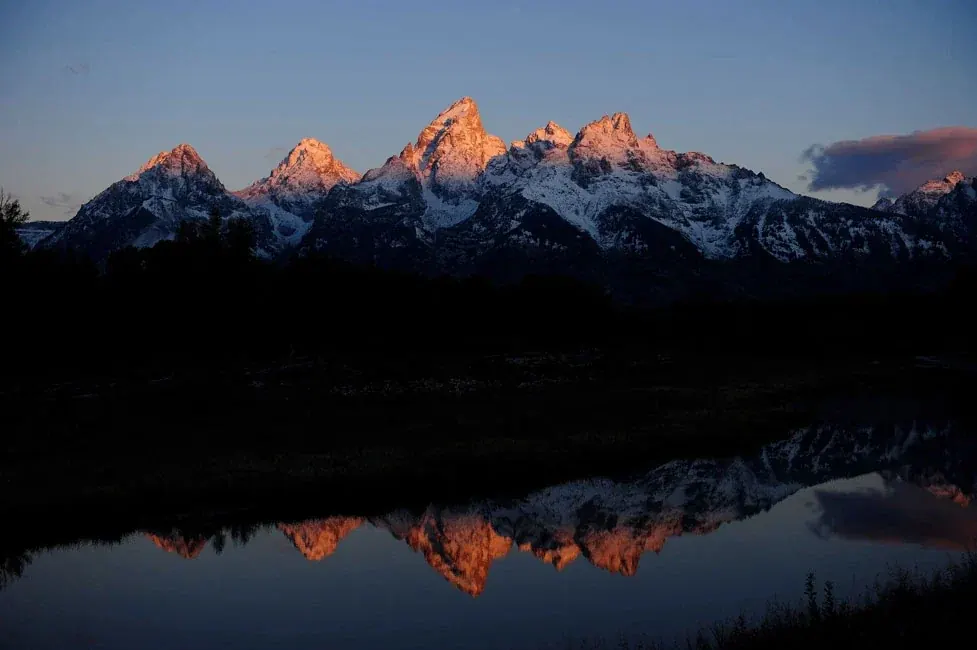
Landscape planning is the process of choosing a location, a date and a time so that light, weather and viewpoint come together for the picture you want. It uses maps, sun and moon position tools, weather forecasts and scouting notes, and it greatly raises the chance of getting a strong image on the first visit.
Why It Matters
Great landscape photographs are rarely accidents. The same hill looks flat at noon under a gray sky and spectacular at sunrise with low cloud in the valley. Planning lets you aim for the second case instead of hoping for it.
It also saves time and effort. Knowing where the sun will rise, how long the walk takes and what the forecast says prevents wasted trips, missed light and unsafe situations in remote places.
Beginner Landscape Planning Basics For Beginners
Start with a question: what do you want to photograph, and what light does it need? A west-facing cliff wants evening light, a forest wants soft overcast, and a lake wants calm wind for reflections. Once you know what the scene needs, you can search for the day and time that delivers it, and choose a backup plan if conditions fail.
What To Check Before You Go
- The direction the main view faces, which decides whether sunrise or sunset lights it.
- Sunrise, sunset, golden hour and blue hour times for the exact date.
- Cloud cover, visibility, wind and the chance of precipitation.
- Access, walking time, parking and any permits or closures.
- Sunset or sunrise height of the moon, tide times or water levels if relevant.
Common Planning Tools And What They Tell You
| Tool Type | What It Shows | Why It Helps |
|---|---|---|
| Sun and moon position app | Azimuth, elevation and rise and set times on a map | Tells you where light will fall and when |
| Weather forecast | Cloud layers, wind, rain, humidity and temperature | Predicts clear sky, fog or storms |
| Satellite and terrain map | Trails, ridgelines, water and roads | Finds viewpoints and routes |
| Photo-sharing sites | Examples taken at the location | Shows compositions and seasonal color |
| Tide or river gauge table | Water level by time | Matters for beaches, estuaries and waterfalls |
A Simple Planning Routine
- Pick a subject and decide the best light: sunrise, sunset, overcast or night.
- Find the viewpoint on a map and note which direction the camera will face.
- Check sun and moon tools for the date and look at the angle of the first and last light.
- Read the forecast three days, one day and a few hours before, focusing on cloud layers and wind.
- Choose a primary spot and two backup spots in case clouds or crowds spoil the first.
Common Mistakes
- Arriving at sunrise without checking where the sun comes up, and finding the best view is shaded.
- Trusting a single forecast number and ignoring cloud height, which decides whether light is blocked at the horizon.
- Planning only the photo and forgetting safety, such as daylight for the walk back.
- Giving up when the forecast says overcast, when soft light might suit forests and waterfalls perfectly.
A Worked Example
Imagine you want a coastal cliff lit warm at sunset. A sun app shows the sun setting northwest in summer, which lights the cliff face from the side. The forecast shows clear sky overhead with a band of cloud near the horizon, which could block the final light. You decide to arrive early, shoot the side light during golden hour, and keep a second composition ready for the afterglow when clouds catch color.
Scouting In Person
Visit the location in daylight when possible, even without the right light. Walk the likely composition, find safe footing, note foreground subjects such as rocks or flowers, and check whether trees or buildings will block the sun. Take quick reference shots on a phone and mark the spot on a map. When the weather finally cooperates, you will already know exactly where to stand.
Pack For The Plan
Planning includes gear. If the forecast shows long shadows and bright sky, bring graduated filters or plan to bracket. If you plan a night shot, bring a headlamp, spare battery and warm clothes. A tripod is rarely optional at dawn or dusk. A short checklist in your phone keeps the bag consistent from trip to trip.
Handy for this: Wide-Angle Zoom Lens — take in the whole scene. (affiliate link)
Advanced Reading Forecasts, Light Angles And Risk
Clouds And The Light Path
A colorful sunrise or sunset needs a gap in cloud near the horizon so low sun can reach clouds higher up and light them from below. High, thin cloud usually gives the best color. Thick low cloud blocks the sun, and a totally clear sky gives clean light but little drama. Forecast layers for low, medium and high cloud tell you which case to expect. The color of the light itself is explained in golden hour photography and blue hour photography.
Sun Azimuth And Elevation
The azimuth tells you the compass direction of the sun and the elevation tells you how high it is above the horizon. Subjects facing the sun at low elevation glow with warm side or back light, and subjects facing away are lit evenly. Terrain changes the effective sunrise time, since a mountain to the east delays first light. Use your planning tool to simulate the horizon profile. For how light direction changes a scene, see direction of light.
Ground Conditions And Water
Fog forms where cool, humid air sits over still water and cold ground, so valleys and lakes after a clear, calm night often hold it. Waterfalls look best after rain but can become dangerous or muddy, and tides alter beaches, rocks and sea stacks within minutes. Learn the local patterns and plan around them. Pairing the plan with foggy landscapes or silky water technique gives you ready shooting strategies.
Gear, Filters And Technique In The Plan
Think about the technical choices before you leave. A wide aperture and long exposure in dim light call for a sturdy tripod, as described in choosing a tripod. Bright skies against dark land call for graduated ND filters or exposure bracketing. Deep scenes from foreground to horizon may need focus stacking. Writing these choices beside the plan prevents rushed decisions when the light is changing quickly.
Try It
- Pick a nearby viewpoint and use a sun app to find the sunrise and sunset direction for tomorrow.
- Check the forecast for cloud layers and wind for the same time.
- Write a two-line plan: primary composition and backup composition.
- Visit the spot at the planned time and compare what you predicted with what happened.
Common Questions
What is the best app for landscape planning?
Any app that shows sun and moon direction on a map, combined with a reliable forecast with cloud layers, covers most needs. Choose tools you can use offline in remote areas.
How far ahead should I plan?
Pick the location and season weeks ahead, check the forecast three days before, and make the final decision a few hours before leaving.
Is bad weather bad for landscape photography?
Not always. Storms, fog and clearing skies often produce the most dramatic pictures, provided you plan for safety and protect your gear.
Do I need to scout a location first?
It helps a lot, since you learn the access, find compositions and avoid surprises. It is not required, but it makes the shoot calmer and the pictures better.
Related Lessons
- Golden Hour Photography for the warm, low light many plans aim for.
- Blue Hour Photography for the quiet color before sunrise and after sunset.
- Direction Of Light to see how sun angle shapes a scene.
- Graduated ND Filters to balance a bright sky with dark land.
- Focus Stacking for sharpness from foreground to horizon.
Gear That Helps With This
Hand-picked kit that makes this lesson easier to put into practice.
Some links are affiliate links: if you buy through them we may earn a small commission at no extra cost to you. How this works.