
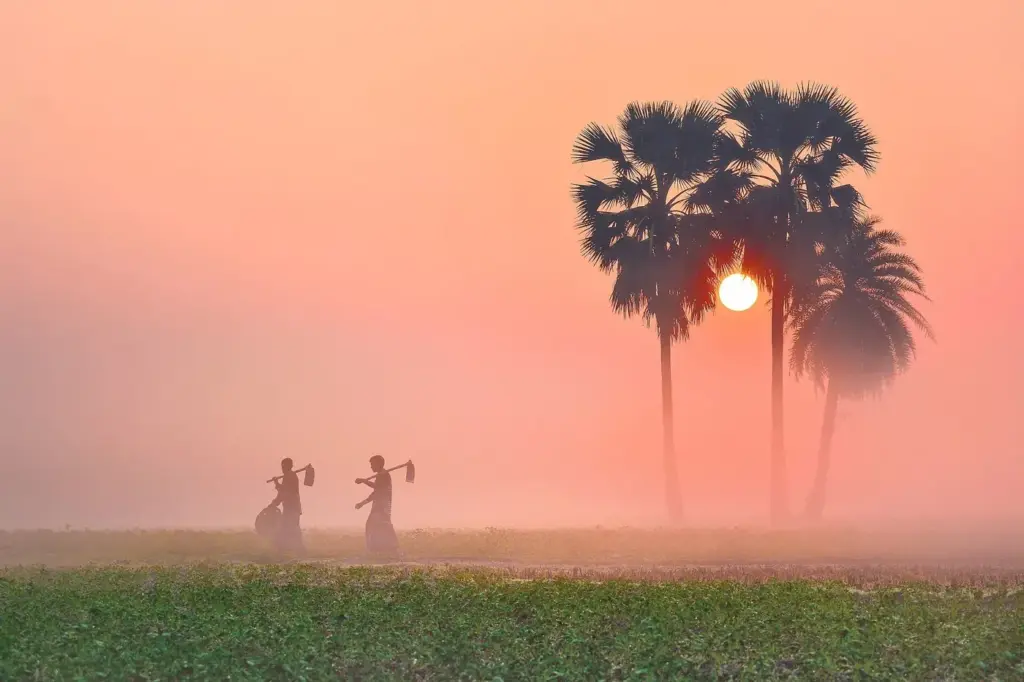
Foggy landscapes are photographs made in fog or mist, where water droplets in the air soften detail and create layers of fading tone. They work best with simple shapes, careful exposure that keeps the fog bright but not blown out, and compositions that show depth through overlapping subjects.
Why It Matters
Fog turns a plain scene into something moody. It hides clutter, simplifies backgrounds and gives a sense of depth because distant objects fade into pale tones.
It is also difficult for cameras. Meters read the bright haze as too light and underexpose it, autofocus can hunt, and flat contrast makes pictures look dull. A few habits fix all of those problems.
Beginner Foggy Landscapes For Beginners
Fog is a cloud at ground level, made of tiny water droplets that scatter light in every direction. The droplets reduce contrast and color with distance, so each layer of the landscape looks paler than the one in front of it. That fading is called atmospheric perspective, and it is the main attraction of a foggy scene.
When And Where To Find Fog
- Early morning, especially after a clear cool night with damp ground.
- Valleys, lakes and rivers, where cold air and moisture settle.
- Coasts in spring and autumn, when warm air meets cold water.
- Mountain slopes, when you are inside low cloud.
Fog often lifts within an hour of sunrise, so arrive before first light and scout the location the day before if you can.
Exposure Basics
A light meter aims for middle gray, so it darkens bright fog and makes it look dull and gray. Add exposure compensation of plus one-third to plus one stop and check the histogram. The graph should lean to the right without touching the edge. Review the highlight warnings so the brightest fog still holds subtle texture.
| Problem | Likely Cause | Fix |
|---|---|---|
| Fog looks gray and dull | Meter underexposes bright scenes | Add plus compensation |
| Whole scene is a flat gray | No dark subject for contrast | Include a dark foreground element |
| Autofocus keeps hunting | Low contrast in haze | Focus on a nearby edge or use manual focus |
| Lens front gets wet | Droplets on glass | Wipe often and use a hood |
Composition
- Look for layers, such as trees or ridges at different distances, so fog separates each one.
- Include one strong dark shape, like a tree trunk, a fence or a boat, to anchor the image.
- Keep the scene simple. Fog already simplifies, so extra objects just compete.
- Use leading lines such as paths and roads that disappear into the mist.
Common Mistakes
- Leaving exposure at the meter value so white fog turns gray.
- Shooting through a wet lens or filter and getting hazy or spotted images.
- Cropping out the layers that make the picture work.
- Adding too much contrast later, which makes fog look harsh and unnatural.
Safety In Low Visibility
Fog hides hazards. Stay off roads, watch for cliffs and water edges, and tell someone where you are going. Take a small light and charge your phone. Photographs are not worth a fall in poor visibility, and a familiar location is a good choice for a first foggy shoot.
Handy for this: Wide-Angle Zoom Lens — take in the whole scene. (affiliate link)
Advanced Light, Contrast And Editing
How Fog Behaves With Light
Fog diffuses sunlight into a large soft source, so there are almost no hard shadows. When the sun breaks through, you may see rays as light shafts crossing the mist, especially in forests. These are called crepuscular or volumetric rays and look best when the sun is low and slightly behind the scene. Backlight makes fog glow, while front light reveals more color and detail. The same principles are discussed in hard vs soft light physics.
Focus And Depth Of Field
Autofocus needs contrast, which fog removes. Aim at a nearby, well-defined subject, or switch to manual focus and use magnification, as described in focus peaking and magnification. A small aperture of f/8 to f/11 keeps layers sharp enough, while a wide aperture can isolate one tree from its foggy background. For landscapes where everything matters, use hyperfocal distance so the near and far layers hold detail.
Color And White Balance
Fog often has a cool blue cast in shade and a warm glow near sunrise. Automatic white balance tends to neutralize this and removes mood. Set a daylight or cloudy white balance, or correct raw files later, and keep a slight warmth or coolness if it suits the scene. See white balance science and color temperature in Kelvin for how those settings change the result.
Editing Fog Naturally
- Set the black point so the darkest subject is near true black, giving depth without ruining the haze.
- Raise whites to restore brightness lost by metering, then check for clipping.
- Use the dehaze slider carefully. A small negative value can increase the misty feel, and a positive value can restore contrast, but large moves cause halos and color shifts.
- Add a gentle graduated mask to darken the top or lift the lower mist.
- Keep noise low in smooth fog, since grain shows clearly in flat gray areas. See texture, clarity and dehaze.
Protecting Your Gear
Condensation and droplets form on everything in fog. Carry microfiber cloths in a sealed bag, and keep the camera in a bag when moving. Weather-sealed bodies cope better, as covered in weather-sealed cameras, but even so wipe them dry and let them warm up slowly before opening the bag indoors so internal moisture does not form.
Series And Variations
Return to the same place on different foggy mornings and photograph from the same position. The same trees look different in light fog, thick fog and thin mist, and a series shows how much mood varies. Try black and white as well, where fog becomes pure tonal gradation.
Try It
- Find a foggy morning and choose a scene with at least three layers, such as a field, a tree line and a hill.
- Take one frame at the metered exposure and another at plus two-thirds compensation.
- Compare the histograms and the brightness of the fog.
- Edit the better frame with a modest black point and white point change, and keep the haze soft.
Common Questions
Why do my foggy photos look gray?
The camera meter treats bright fog as too bright and darkens it. Add plus exposure compensation and check that the histogram sits toward the right.
What aperture is best for fog?
Use f/8 to f/11 for sharp layers across the scene, or a wider aperture to separate one subject from the mist. The right choice depends on what you want to emphasize.
Does fog need a special filter?
No filter is required. A polarizer can darken colors and reduce the soft feel, so most photographers leave it off. Keep the front element clean and dry instead.
Should I use manual focus in fog?
Often yes. If autofocus hunts, focus manually on a distant edge with magnification, or use autofocus on a nearby high-contrast object and recompose.
Related Lessons
- Hyperfocal Distance to keep layered landscapes sharp.
- Expose To The Right for brighter exposures that protect detail.
- Texture, Clarity And Dehaze for editing misty scenes carefully.
- Golden Hour Photography for warm light that works with morning mist.
- Landscape Planning to prepare for the right conditions.
Gear That Helps With This
Hand-picked kit that makes this lesson easier to put into practice.
Some links are affiliate links: if you buy through them we may earn a small commission at no extra cost to you. How this works.