
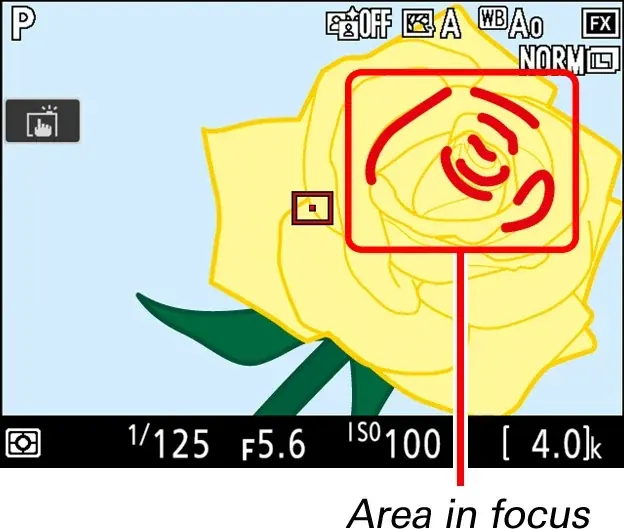
Focus peaking is a camera aid that outlines the sharpest edges in the image with a bright color, so you can see what is in focus while turning the focus ring. Combined with magnification, which enlarges part of the picture, it makes manual focus faster and more accurate, especially in macro, video and low light.
Why It Matters
Autofocus is not always the best choice. In macro work, night scenes, tripod landscapes and manual lenses, you need to place focus exactly, and the small screen makes that difficult without help.
Peaking and magnification are built into most mirrorless cameras and many video-capable DSLRs. Learning to use them well gives sharper pictures and more reliable footage, particularly at wide apertures where depth of field is thin.
Beginner How Focus Peaking Works
The camera analyzes contrast along edges in the live view image. Where contrast is high, which usually means sharp focus, it overlays a colored highlight such as red, yellow, white or blue. As you turn the focus ring, the colored outline moves onto the area that is sharp. Most cameras let you set the sensitivity level, often low, medium or high, and the color. Magnification, often called focus assist or zoom, enlarges a part of the view by 5 to 15 times so you can judge fine detail.
Setup Tips
- Choose a peaking color that contrasts with the scene, such as red on green foliage or yellow on a blue sky.
- Start with medium sensitivity and adjust if the highlight is too noisy or too weak.
- Assign a button for quick magnification so you can toggle it without menus.
- Use a tripod when magnified, because shake becomes obvious.
- Turn off peaking before the final exposure if it distracts, since it does not appear in the image.
Peaking Versus Magnification
| Aid | Strength | Limit |
|---|---|---|
| Focus peaking | Shows the whole frame at once and works in motion | Less accurate at wide apertures, can show noise as edges |
| Magnification | Precise detail check on a small area | Loses the full composition while zoomed |
| Both together | Fast and accurate | Needs button setup and practice |
| Rangefinder-style focus indicator | Simple and works on some lenses | Less informative than peaking |
| External monitor with peaking | Large screen for video work | Extra gear |
A Focus Routine
- Switch the lens or camera to manual focus and enable focus peaking in the menu.
- Turn the focus ring until the colored edges appear on your chosen subject area.
- Press the magnification button, move the box to the target detail, and fine tune focus.
- Exit magnification, check composition and take the shot or start recording.
- Review at 100 percent to verify that the target is sharp.
Common Mistakes
- Trusting peaking alone at f/1.4, where a wide depth of field of colors can appear too early.
- Peaking on a high-contrast background instead of the actual subject.
- Magnifying while handholding and chasing a moving image.
- Forgetting to refocus after changing the aperture on lenses that focus wide open.
A Worked Example
You photograph a flower in a garden using a macro lens at f/4. Peaking shows red outlines on the whole petal edge, but you want the stamen sharp. Enable magnification at 10 times and move the box over the stamen, then adjust until the pollen grains are crisp. Switch back to the whole view and take the shot, and the stamen is the sharp point.
Video Applications
Peaking is vital in video, where you cannot check each frame later. Pulling focus between subjects with a manual lens requires marks and peaking to hit the target. Use a follow focus or an external monitor, as described in follow focus, and keep the aperture consistent so the depth of field is predictable.
Calibrating Your Eye
Practice by taking several shots with different peaking levels and comparing them at 100 percent. You will learn how early or late the highlight appears for your camera and lens. Different cameras set peaking thresholds differently, so repeat this test with any new body.
Peaking With Different Lenses
Autofocus lenses with focus-by-wire rings respond differently from older manual lenses with direct mechanical rings. The wire type can feel less precise and speeds up as you turn quickly, so turn slowly. With adapted manual lenses, peaking and magnification are often the only way to focus, and they make vintage glass practical on modern cameras.
Shooting Handheld
Magnification is tricky handheld, because small movements look larger. Brace your elbows against your body, lean on a wall or use a monopod. Peaking alone is better for moving subjects, and magnification suits static ones. Switch between them quickly with a customized button, which makes a significant difference in speed when shooting in the field.
Practice Drills
Set up three objects at different distances and focus on each in turn using only peaking, then with peaking plus magnification, and time yourself. Check your results at 100 percent. After a few sessions you will focus faster and know which method works best for each subject, which builds confidence for demanding shoots such as weddings and wildlife.
Handy for this: Carbon Fiber Tripod — sharp at slow shutter speeds. (affiliate link)
Advanced Accuracy, Depth Of Field And Related Tools
Why Peaking Can Mislead
Peaking detects edge contrast, not true sharpness, so noise, texture or high-contrast edges can trigger it. At wide apertures the depth of field is thin, but peaking may light up an area slightly in front or behind the real focus plane. Verify with magnification. Understanding the circle of confusion and depth of field control explains why.
Live View And Focus Checks
Magnification uses the live view image, so settings like exposure simulation matter. See live view zoom focus checks for a method, and night focus with a flashlight for dark scenes where peaking is weak. A bright point light or distant star can serve as a focus target.
Manual Focus And Autofocus Together
You can combine manual and automatic focus: use autofocus to get close, then fine tune with the ring and peaking. On many cameras this is called direct manual focus. For fast action use back button focus, and for adjusting lenses see autofocus micro adjustment. Each method has its place.
Focus Stacking And Macro
In macro photography and landscape work you may need several frames at different focus distances, as shown in focus stacking. Peaking and magnification help set the first and last focus points, and a steady tripod keeps frames aligned. Good manual focus technique is the base of high quality stacks.
Try It
- Turn on focus peaking in your camera and choose a contrasting color.
- Practice focusing on a nearby object using only the colored highlight.
- Add magnification and check that the highlighted area is truly sharp.
- Take a picture at f/2.8 and view at 100 percent to confirm accuracy.
Common Questions
What is focus peaking?
It is a display aid that colors the sharpest edges in the image, so you can see what is in focus during manual focusing.
Does focus peaking affect the final image?
No. The colored overlay is only on the screen or viewfinder and does not appear in the picture.
Is peaking accurate enough for wide apertures?
It is helpful but not exact. Confirm with magnification, particularly at wide apertures with thin depth of field.
Which peaking color is best?
Choose one that stands out against the subject, such as red for green scenes or yellow for blue ones.
Related Lessons
- Live View Zoom Focus Check for a magnification method.
- Follow Focus for video focus pulls.
- Focus Stacking to use manual focus for deep scenes.
- Control Depth Of Field to predict what will be sharp.
- Back Button Focus for combining manual and auto focus.
Gear That Helps With This
Hand-picked kit that makes this lesson easier to put into practice.
Some links are affiliate links: if you buy through them we may earn a small commission at no extra cost to you. How this works.