
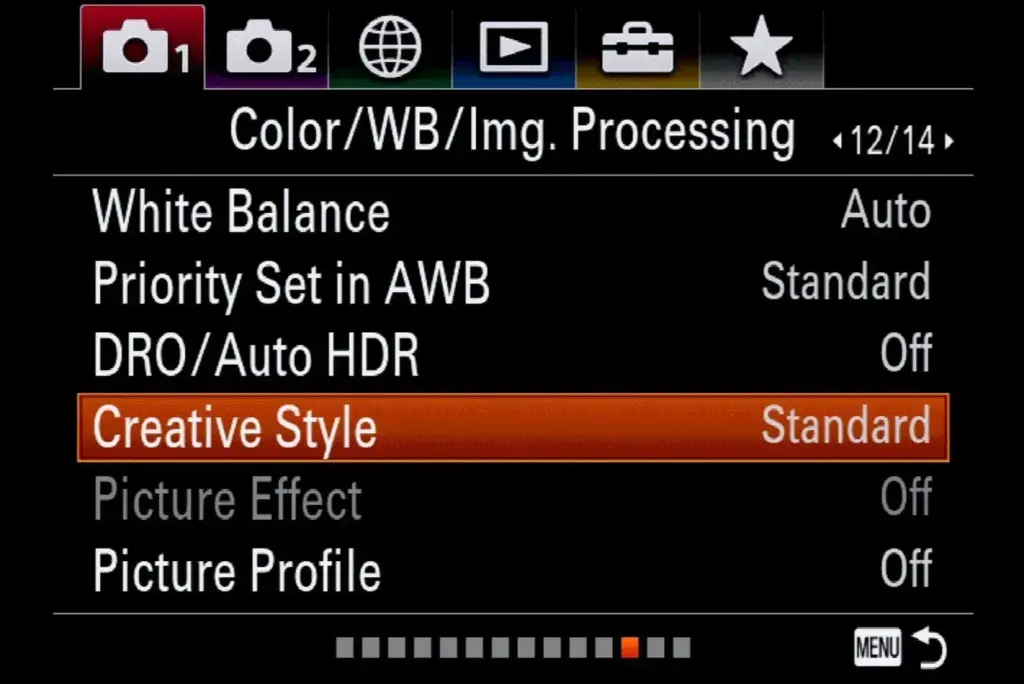
Picture styles are camera presets that change contrast, saturation, sharpness and color tone in the preview and in JPEG or video files. They shape how an image looks straight from the camera, but they do not change the underlying raw data, so they are a preview aid more than a permanent edit.
Why It Matters
Straight out of the camera, an image can look flat or punchy depending on the style, and that look influences how you judge exposure, white balance and mood on the back screen. A style that matches your taste saves time when you deliver JPEGs or video directly.
Knowing what a style does also prevents mistakes. Many photographers shoot raw files with a vivid style and then think they have recorded those colors permanently, or they ruin a video file by baking in too much contrast before grading.
Beginner Understanding Picture Styles
Common Styles
Camera makers use different names, such as Standard, Vivid, Neutral, Portrait, Landscape, Monochrome and Faithful. The idea is the same across brands: each one applies a set of adjustments to the image.
| Style | Typical Look | Good For |
|---|---|---|
| Standard | Balanced contrast and color | General use |
| Vivid | Strong color and contrast | Landscapes, quick sharing |
| Neutral | Low contrast and color | Editing and video grading |
| Portrait | Soft contrast, gentle skin tones | People |
| Monochrome | Black and white | Mood and tone checks |
What A Style Changes
– Contrast, which is the tone curve strength.
– Saturation, the intensity of color.
– Sharpness, the in-camera edge enhancement.
– Hue and tone adjustments for specific colors.
What It Does Not Change
A style does not change the exposure, focus, aperture or the raw data. If you shoot raw, the file keeps all its information, and your editing software may apply the style only as a starting point. If you shoot JPEG or video, the style is baked in and cannot be fully undone.
Choosing A Style
1. If you shoot raw and edit, choose Neutral or Standard so the preview stays close to the data.
2. If you share JPEGs directly, pick the style you like and check it on real scenes.
3. If you shoot video that you will grade, choose the flattest option.
4. If you want black and white, choose Monochrome for preview, and shoot raw to keep color.
Common Mistakes
– Shooting JPEG with an aggressive style and then trying to fix it.
– Judging raw exposure from a very contrasty preview.
– Changing styles randomly and losing consistency across a shoot.
– Ignoring sharpening settings and ending up with halos.
Handy for this: Carbon Fiber Tripod — sharp at slow shutter speeds. (affiliate link)
Advanced Customizing Picture Styles And Using Them Well
Adjusting The Parameters
Most cameras let you modify each style: sharpness, contrast, saturation and hue. Small changes make a large difference. For video, reduce contrast and saturation a little to keep detail in highlights and shadows. For portraits, lower sharpness and contrast slightly to soften skin. Save the changed version under a custom slot, and see custom shooting modes to recall it quickly.
Styles And Raw Files
A raw file contains no baked-in style, but the preview image embedded in it does, and so does the histogram on the camera. A high contrast style can make the histogram look clipped when the raw file still has detail. If your camera offers a flat style, use it to judge exposure more accurately, and read reading histograms for interpretation. Raw converters from the camera maker can sometimes apply the style again, which is why colors sometimes differ between software. More on the format is in raw versus JPEG.
Styles In Video
Video benefits from planned looks. A neutral style leaves room for grading, while a log profile goes further, as described in log footage and exposing log. If you shoot for quick delivery without grading, a gentle custom style can give a pleasant look straight from the camera. Check highlights, since a vivid style can clip skin tones on bright days.
White Balance And Color Interaction
Styles interact with white balance. A warm style plus a warm white balance can push the image too far, and a cool style in tungsten light may look blue. Set white balance with care, as covered in white balance science and custom white balance, and then apply a style on top.
Creative Looks
Creative filters or looks, such as film emulation, toy camera and soft focus, are offered by many cameras. They are fun but usually baked into JPEG and video files, so use them when you want a finished look and keep raw copies if possible. Many cameras let you shoot raw and JPEG together so you can have both.
Matching Styles Between Cameras
If you shoot with two bodies, set similar styles and white balance so the results match. Even then, sensors differ, so check on a color chart or a gray card. In editing, use profiles, as covered in camera matching profiles, to bring different cameras closer together.
Style Strategy For Events
At events with fast turnaround, create one or two custom styles you trust, and stick to them. Use a gentle portrait style for people and a neutral style for mixed light. Shoot raw plus JPEG so you can deliver quickly and fix problem frames later.
Testing Your Own Camera
Photograph the same scene in each style with a color chart or colorful objects, then compare on a computer. Look at skin tones, blue sky, green foliage and neutral gray. You will find the style that fits your taste, and you will learn how far each one pushes the image. Keep the test frames as a reference.
Styles And Editing Programs
When you open a raw file, some programs apply the camera style as a profile, while others use their own default. In Lightroom, a camera-matching profile approximates the style, and in other programs you may need to choose it. If your colors change after import, check the profile setting before blaming the camera.
Monochrome Style For Previewing
A monochrome style helps you judge light and shape without color distraction. Shooting raw with a black and white preview shows tonal contrast while keeping color for later. A yellow, orange or red filter effect in the monochrome settings darkens skies or lightens skin, as explained in black and white photography.
Sharpening Settings
Sharpness settings in styles add edge contrast that can look crunchy on screen and produce halos in print. For raw work, the setting has no effect on the data. For JPEG, keep it moderate. For video, lower sharpness often looks more natural.
Try It
- Photograph one scene with Standard, Vivid, Neutral and Portrait styles on a tripod.
- Compare the four images on a computer, looking at skin, sky and shadows.
- Create a custom style by lowering contrast and saturation by one step from Standard.
- Use it for a week and decide whether you prefer it for everyday shooting.
Common Questions
Do picture styles affect raw files?
Not the raw data. They affect the preview, the histogram and the embedded JPEG, and some software can apply them as a starting point when you open the raw file.
Which picture style is best for editing?
Neutral or a flat style is usually best, since it keeps the preview close to the data and leaves room for adjustments in editing.
Can I change a picture style after taking a JPEG?
Not completely. The style is baked into the file, so you can adjust it in editing but cannot restore the original look as you can with raw.
Are picture styles the same as filters?
They are related but not the same. Styles adjust tone and color settings, while creative filters add effects such as soft focus or film looks.
Related Lessons
- Raw Versus JPEG to see what is stored in each file type.
- Custom Shooting Modes for saving a preferred style quickly.
- White Balance Science since color tone depends on it.
- Log Footage for flat video profiles meant for grading.
- Camera Matching Profiles to match styles in editing software.
Gear That Helps With This
Hand-picked kit that makes this lesson easier to put into practice.
Some links are affiliate links: if you buy through them we may earn a small commission at no extra cost to you. How this works.