
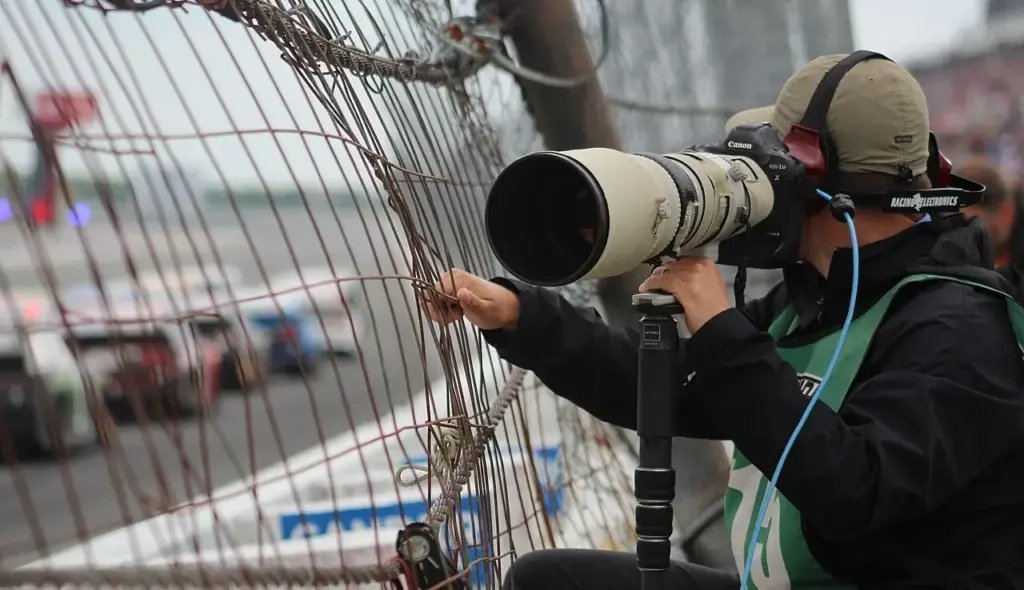
Drive modes control how the camera takes pictures when you press the shutter button. Single shot takes one frame, continuous or burst takes a series at a set speed, silent modes use the electronic shutter, timers delay the shot and pre-capture records frames before you press. Choosing the right one improves your chance of catching the moment.
Why It Matters
Timing decides many photographs. A bird launching, a smile or a ball hitting a bat lasts a fraction of a second, and the drive mode determines how many chances you get.
Drive modes also affect noise, battery, buffer, storage and shutter wear. Understanding them helps you avoid full buffers, missed shots and distracting sounds.
Beginner Drive Modes Explained
Drive modes are usually set with a button or menu labeled with icons for single frame, continuous low, continuous high, self timer and sometimes silent. In single mode, each press takes one frame. In continuous modes, holding the button takes frames at a rate, such as 5, 10 or 20 per second. The faster the rate, the more frames you capture but the faster the buffer fills.
Common Drive Modes
- Single shot: one frame per press, best for deliberate work.
- Continuous low: a slower burst, useful for general action and portraits.
- Continuous high: the fastest rate, ideal for sports and wildlife.
- Silent or electronic shutter: no mechanical sound, for quiet scenes.
- Self timer and remote: delayed or remote release for stability and group photos.
Choosing A Drive Mode
| Situation | Mode | Reason |
|---|---|---|
| Landscape on a tripod | Single or 2-second timer | Avoid vibration and wasted frames |
| Children and pets | Continuous low or high | Catch expressions and movement |
| Sports and birds in flight | Continuous high with pre-capture | Maximum chances at the peak moment |
| Weddings and theaters | Silent single or low burst | No disturbing sound |
| Group photos | Timer or remote | Include the photographer or avoid shake |
Setting Up For Action
- Switch to continuous high and check the frame rate in the manual.
- Use continuous autofocus so focus updates between frames.
- Set a shutter speed fast enough to freeze the motion.
- Press and hold just before the peak moment and release after it.
- Review the burst and delete unneeded frames to save storage.
Common Mistakes
- Shooting bursts in single autofocus, which locks focus after the first frame.
- Holding the button until the buffer fills and the camera stalls.
- Using electronic shutter with artificial lights, which can cause banding.
- Keeping bursts of every scene, which fills cards and slows editing.
A Worked Example
At a soccer match, you set continuous high at 10 frames per second, continuous autofocus and a shutter speed of 1/1000. You start the burst as the player winds up and keep it going through the kick. Out of 18 frames, three show the foot hitting the ball with sharp detail. A single shot would have missed that instant.
Understanding Frame Rates
Frame rate is how many pictures per second the camera records. A higher rate raises your chance of catching the peak, but it also uses more storage and creates more culling work. Match the rate to the subject: 5 to 8 for people, 10 to 20 or more for fast sports and wildlife.
Buffer Limits
The buffer is memory that holds images before they are written to the card. When it fills, the camera slows down. Faster cards, smaller file sizes and shorter bursts help. See camera buffer depth for how to find your limit and plan accordingly.
Silent Shooting
The electronic shutter makes no sound and can reach very high speeds, which helps at ceremonies and wildlife. It may cause distortion with fast motion and banding under some lights. Test in your location and switch to mechanical shutter when problems appear.
Self Timer And Remote Release
Timers delay the shot to avoid shake from pressing the button. A 2 second delay is enough for tripod work, while a 10 second delay lets you join a group photo. A remote or phone app offers the same benefit with more flexibility and works for long exposures.
Managing Storage And Battery
Bursts use cards and batteries quickly. Carry spare cards, format them in the camera and use fast cards that match the camera. Shoot shorter bursts when possible, since quality often matters more than quantity, and a disciplined approach saves time when you sort the files later.
Culling Bursts Quickly
Bursts create many similar frames. Use rating and flag shortcuts in your editor, compare pairs at 100 percent and keep only the sharpest, best-timed frame from each sequence. Deleting early keeps your catalog clean, saves storage and speeds up every later step in the workflow.
Choosing Settings By Subject
People moving slowly need low burst rates, while birds and athletes need the fastest. Test your camera before an important event and note the settings that worked. Writing down a short list for each type of subject lets you switch quickly in the field without thinking, so you can focus on timing and composition.
Practicing The Press
Good burst technique means pressing smoothly and starting just before the peak action. Practice on cars, joggers or birds in a park. Short bursts of three to six frames, repeated, often beat one long burst, because they leave room in the buffer and keep you ready for the next moment.
Handy for this: Carbon Fiber Tripod — sharp at slow shutter speeds. (affiliate link)
Advanced Pre-Burst Capture, Rolling Shutter And Wear
Pre-Burst Capture
Many newer cameras can record frames before you fully press the shutter. When you half press, the camera saves a loop of frames and keeps the ones just before the full press. This is valuable for sudden actions such as a bird taking off, as discussed in birds in flight. Set the duration carefully because it uses buffer space.
Rolling Shutter In Silent Modes
Electronic shutters read the sensor line by line, which can skew fast subjects or moving cameras. See electronic shutter for details. Global shutter or very fast sensor readout reduces the effect. When photographing propellers, golf clubs or panning shots, use the mechanical shutter instead.
Autofocus And Drive Together
Burst shooting works best with continuous focus and a suitable area mode. Read continuous autofocus and autofocus area modes to pair them properly. For sports, combine them with the settings in sports photography settings and a fast shutter speed.
Shutter Life And Care
Mechanical shutters have a rated number of actuations, often 100,000 to 500,000. Frequent bursts use that life faster, although most photographers never reach the limit. Electronic shutter does not wear in the same way. Keep track of the count and plan servicing if you shoot heavy action work.
Try It
- Set the camera to continuous high and take a burst of a moving subject.
- Repeat with continuous low and single shot and compare the results.
- Test silent mode and look for distortion or banding.
- Note how many frames you can shoot before the buffer fills.
Common Questions
What are drive modes?
They are settings that decide how the camera fires: single, burst, timer, silent or pre-capture.
Which drive mode is best for sports?
Continuous high with continuous autofocus and a fast shutter speed, with pre-capture if available.
Is silent shooting safe for all subjects?
Not always. Electronic shutters can distort fast motion and cause banding under some lights.
What is the buffer?
Memory that stores images before they are saved to the card. It limits how long you can shoot a burst at full speed.
Related Lessons
- Camera Buffer Depth to know your burst limit.
- Electronic Shutter for silent shooting details.
- Continuous Autofocus for sharp bursts.
- Sports Photography Settings for action setups.
- Birds In Flight for pre-capture use.
Gear That Helps With This
Hand-picked kit that makes this lesson easier to put into practice.
Some links are affiliate links: if you buy through them we may earn a small commission at no extra cost to you. How this works.