
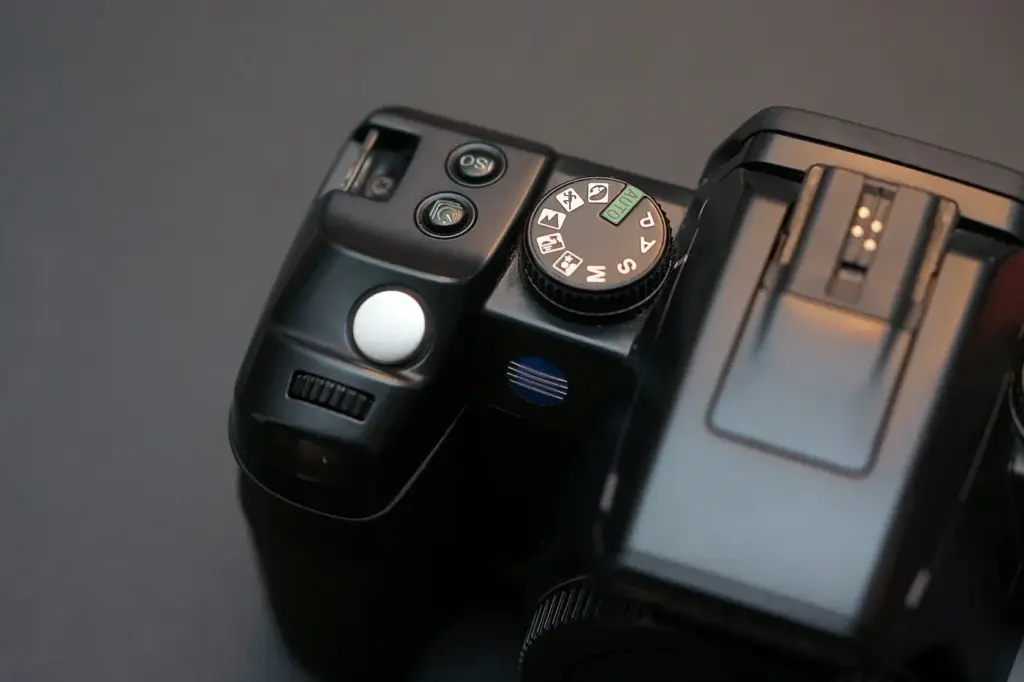
Camera shooting modes are the settings on the mode dial that decide which exposure controls you choose and which the camera chooses for you. Auto and Program mostly decide everything, Aperture Priority and Shutter Priority let you pick one value while the camera sets the rest, and Manual gives you full control of aperture, shutter speed and ISO.
Why It Matters
The mode dial is the first control that shapes every photo. The mode you pick decides how much of the exposure you can change and how much the camera quietly decides for you. A good match between mode and scene gets you a correct picture faster, with fewer missed moments.
Picking the wrong mode is a common reason for a photo that looks fine on the back screen but is wrong in some quiet way: a background that is too sharp, a moving subject that is blurred, or an exposure that drifts as you recompose. Knowing what each mode actually controls lets you fix those problems in one turn of a dial.
Beginner What Each Mode On The Dial Does
Every mode solves the same puzzle. Exposure comes from three settings working together: aperture, shutter speed and ISO. The camera has a light meter that tells it how bright the scene is. A mode simply says which of those three settings you will set and which the camera will adjust to hit a correct exposure. If you need the basics first, read the exposure triangle.
The Main Camera Shooting Modes
| Mode | You Set | Camera Sets | Best For |
|---|---|---|---|
| Auto (green box or A+) | Almost nothing | Aperture, shutter, ISO, often focus area, white balance and flash | Handing the camera to a friend; zero-thinking snapshots |
| P (Program) | Exposure compensation, ISO, many menu options | Aperture and shutter speed | Quick shooting with more control than Auto |
| A or Av (Aperture Priority) | Aperture | Shutter speed | Portraits, landscapes, controlling background blur |
| S or Tv (Shutter Priority) | Shutter speed | Aperture | Sports, water, anything where motion matters |
| M (Manual) | Aperture, shutter speed and ISO | Nothing; the meter only advises | Studio, flash, repeatable lighting, night scenes |
The letters differ by brand. Canon calls aperture priority Av and shutter priority Tv. Nikon, Sony, Panasonic and most others use A and S. Fujifilm bodies often have no mode dial, so you set the aperture ring and shutter dial to Auto or to a value instead, which gives the same result.
Scene Modes And Auto
Many cameras also offer scene modes such as Portrait, Landscape, Sports and Night. These are Auto with a bias: Portrait favors a wide aperture, Sports favors a fast shutter. They are fine for learning what a setting does, but they lock you out of most menu options and often raise noise or force flash. Use them as training wheels, not as a long-term plan.
Which Mode To Start With
Start with Aperture Priority. You choose the f-number, which controls both how blurred the background looks and how much light enters. The camera picks a shutter speed that gives a good exposure. Check that shutter speed on the screen: if it is slower than about 1/60 second for a handheld shot, raise the ISO or open the aperture. Learn the details in the aperture priority lesson.
Common Mistakes
- Leaving the camera in Auto and wondering why settings are grayed out in the menu.
- Staying in Manual with the meter far off center after the light changes, so the picture is too dark or too bright.
- Never looking at the shutter speed in Aperture Priority and ending up with blurred handheld shots indoors.
- Forgetting which mode the camera was left in after the last shoot. Glance at the dial or top screen before you lift the camera.
Handy for this: Carbon Fiber Tripod — sharp at slow shutter speeds. (affiliate link)
Advanced Mode Logic, Program Shift, And A Mode Strategy By Genre
How The Camera Solves For Exposure
In every automatic mode the camera runs the same loop. The meter measures light through the lens, then compares it with a target, usually middle gray, as described in middle gray. If the scene is brighter than the target, the camera shortens exposure or closes the aperture. The mode only determines which variable moves. This means exposure compensation behaves differently in each mode: in Aperture Priority it changes the shutter speed, in Shutter Priority it changes the aperture, in Program it changes both, and in Manual it does nothing unless Auto ISO is on. See the exposure compensation guide for details.
Program Shift
Program mode picks a pair of aperture and shutter values that give a correct exposure. Most cameras let you turn a dial to move along that line, trading one value for the other without changing brightness. This is called flexible program or program shift. It keeps the same exposure but lets you pick a wider aperture with a faster shutter, or the reverse. On Canon it shows with a small star or an asterisk by the mode, and it resets when the meter turns off or you change the mode. It is a good way to get the speed of Auto with one dial of control.
Auto ISO Changes The Logic
Auto ISO turns ISO into a third variable the camera can move. In Manual mode with Auto ISO on, you set aperture and shutter and the camera raises or lowers ISO to match the meter, giving you a locked depth of field and a locked shutter speed with a safe exposure. Many working photographers prefer this over plain Manual because it removes one chore. Set limits as described in auto ISO settings.
Custom Modes And User Slots
Many bodies include slots named C1, C2, C3 or U1, U2. These store a full set of camera settings: mode, aperture, ISO limits, autofocus choices, drive mode and more. Save one slot for fast action, one for portraits and one for low light, and a single dial turn changes everything at once. The details are in custom shooting modes.
A Mode Plan By Genre
| Genre | Common Mode | Reason |
|---|---|---|
| Landscape on a tripod | Aperture Priority or Manual | Fixed aperture for sharpness; shutter speed can be long |
| Portraits | Aperture Priority | Direct control of background blur |
| Sports and wildlife in motion | Manual with Auto ISO, or Shutter Priority | Guaranteed fast shutter speed |
| Street and travel | Aperture Priority or Program | Quick reaction in changing light |
| Studio and flash | Manual | The meter cannot see flash, and settings must repeat |
| Night sky | Manual | The meter is not reliable in near darkness |
None of these is a rule. The right choice is the one that keeps the setting you care about steady while letting the camera handle the one that changes with light.
Try It
- Set the dial to Aperture Priority, choose the widest f-number your lens allows, and photograph a subject close to you with a background far behind it.
- Now switch to Shutter Priority and set 1/1000 second, then 1/15 second, and take a photo of something moving, such as a walking person or a dripping tap. Compare the blur.
- Switch to Manual, set aperture f/5.6, shutter 1/125 and ISO 400, and adjust only the shutter until the meter reads zero.
- Turn on Program mode and use program shift to move through the options while watching the brightness stay the same.
Common Questions
Is Auto mode bad?
No. Auto gives a safe exposure and often reliable autofocus, which suits quick snapshots. Its drawback is control: the camera may choose flash, high ISO or a wide aperture that you would not choose, and many menu options are locked.
Which camera shooting mode do professionals use?
Many professionals use Aperture Priority or Manual with Auto ISO because both give direct control over the setting that matters most. Others switch between modes during the day. There is no single professional choice, only a match between the mode and the subject.
Why is my shutter speed so slow in Aperture Priority?
The camera lowers the shutter speed to keep the exposure correct when the aperture you chose lets in little light. Raise the ISO, open the aperture or add light. Auto ISO with a minimum shutter speed prevents the problem.
What is the difference between P and Auto?
Program gives you access to exposure compensation, white balance, ISO and menu settings, while Auto locks many of them. Both choose aperture and shutter speed, but only Program lets you shape the result.
Related Lessons
- Aperture Priority Mode for the mode most photographers should learn first.
- Shutter Priority Mode to control motion blur directly.
- Manual Mode Photography for full control with the meter as a guide.
- Exposure Triangle Explained to see how the three settings trade off.
- Custom Shooting Modes to save full setups on the dial.
Gear That Helps With This
Hand-picked kit that makes this lesson easier to put into practice.
Some links are affiliate links: if you buy through them we may earn a small commission at no extra cost to you. How this works.