
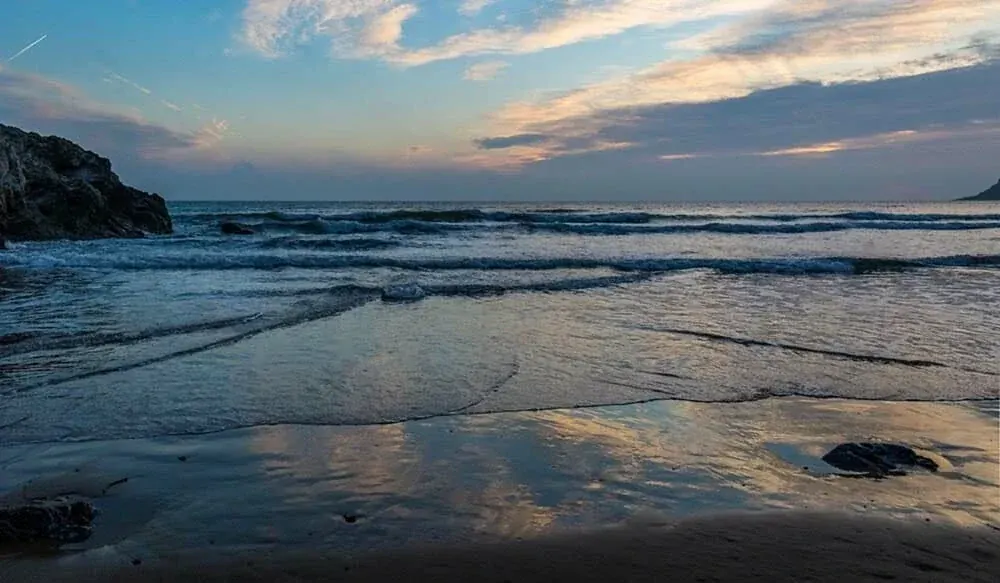
Seascape photography is the art of photographing the sea, coast and sky together, using waves, rocks, light and tides to build dramatic images. Success depends on planning for tide and weather, using a tripod and filters for controlled exposures, and choosing shutter speeds that either freeze waves or turn them into mist.
Why It Matters
The coast offers constant change: waves, tides, clouds and light all shift every few minutes. A planned approach lets you be in the right place when conditions are best, instead of hoping for luck.
Seascapes are also demanding on gear and safety. Salt spray, slippery rocks and rising tides pose real risks, so good habits protect both you and your camera.
Beginner Seascape Photography Basics
Start by choosing a location with strong foreground interest, such as rocks, pools, a pier or a headland. Check the tide tables, because the same spot can look very different at low, mid and high tide. Arrive well before sunrise or sunset to explore and set up. Most seascape work uses a tripod, a wide to medium lens and a neutral density filter to control shutter speed.
Basic Kit
- A sturdy tripod with legs that can be used in shallow water.
- A wide angle lens, often 16 to 35mm, and a short telephoto for details.
- Neutral density and graduated filters to control exposure.
- A polarizing filter to reduce glare on wet rocks and water.
- Microfiber cloths and a rain cover, because spray constantly lands on the lens.
Shutter Speed Effects On Waves
| Shutter Speed | Effect | Typical Use |
|---|---|---|
| 1/500 and faster | Freezes spray and wave shapes | Big surf and crashing waves |
| 1/60 to 1/15 | Shows motion with some detail | Gentle waves with texture |
| 0.5 to 2 seconds | Creates streaks and flow lines | Waves running over rocks |
| 5 to 30 seconds | Smooth, misty water | Calm, ethereal scenes |
| 1 minute or more | Glassy surface | Minimalist long exposures |
Planning And Shooting A Seascape
- Check tide tables, wave forecasts, weather and sunrise or sunset times before you go.
- Arrive early, scout compositions with a clear foreground, a middle ground and a background.
- Set up the tripod low and level, compose and add filters as required.
- Choose a shutter speed for the effect you want and time exposures with the wave movement.
- Check focus, histogram and lens for spray after every few shots.
Common Mistakes
- Ignoring the tide and getting trapped by rising water.
- Leaving salt spray on the lens and filters, which ruins sharpness.
- Placing the horizon in the middle of the frame without reason.
- Using too long an exposure so the waves lose all shape.
A Worked Example
At sunrise on a rocky coast, you set a camera on a tripod at ISO 100, f/11, and add a six-stop ND filter. A one second exposure at the moment a wave retreats produces streaks that lead toward the sunrise. A graduated ND balances the bright sky, and the polarizer removes glare on wet rocks. The final image has flowing lines, rich color and detail in all areas.
Timing With Waves
Waves move in sets, with larger waves arriving after smaller ones. Watch for a few minutes before shooting to learn the rhythm. For flow lines, begin the exposure as the wave starts to wash in or out. Take many frames, because each wave is different and only a few will have the best pattern.
Light And Weather
Dramatic skies make seascapes. Stormy weather, fog and low sun over the water create mood, while flat gray skies make dull images. Check weather apps and forecasts, and be ready to go when conditions are promising. Safety comes first in storms, because large waves are dangerous.
Caring For Gear After The Shoot
Salt corrodes metal and damages electronics. After shooting, wipe the camera and lens with a slightly damp cloth, dry them and keep them in a sealed bag while you return indoors. Rinse tripod legs with fresh water and dry them to avoid corrosion and sticking.
Wind And Stability
Coastal wind shakes tripods and blurs long exposures. Spread the legs wide, lower the center column, and hang your camera bag from the hook for weight. Shield the camera with your body when possible, and use a remote release or the self timer to avoid vibration. If conditions are too windy for long exposures, use shorter shutter speeds and higher ISO.
Foreground And Reflections
Wet sand after a retreating wave acts like a mirror and reflects the sky and sunrise colors. Position the camera low to capture reflections, and time the shot just after the wave leaves. Rocks, shells and tide pools make good foreground anchors, and small changes in position can transform the composition, so move your tripod several times before settling on one.
Working Through The Day
Sunrise and sunset get the most attention, but midday and overcast conditions have their uses too. Stormy skies, mist and blue hour all produce moods that clear sunsets cannot. Visit the same coast in different weather, keep notes on what works, and photograph details such as foam patterns, rock textures and birds when the light is not ideal for wide views.
Handy for this: Carbon Fiber Tripod — sharp at slow shutter speeds. (affiliate link)
Advanced Exposure, Filters And Composition
Controlling Exposure With Filters
Use graduated ND filters for bright skies and ND filters for long exposures. Follow the process in the silky water technique for smooth water, and check highlights with highlight warnings because white foam clips easily.
Composition Along The Coast
Use leading lines such as shorelines and wave streaks, and layer foreground, middle ground and background for depth. See leading lines, foreground interest and horizon placement for guidance. Keep the horizon level, and consider placing it low for a big sky or high for dramatic waves.
Planning Tools
Planning improves your odds, as explained in landscape planning. Apps for tide, weather and sun position help predict conditions. Observe the same location in different seasons and tides, and keep notes about what works. Many great seascapes come from repeated visits.
Salt Air And Weather Sealing
The sea is hard on equipment. See salt air camera care and weather sealed cameras for protection and maintenance. Never change lenses in blowing spray, and carry spare cloths and a dry bag.
Try It
- Check the tide table for a nearby coast and plan a visit one hour before sunrise or sunset.
- Compose with a foreground rock and take shots at 1/500, 1/4 and 2 seconds.
- Compare how the waves appear at each shutter speed.
- Wipe the lens and filters between shots and keep a safe distance from the water.
Common Questions
What shutter speed is best for seascapes?
It depends on the look. Fast speeds freeze waves, half a second to two seconds shows flow and several seconds creates mist.
Do I need an ND filter?
In daylight, yes, for long exposures. At dawn or dusk you may manage without one.
How do I keep my lens clean?
Carry several microfiber cloths, shield the lens between shots and wipe off spray often.
Is seascape photography dangerous?
It can be. Watch tides and waves, wear shoes with grip, avoid wet rocks near big surf and never turn your back on the sea.
Related Lessons
- Silky Water Technique for long exposure settings.
- Graduated ND Filters to balance sky and sea.
- Landscape Planning to time your visit.
- Leading Lines for composition.
- Salt Air Camera Care to protect your gear.
Gear That Helps With This
Hand-picked kit that makes this lesson easier to put into practice.
Some links are affiliate links: if you buy through them we may earn a small commission at no extra cost to you. How this works.