
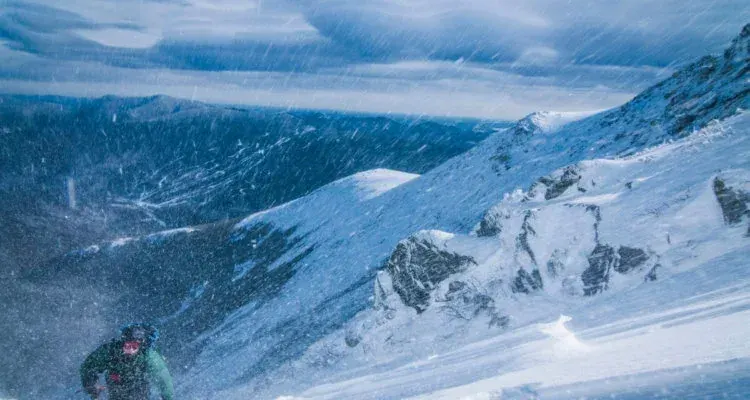
Snow photography is shooting bright, white scenes where the camera meter is fooled into rendering snow as dull gray. The fix is positive exposure compensation, usually +1 to +2 stops, checked against the histogram so snow sits near the right edge without clipping, plus basic care for batteries and gear in the cold.
Why It Matters
Snow is one of the easiest subjects to get wrong and one of the most rewarding to get right. A winter scene full of fresh powder, blue shadows and low sun can look magical, yet an automatic exposure often delivers a flat, gray, lifeless frame.
The reason is predictable, which means it is fixable. Once you understand what the meter is trying to do and how to push it, you can shoot snow confidently in any weather and come home with clean whites and good detail in the texture of the drifts.
Beginner How To Start With Snow Photography
Why Snow Turns Gray
A reflected light meter assumes that whatever it points at averages out to middle gray, about 18 percent reflectance. Fresh snow reflects far more than that, so the meter darkens the picture to bring it back down to middle gray. The result is gray snow and an underexposed scene. See middle gray for the full idea.
The Basic Fix
Use exposure compensation to override the meter. Start at +1 stop on an overcast day and try +1.5 to +2 stops under bright sun when the frame is mostly snow. If the scene has a dark subject such as a person in a black coat filling the frame, you need less compensation because the meter already sees plenty of dark tones.
- Shoot in Aperture Priority or Program with exposure compensation available.
- Dial in +1 stop and take a test frame.
- Check the histogram. Snow should form a hump near the right side but not be pressed against the edge.
- Turn on highlight warnings and add a little less compensation if large areas of snow blink.
- Shoot in RAW so you can recover texture later.
What To Bring
– A spare battery kept in an inside pocket, because cold drains charge quickly.
– A lens hood to cut flare and keep falling snow off the front element.
– Microfiber cloths and a zip bag for moisture.
– Thin liner gloves so you can work the controls.
Common Mistakes
– Trusting the screen on a sunny day. Glare makes the image look brighter than it is, so use the histogram.
– Leaving compensation on after you leave the snow, which overexposes the next scene.
– Forgetting white balance, which can leave snow looking too blue or too yellow.
– Bringing a cold camera straight into a warm room, where condensation forms on the lens and inside the body.
Simple Compositions
Look for contrast. A single dark tree, a red jacket or a fence line against a white field gives the eye somewhere to land. Side light at low sun angles raises small shadows on the surface and shows the ripple and texture that flat midday light hides.
Handy for this: ND And Polarizing Filters — control light and glare. (affiliate link)
Advanced Exposure, Color And Texture In Snow Photography
Metering Methods
Evaluative metering often handles mixed scenes but can still bias dark. Spot metering lets you meter a mid-tone such as a gray rock or the skin of a face, and expose it correctly without compensation. If you spot meter fresh snow, place it about 2 stops above middle gray. The tradeoffs between methods are in metering modes compared.
Reading The Histogram
Because snow dominates the frame, the histogram will crowd the right side. That is correct. What matters is that the right edge is not hit by a tall spike, which would show clipped, textureless white. A well exposed frame often has the peak just short of the edge. Technique in reading histograms and expose to the right applies directly, and highlight warnings give a quick second check.
White Balance And Color
Snow in shade reflects blue sky and can look cold and blue, which may be pleasing or unnatural depending on your goal. Auto white balance often neutralizes the scene and removes the mood. Try a daylight or cloudy preset for consistent results, or shoot RAW and set it later. Around 5500 to 6500 K is a typical starting point for open daylight, and shade can run higher. For the science of the scale see color temperature.
Keeping Texture
The sparkle and shape in snow come from tiny gradations near white. Clipping removes them for good. When you must choose, protect the highlights and lift the shadows in editing, since RAW files hold far more recoverable information in shadows than in blown whites. A low sun, a polarizer used carefully, or a slightly underexposed raw can help preserve ripples and crystals.
Falling Snow And Shutter Speed
For falling snow, shutter speed changes the look. About 1/500 second or faster freezes flakes as dots. Around 1/60 to 1/125 second turns them into short streaks and gives a feeling of motion. A flash pointed straight ahead lights flakes near the lens into large bright spots, so angle the flash upward or off camera. Autofocus can also hunt in falling snow, so switch to a single focus point or manual focus when needed.
Cold Weather Care
Batteries lose capacity in low temperatures, so keep spares warm and rotate them. Moisture is the bigger risk. Let the camera warm up slowly inside a sealed bag before opening it indoors. A weather sealed body helps, though sealing is not a license to ignore snow melting on seams, and you can read about it in weather sealed cameras and camera battery life.
Shooting People In Snow
Portraits in snow benefit from the giant reflector effect: snow bounces light up into faces and removes harsh shadows under the eyes and chin. Meter for the face, not the snow, and use spot metering or add compensation until skin looks natural. Dress your subject in a bold color so they stand out against the white, and keep them out of direct glare when you can, since squinting eyes spoil a good frame. Fill flash on low power can add catchlights on a gray, overcast day.
Overcast Days And Fog
Flat gray light is more difficult than sun, because snow and sky merge into the same tone. Look for dark anchors such as tree trunks, rocks, fences or animals, and consider converting to black and white, where gentle gray tonality becomes a feature. Keep exposure compensation high, but watch the histogram closely, since low contrast scenes can look muddy if the whites are placed too low.
Try It
- On a snowy day, shoot the same scene at 0, +1 and +2 stops of exposure compensation.
- Compare the histograms and the highlight warnings for each frame.
- Pick the brightest setting that does not clip the snow, and write it down for that kind of light.
- Repeat with a dark subject in the frame and notice how much less compensation you need.
Common Questions
How much exposure compensation do I need for snow?
Most snowy scenes need +1 to +2 stops. Use less when a large dark subject is in the frame and more when snow fills it. Confirm with the histogram rather than a fixed number.
Why does my snow look blue?
Snow in shade reflects blue sky, and a cool white balance setting exaggerates it. Try a daylight or cloudy preset, or correct the white balance in your raw editor.
Should I use a polarizer on snow?
It can reduce glare and deepen a blue sky, but it may also darken snow texture and cause uneven skies with wide lenses. Use it gently and check the result.
How do I protect my camera from the cold?
Keep spare batteries in an inside pocket, wipe moisture promptly, and seal the camera in a bag before bringing it into a warm room so condensation forms on the bag instead.
Related Lessons
- Exposure Compensation Guide for the tool you use to push the meter.
- Middle Gray 18 Percent to see why the meter turns snow gray.
- Reading Histograms for judging white without clipping.
- Color Temperature Kelvin to understand blue shade and warm sun.
- Weather Sealed Cameras for the limits of gear protection.
Gear That Helps With This
Hand-picked kit that makes this lesson easier to put into practice.
Some links are affiliate links: if you buy through them we may earn a small commission at no extra cost to you. How this works.