
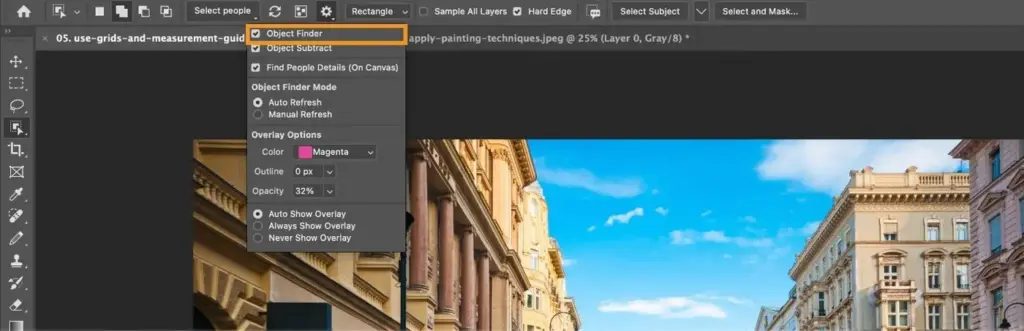
Photoshop selection tools isolate part of an image so an edit affects only that area. The main ones are the Marquee, Lasso, Quick Selection, Magic Wand and Object Selection tools, plus Select Subject and Color Range. Pick the tool by the shape of the area: geometric, hand-drawn, or defined by color and edges.
Why It Matters
Almost every retouching job starts with a selection. You cannot brighten only the eyes, replace a sky or remove a distracting sign without telling Photoshop which pixels to change. A weak selection shows up later as halos, jagged edges or an effect that spills onto the wrong area.
There are many selection tools, and each one is good at a different job. Learning which to reach for first saves time and gives cleaner results than forcing one tool to do everything.
Beginner The Main Photoshop Selection Tools
A selection appears as a moving dashed outline, often called marching ants. Anything you do while it is active, such as a fill or adjustment, applies only inside the outline. Press Ctrl+D on Windows or Command+D on macOS to deselect.
Meet The Tools
| Tool | Shortcut | Best for |
|---|---|---|
| Rectangular and Elliptical Marquee | M | Perfect boxes and circles |
| Lasso | L | Freehand shapes |
| Polygonal Lasso | L (cycle with Shift+L) | Straight-edged shapes such as buildings |
| Magnetic Lasso | L (cycle with Shift+L) | High-contrast edges |
| Quick Selection | W | Painting over a subject to grow a selection |
| Magic Wand | W (cycle with Shift+W) | Flat areas of similar color |
| Object Selection | W (cycle with Shift+W) | Dragging a box or loose outline around an object |
Tools that share a key are grouped in the toolbar. Click and hold the icon, or press Shift with the key, to cycle through the group.
How To Pick One
- If the area is a rectangle or an oval, use the Marquee tools.
- If it is a person, animal or object with a clear edge, start with Object Selection or Quick Selection.
- If it is a flat sky or plain wall, try the Magic Wand with a low Tolerance.
- If it has straight edges, use the Polygonal Lasso and click corner to corner.
- If it must be traced by hand, use the Lasso and move slowly.
Add, Subtract And Intersect
The options bar at the top has four small icons for new, add, subtract and intersect selection modes. Faster is to hold Shift to add, hold Alt on Windows or Option on macOS to subtract. Most real selections come from several small additions and subtractions rather than a single perfect drag.
Using Quick Selection
- Press W to choose Quick Selection and set the brush size in the options bar to a little smaller than the area you need.
- Paint inside the subject. The selection grows and snaps to edges.
- If it spills over, hold Alt or Option and paint over the extra area to remove it.
- Press Q to enter Quick Mask mode, which shows the selection as a red overlay so you can check it.
Feather, Invert And Save
Choose Select, then Modify, then Feather to soften the edge by a number of pixels, which helps edits blend. Choose Select, then Inverse, or press Ctrl+Shift+I, to select everything except the current selection. To keep a selection for later, choose Select, then Save Selection, which stores it as a channel.
Common Mistakes
- Using the Magic Wand on gradients or photos with noise, which gives ragged, spotty selections.
- Leaving the feather at a high value from a previous job so edges look blurry.
- Making a selection and then painting on the wrong layer.
- Skipping the check in Quick Mask or on a contrasting background before finishing.
Handy for this: Pen Tablet — precise retouching. (affiliate link)
Advanced Refining Selections For Clean Results
Color Range
Select, then Color Range, selects pixels by color or tone. Click the Select menu in the dialog and choose Sampled Colors, then click in the image with the eyedropper. Fuzziness widens or narrows what counts as similar. The dialog also offers shortcuts such as Skin Tones, Highlights, Midtones and Shadows. It is especially good for selecting a color of flowers, a blue sky or the brightest parts of an image, and it can work on a masked area only when you select a region first.
Selecting By Luminosity
For tonal work such as dodging or targeted contrast, selections based on brightness give soft, natural transitions. You can load a channel as a selection by holding Ctrl or Command and clicking a channel thumbnail in the Channels panel. This is the base idea of luminosity masks, which build on selections that fade smoothly rather than cut sharply.
Select And Mask For Edges
For hair, fur and soft edges, a tool selection alone is rarely enough. Choose Select, then Select and Mask, to open a workspace with edge refinement tools, a Radius control, and view modes to judge the result. The workspace is explained further in Select Subject and Select and Mask. Outputting to a layer mask keeps the selection editable, which is explained in layer masks.
Anti-Alias And Edge Quality
Anti-alias smooths the jagged stair-step look of a selection edge by blending edge pixels. It is turned on by default in most selection tools and should stay on. Feathering is different, because it softens the edge across a number of pixels you choose. Use a small feather of about one to two pixels on high-resolution images to avoid a cut-out look, and a larger one when blending large areas such as a vignette.
Selections And Layers
A selection is not tied to a layer, but most tools sample the active layer. Quick Selection and Magic Wand can sample all layers if you turn on Sample All Layers in the options bar. When working with adjustment or text layers, the selection might not behave as expected, so confirm which layer is active. Converting a selection to a layer mask is far safer than deleting pixels, since a mask can be changed later.
Selections As A Workflow
- Start with the fastest tool that gets close, usually Object Selection or Quick Selection.
- Clean up with add and subtract modes using a smaller brush near edges.
- Open Select and Mask for soft edges and hair.
- Output as a layer mask on a new layer so you can refine again later.
Working At The Right Zoom
Zoom to at least 100 percent when making fine edge corrections. Many selections look right at a screen-fitting size but show gaps when printed or viewed on a large monitor. Press the spacebar to temporarily switch to the Hand tool and move around without losing the selection.
Troubleshooting
If a tool seems dead, check whether a selection already exists and whether the layer is locked or hidden. If the dashed outline is hard to see, press Ctrl+H on Windows or Command+H on macOS to toggle the extras display. If the selection snaps to the wrong edge, lower the brush size or turn on Auto-Enhance only when a smoother edge is needed.
Try It
- Open a photo with a clear subject, such as a person in front of a plain wall.
- Press W to pick Quick Selection and paint across the subject, then hold Alt or Option to remove any spill.
- Press Q to see the selection as a red overlay, then press Q again to exit.
- Choose Select, then Modify, then Feather and apply 2 pixels, then invert the selection with Ctrl+Shift+I.
- Try Select, then Color Range on a colored object and compare the result with the Magic Wand.
Common Questions
Which Photoshop selection tool is best for beginners?
Object Selection and Quick Selection are the easiest because they find edges for you. Start with one of them, then correct the result with add and subtract modes.
How do I add to or subtract from a selection?
Hold Shift while selecting to add, or hold Alt on Windows or Option on macOS to subtract. You can also click the mode icons in the options bar.
Why does my selection look jagged?
It may be zoomed out, or anti-alias may be turned off. Make sure anti-alias is on, zoom in to check, and use Select and Mask to smooth the edge.
How do I save a selection to use again?
Choose Select, then Save Selection. Photoshop stores it as a channel in the document, and you can reload it with Select, then Load Selection.
Related Lessons
- Select Subject And Select And Mask for fast cutouts with refined edges.
- Layer Masks to keep selections editable and non-destructive.
- Luminosity Masks to select by brightness for natural-looking edits.
- Hair Cutouts for the hardest edges you can select.
- Adjustment Layers to apply edits only inside a selection.
Gear That Helps With This
Hand-picked kit that makes this lesson easier to put into practice.
Some links are affiliate links: if you buy through them we may earn a small commission at no extra cost to you. How this works.