
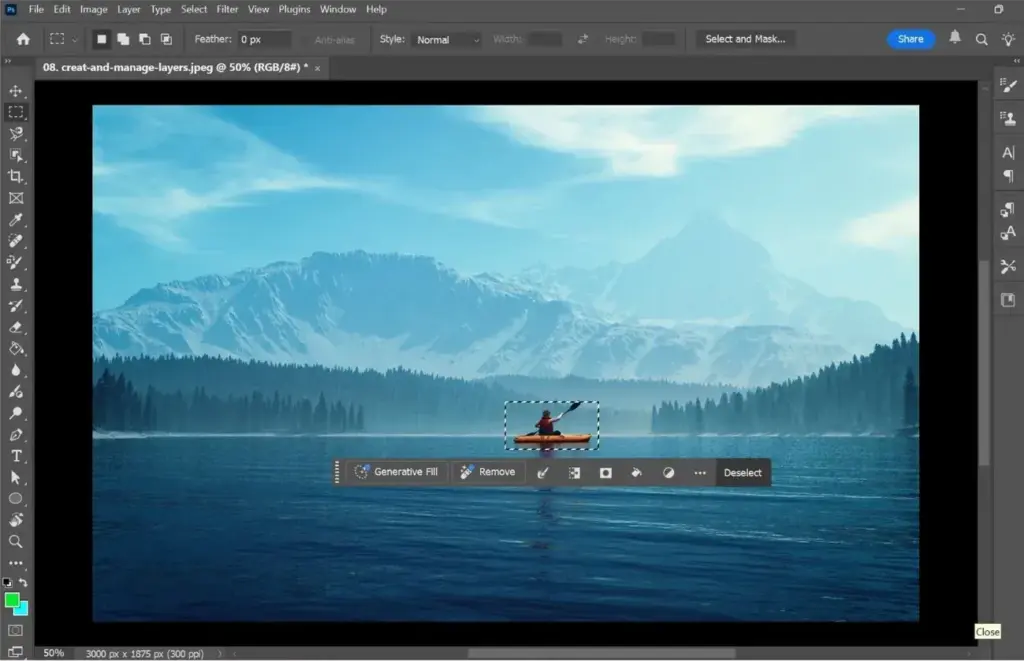
Content-aware fill is a Photoshop tool that removes an unwanted object by analyzing the surrounding pixels and generating new content to fill the gap. You select the object, open the Content-Aware Fill workspace, adjust the sampling area and output to a new layer, then clean up any repeated patterns or soft edges by hand.
Why It Matters
Distracting objects such as power lines, tourists, signs or blemishes can weaken an otherwise strong photograph. Removing them cleanly keeps attention on the subject and saves reshoots.
Content-aware fill is faster than manual cloning on textured areas, and when used on a separate layer it stays non-destructive, so you can refine or discard the result at any time.
Beginner Content-Aware Fill Basics
Make a selection around the object with a tool such as the Lasso, leaving a small margin of background. Choose Edit, then Content-Aware Fill. Photoshop opens a workspace with a preview, a green overlay showing the sampling area and an options panel. The result is built from the pixels inside the green area, so the quality depends on how well that area represents what should replace the object.
Key Controls
- Sampling Area Options: auto, rectangular or custom, which decide where pixels are borrowed from.
- Brush tools: paint over the overlay to add or remove areas from sampling.
- Fill Settings: color adaptation, rotation adaptation, scale and mirror for textures.
- Output To: current layer, new layer or duplicate layer.
- Preview: shows the result live, so you can adjust before confirming.
Choosing The Right Removal Tool
| Tool | Best For | Limit |
|---|---|---|
| Content-aware fill | Larger objects on textured backgrounds | May repeat patterns |
| Spot healing brush | Small blemishes and dust | Weak on large areas |
| Clone stamp | Precise control over source | Slow on big areas |
| Generative fill | Complex scenes or new content | Needs a connection and may change style |
| Patch tool | Smooth gradients and skin | Can smear texture |
Removing An Object Step By Step
- Duplicate the background layer or work on an empty layer set to sample all layers.
- Select the object with the Lasso tool and include a little extra background around the edges.
- Choose Edit, then Content-Aware Fill, and check the green sampling area.
- Paint out areas that should not be used, such as another person or a conflicting texture.
- Set Output To New Layer, press OK, and then touch up remaining flaws with the clone or healing tools.
Common Mistakes
- Selecting too tightly so that edge halos remain.
- Leaving the default sampling area including unwanted objects.
- Applying the fill directly to the background layer, which is destructive.
- Skipping the final cleanup of repeated textures.
A Worked Example
A landscape photo has a hiker in the lower corner. Draw a loose selection around the hiker, open Content-Aware Fill and remove the sky from the sampling area, since only grass should be used. Output to a new layer. The first result repeats a clump of grass, so apply the clone stamp with a soft brush to break the pattern. The final image is clean and fully reversible.
Selecting With Margin
A selection that hugs the object leaves a faint outline of its edges, because anti-aliasing and shadows extend past the visible shape. Expand the selection by 3 to 10 pixels so that shadows and fringes are included. For people, include cast shadows on the ground, or the removal will leave a gray patch where the shadow was.
Reading The Sampling Overlay
The green overlay shows which pixels Photoshop may use. If it includes the object itself or a very different area, results will look wrong. Use the brush in subtract mode to remove those areas, or switch to a custom area and paint only the parts that match. Taking a minute here saves a lot of cleanup later.
Avoiding Repeated Patterns
The most common flaw is a tiled look, where the same texture repeats in the filled area. Counter it by changing the sampling area, turning on rotation adaptation or mirroring, and then re-running the fill. For stubborn repeats, apply the fill twice on separate layers and blend them with a mask.
Working On A Separate Layer
Output to a new layer gives full control. You can lower opacity, mask areas, change blend modes or delete the layer entirely. This also helps when the client wants a version with and without the removal, because you can switch the layer on and off.
Matching Grain And Noise
Filled areas are often smoother than the rest of a noisy photo, which makes the edit visible when zoomed in. Add a thin layer of noise or grain to the fill layer so that it matches the surroundings. Check the result at 100 percent and at print size to make sure the repair blends.
Handy for this: Sensor And Lens Cleaning Kit — keep glass spotless. (affiliate link)
Advanced Pro Refinements And Workflow
Combining With Selections
Precise selections improve results. Use tools described in Photoshop selection tools to isolate objects with complex edges, and refine with Select and Mask. Better selections give the fill a cleaner boundary to work against, which is especially important for thin objects such as wires or branches.
When To Use Generative Fill Instead
For large or complex areas, generative fill can invent plausible content that content-aware fill cannot. Content-aware fill still has benefits: it works offline, uses only your pixels and keeps the original texture and grain. Choose based on the scene, and compare both on a layer if unsure.
Finishing With Healing And Cloning
After the fill, use healing and cloning tools to fix small flaws. This two-step approach gives the best results on difficult scenes, because the fill handles the bulk and the brush tools handle the details. Work at 100 percent zoom and sample from nearby areas with similar lighting.
Masks, Layers And Non-Destructive Habits
Keep every removal on its own layer and add a layer mask to hide mistakes. Name layers clearly and group them, which keeps large projects manageable. If the subject changes later, you can revisit one fix without touching the rest. For background cleanup, also see background removal.
Try It
- Open a photo with an unwanted object on a textured background.
- Make a loose selection and run Content-Aware Fill with output to a new layer.
- Edit the sampling area and compare the results.
- Clean up repeated patterns with the clone stamp and match the noise.
Common Questions
What is content-aware fill?
A Photoshop feature that removes a selected area and fills it with content built from the surrounding pixels.
Why does my fill look repeated?
The sampling area is too small or limited. Change the area, enable rotation or mirror and clean up with the clone tool.
Is it better than generative fill?
Each has strengths. Content-aware fill uses your pixels and works offline, while generative fill can create new content for complex areas.
Can I undo or adjust the result later?
Yes, if you output to a new layer, because you can mask or delete it at any time.
Related Lessons
- Generative Fill for complex areas and new content.
- Healing And Clone Tools to finish repairs.
- Photoshop Selection Tools to make precise selections.
- Layer Masks In Photoshop to blend and hide edits.
- Remove Background for subject isolation.
Gear That Helps With This
Hand-picked kit that makes this lesson easier to put into practice.
Some links are affiliate links: if you buy through them we may earn a small commission at no extra cost to you. How this works.