
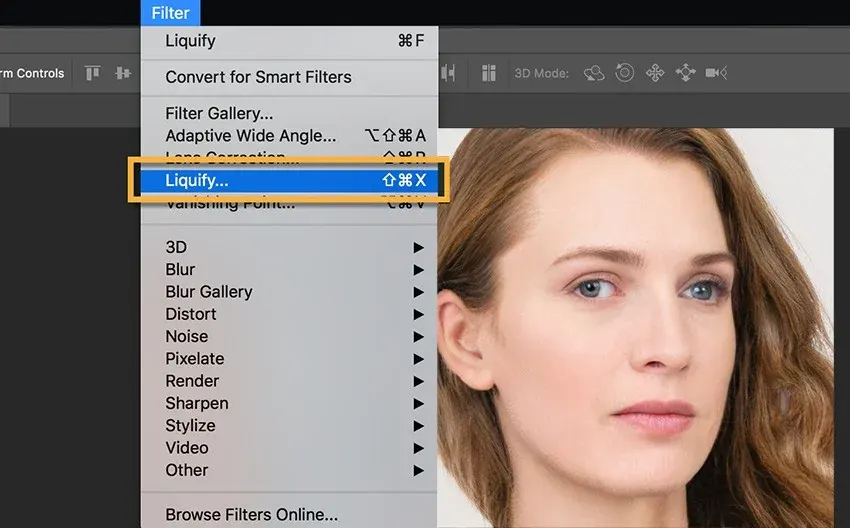
The Liquify filter in Photoshop pushes, pulls, twirls and smooths pixels like wet paint, so you can reshape clothing, posture or features. To avoid a fake look, use a large soft brush, low pressure and tiny changes, protect straight lines with the Freeze Mask tool, and apply it as a smart filter.
Why It Matters
Liquify is useful far beyond portraits. It can straighten a collar, soften a wrinkled sleeve, tuck in a flyaway hair, nudge a product edge into a clean curve or adjust a tilted skyline. Used lightly, it repairs problems that cannot be fixed at the camera.
It is also the tool most easily overdone. Warped backgrounds, bent door frames and mismatched shapes give away the edit instantly, so technique matters more than the number of sliders you know.
Beginner How To Use The Liquify Filter
Opening And Setting Up
Select the layer you want to edit, then choose Filter, then Liquify. For flexibility, first convert the layer to a Smart Object so the edit stays adjustable. The Liquify window opens with tools on the left, a preview in the center and properties on the right.
The Main Tools
– Forward Warp (W) pushes pixels in the direction you drag. It is the workhorse.
– Reconstruct (R) paints back toward the original.
– Smooth removes jagged edges caused by earlier moves.
– Twirl, Pucker and Bloat rotate, shrink and expand areas.
– Freeze Mask (F) protects an area from changes, and Thaw Mask (D) removes the protection.
– Face Tool (A) adjusts facial features with handles or sliders.
Safe Starting Settings
1. Choose Forward Warp and set Size larger than the area, such as 150 to 400 pixels.
2. Set Density to about 50 and Pressure to 20 to 30.
3. Zoom to a comfortable view and drag in short, gentle strokes.
4. Toggle the Preview checkbox to compare before and after.
What To Change And What To Leave
Good targets include loose threads, bulges in clothing, small hair gaps, an uneven hem or a wobbly product edge. Think twice before changing faces and bodies, since people value an honest likeness. Keep any change small enough that the person still looks like themselves.
Common Mistakes
– Using a tiny brush with a high pressure, which creates ripples.
– Moving pixels near a straight edge and bending the background.
– Changing one side and forgetting to mirror it for symmetry.
– Pushing the same area many times so that texture smears.
Handy for this: ND And Polarizing Filters — control light and glare. (affiliate link)
Advanced Precision And Natural Results With The Liquify Filter
Protecting Edges With Freeze Mask
Before warping near a wall, doorframe or horizon, paint a freeze mask over the line so it stays straight. Choose Freeze Mask, paint over the sensitive area, and edit near it with confidence. Press Show Mask in the view options to see it as a colored overlay. The mask can be inverted or cleared with the mask options, and holding Alt or Option toggles it off while you paint.
Face-Aware Liquify
The Face Tool detects eyes, nose, mouth and face shape and gives sliders for size, height, width, tilt and distance. Edit each side separately, since few faces are symmetrical, and keep changes small. Moves of 5 to 10 units often look natural, while 30 or more start to look artificial. Check eye distance and the smile lines, and compare with the original at normal viewing size. For wider retouching work, see skin retouching and frequency separation.
Brush Pressure And Backdrop
Pressure controls how much the pixels shift per stroke. A lower pressure gives smooth, controlled results. Pen users can enable Stylus Pressure for variable strength. Show Backdrop lets you view another layer beneath, which helps when editing a duplicate layer to match a clean version. Use a duplicate layer for edits so the original remains untouched.
Working As A Smart Filter
Applying Liquify to a Smart Object lets you reopen it by double clicking the filter in the layers panel, and the earlier mesh is stored so you can refine it. This makes it possible to dial back a heavy change days later. Learn more about this in smart objects. Photoshop may display a warning when the filter is applied to a layer with a mask, so check the layer structure.
Fixing Texture And Detail After Warping
When pixels are stretched, patterns such as fabric weave, hair strands and skin pores can warp. Fix them with the Clone Stamp or healing tools on an empty layer after the warp, as covered in healing and clone tools. Check the background lines, tiles and text. A pattern that bends near a person is a clear sign of a heavy edit.
Straightening And Transforming Instead
For large changes in perspective or scale, the transform tools are better than Liquify. Use Free Transform, Warp or Perspective Warp for those jobs, and keep Liquify for local adjustments. See transform tools for the options. In architectural scenes, correct converging lines at capture or with perspective correction.
Ethics And Judgment
Retouching sets expectations. Decide what you will and will not change for each client and discuss it in advance. For commercial work, follow the brand’s guidelines. A light touch usually honors the subject better.
Fabric, Clothing And Product Work
Liquify shines on cloth. A shirt that bunches at the waist, a dress hem that dips or a collar that curls can be smoothed with a large brush at low pressure. Work in broad strokes that follow the direction of the fabric, then step back and compare. For product images, use it to tidy a slightly dented bottle shoulder or an uneven strap, but keep logos and text frozen so they stay legible and straight.
Hair And Fine Detail
Flyaway hair is best tucked with the Forward Warp using a small brush and light pressure, working from the root outward. Pulling hair across a clean background creates streaks, so freeze the background region first, or clone away the strands instead. When strands cross skin or shoulders, check that the pattern still looks like hair at 100 percent.
Resolution And Speed
Liquify slows down on very large files. Work on a copy sized to what you need, and avoid running it twice on the same pixels, since repeated warping softens detail. If the preview lags, lower the mesh display or switch off the mesh overlay. Always finish with a look at the whole image at its final size.
A Quick Review Habit
After closing the dialog, toggle the layer on and off at normal viewing size. If the difference is obvious when you flick between the two, you have probably gone too far. The best retouching is the kind that people only notice when it is missing.
Try It
- Open a portrait and duplicate the layer, then convert the duplicate to a Smart Object.
- Open Liquify, freeze the background lines near the subject, and smooth a collar or a stray hair with Forward Warp at low pressure.
- Toggle Preview often and stop when the change is hard to notice.
- Reopen the smart filter and reduce one adjustment using Reconstruct.
Common Questions
Is the Liquify filter destructive?
It changes pixels permanently if applied to a normal layer. Convert the layer to a Smart Object first, or work on a duplicate, so you can reopen and adjust it later.
How do I keep straight lines from bending?
Paint a freeze mask over the lines before warping nearby areas, and use a large soft brush with low pressure so the pushes stay gentle.
What brush pressure should I use?
Start between 20 and 30 with density around 50. Lower pressure gives more control and prevents ripples and smears.
Can Liquify fix a crooked horizon?
Not well. Use rotation in the crop tool or transform tools for large corrections, and keep Liquify for small local shape changes.
Related Lessons
- Smart Objects for keeping the filter editable.
- Skin Retouching for the wider portrait workflow.
- Frequency Separation to fix texture without moving shapes.
- Healing And Clone Tools to repair patterns after a warp.
- Photoshop Transform Tools for larger shape and perspective changes.
Gear That Helps With This
Hand-picked kit that makes this lesson easier to put into practice.
Some links are affiliate links: if you buy through them we may earn a small commission at no extra cost to you. How this works.