
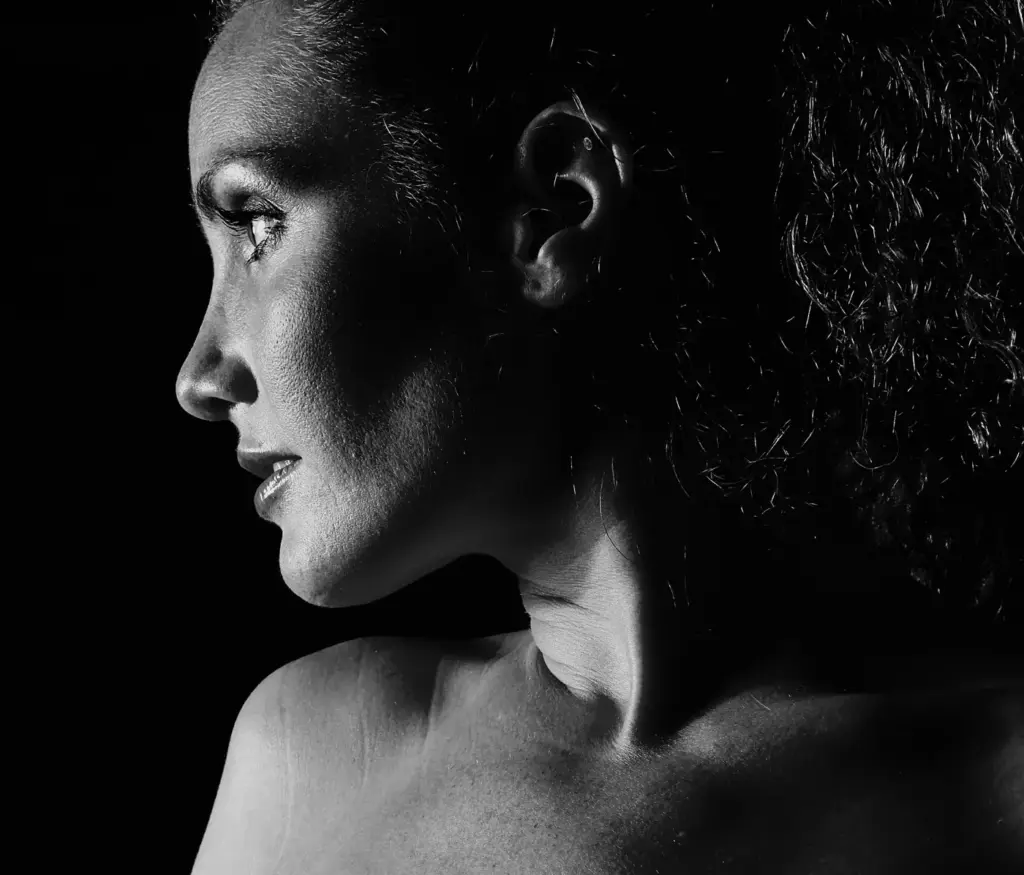
Low key high key describes two opposite tonal styles. Low-key images are mostly dark, with deep shadows and a few bright highlights for a dramatic or moody feel, while high-key images are mostly bright, with few shadows and a light, airy, clean look. The terms describe overall tone, not a particular subject.
Why It Matters
Tone is one of the strongest tools for mood. A dark, shadowed portrait feels serious or mysterious, while a bright, soft portrait feels gentle, clean and optimistic. Choosing the style on purpose gives your photographs a consistent emotional message.
Both styles also teach exposure. They push you to control light, check the histogram and understand why cameras can misjudge scenes that are mostly very dark or very bright.
Beginner Understanding Low Key And High Key
In a low-key photograph most tones sit at the dark end, with a small area of light that draws the eye. Black or dark backgrounds, side light and strong contrast are common. In a high-key photograph most tones sit near the bright end, with soft light, light backgrounds and low contrast. High-key does not mean overexposed: details and edges should still show, and the brightest areas are not blown out unless that is your intent.
Typical Features
- Low key: dark background, side or edge light, strong shadows, deep blacks.
- High key: white or light background, soft frontal light, minimal shadows, pale tones.
- Low key often uses a single light source to sculpt the subject.
- High key often uses several lights or a large diffuse source to fill shadows.
- Both can be color or black and white.
Low Key Versus High Key At A Glance
| Feature | Low Key | High Key |
|---|---|---|
| Overall tone | Dark | Bright |
| Mood | Dramatic, mysterious, serious | Clean, light, cheerful |
| Light | One hard or directional source | Large, soft, even light |
| Background | Black or dark | White or pale |
| Common subjects | Portraits, still life, moody product shots | Beauty, babies, fashion, product on white |
Try A Simple Low-Key Portrait
- Place the subject a few feet from a dark wall or use a black cloth behind them.
- Use a single window or lamp from one side, and turn off other lights in the room.
- Meter for the lit part of the face and use exposure compensation so shadows stay dark.
- Check the histogram to see that data sits mostly on the left, with highlights not clipped.
- Adjust the angle of the light until one eye and cheek are shaped by a soft shadow.
Common Mistakes
- Letting the camera brighten a dark scene, since metering tries to make everything mid-gray.
- Losing all shadow detail in a low-key image so the subject disappears into the background.
- Overexposing a high-key image until skin and clothing lose texture.
- Using a color cast on a white background, which makes a high-key image look dirty.
A Worked Example
To make a high-key portrait, place the subject in front of a white wall about 6 feet away, light the wall so it reads pure white, and use a large soft source such as a window or softbox in front. Set exposure compensation to +1 and check that the skin is bright but still shows texture. For a low-key version of the same subject, move them in front of a dark cloth, remove the front light and keep only one side light.
Do Not Confuse Tone With Exposure
A correctly exposed low-key photograph is not an underexposed photograph. Underexposed images look muddy because even the key subject is too dark and noisy. In low-key work the subject has the correct brightness and the rest is allowed to fall away. In the same way, a correctly exposed high-key image gives the subject the right brightness while the background is lit above it.
Keep Some Contrast Of Tone
Even in a high-key image a few darker accents, such as eyes, lashes or hair, give the viewer a place to look. In a low-key image a small bright highlight on an eye or edge does the same. Without any contrast the image looks like a failed exposure instead of a deliberate style.
Handy for this: Fast Prime Lens — creamy backgrounds, low light. (affiliate link)
Advanced Metering, Lighting Ratios And Editing
Why Meters Fight You
A camera meter assumes the scene averages out to middle gray, so it brightens a dark low-key scene and darkens a bright high-key scene. Use exposure compensation, spot metering or manual mode to override it, as explained in exposure compensation and metering modes compared. For a bright white background, a rule of thumb is to add about +1 to +2 stops, and for a dark scene subtract about 1 stop.
Lighting Ratios
The ratio between the lit side and the shadow side defines the style. Low-key work uses high ratios such as 8:1 or more, where shadows are very dark, while high-key work uses low ratios of about 2:1 or even 1:1, where light wraps around the subject. Lighting patterns are explained in one light setup, and the quality of the shadows depends on direction of light.
Reading The Histogram
A low-key histogram clusters at the left with a small spike on the right, and a high-key histogram clusters at the right. Neither should touch the edge strongly unless you want clipping. The tool is explained in reading histograms. Learning to accept a lopsided histogram as correct is one of the best lessons these styles teach.
Editing And Mood
In editing, low-key images benefit from a gentle curve that holds black but lifts a hint of shadow detail, plus subtle dodging of the subject, and high-key images benefit from lifting whites and shadows while preserving some mid-tone contrast. Color choices matter: see color harmony and negative space, since both styles use large empty areas. Texture also helps; texture in photography covers how to keep surfaces from vanishing.
Try It
- Set up a lamp to one side of an object in a dark room and photograph it so most of the frame is dark.
- Photograph the same object on a white sheet with soft window light and +1 exposure compensation.
- Compare the two histograms and note where the data sits.
- Convert both to black and white and see which mood each one keeps.
Common Questions
Does high key mean overexposed?
No. High key means mostly bright tones with low contrast. Details should still be visible, and the subject should not be blown out.
Do I need studio lights for low-key images?
No. A single window or lamp with a dark background is enough. The main requirement is controlling where light falls.
Can I make a photo low key in editing?
You can darken backgrounds and add contrast, but the best results begin with real directional light. Editing alone often looks flat or noisy.
Which style is easier for beginners?
Low key is often easier because one light is enough. High key needs more light and control over the background.
Related Lessons
- Reading Histograms to see tone distribution.
- Exposure Compensation Guide to override the meter for dark and bright scenes.
- One Light Setup for a simple way to build low-key light.
- Negative Space for the empty areas both styles rely on.
- Color Harmony to shape mood beyond tone.
Gear That Helps With This
Hand-picked kit that makes this lesson easier to put into practice.
Some links are affiliate links: if you buy through them we may earn a small commission at no extra cost to you. How this works.