
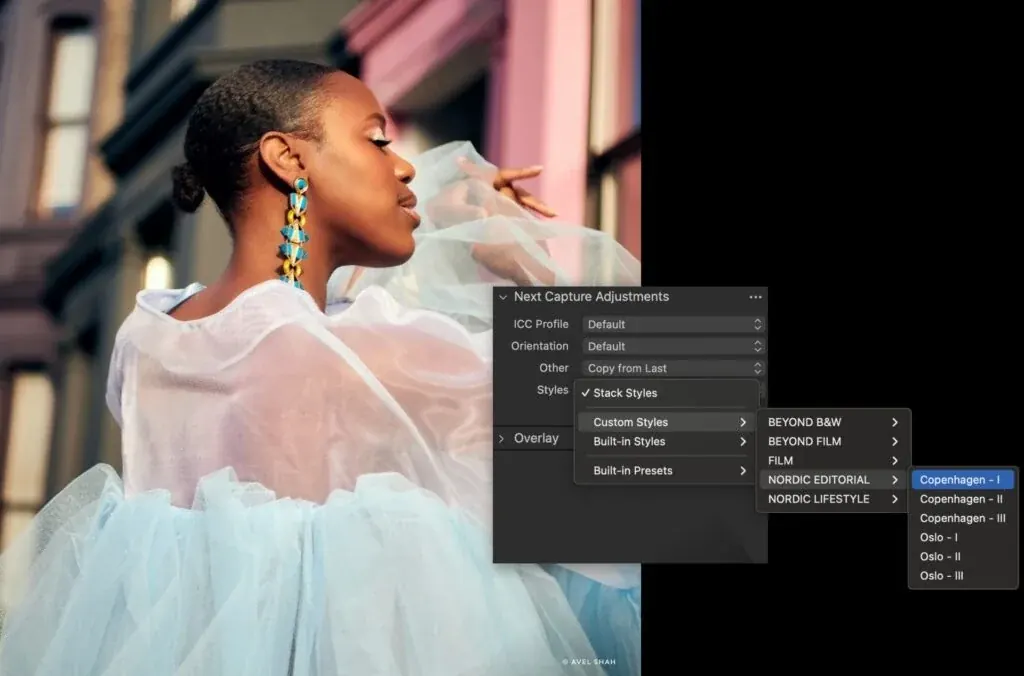
Capture One styles are saved sets of adjustments that apply a complete look or correction in one click, and they can include several tools and layers at once. Presets save the settings of a single tool, while styles can combine tools, so most photographers use both together.
Why It Matters
Editing hundreds of photos from one shoot is tedious if every frame starts from zero. Reusable styles bring consistency, so a wedding gallery or a product catalog looks cohesive, and they cut the time between import and delivery.
They are also a way to learn. Looking at a good style shows which adjustments create a look, and the ability to apply a style on a layer lets you build on it instead of replacing it.
Beginner Capture One Styles And Presets Workflow
Styles Versus Presets
| Item | What It Stores | Typical Use |
| Preset | Settings of one tool, such as a curve or a clarity setup | Tweak one aspect |
| Style | Settings from several tools, optionally with layers | Whole look or correction set |
A preset is like a saved recipe for a single ingredient. A style is the full dish. You can apply either to an image, and a style can be applied as a layer so you can paint it onto part of the picture.
Applying A Style
1. Select one or more images in the browser.
2. Open the Styles and Presets tool, which may be in the Adjustments area depending on your workspace.
3. Click a style to apply it. Some styles can be applied with a brush on a layer.
4. Adjust the sliders in the individual tools if the look needs tuning.
5. Use the reset or the undo to remove it.
Creating Your Own Style
1. Edit an image until you like the look.
2. Open the menu in the Styles and Presets tool and choose to save a new user style.
3. Choose which tools and adjustments to include, such as color balance, curves and grain, and leave out exposure if it varies from shot to shot.
4. Name it clearly, such as Warm Portrait Soft or Clean Product.
5. Save, and it appears in your user styles.
Organizing Styles
Create folders for categories, such as Portrait, Landscape and Black and White. Use a naming scheme with a prefix, so related styles sort together. Do not keep dozens of similar versions, since they slow you down.
Common Mistakes
– Saving exposure and white balance into a look, so it fails on other photos.
– Applying a style to a photo and then forgetting which adjustments came from it.
– Downloading many styles and never learning what each does.
– Overusing a strong style, which hides the character of a scene.
Handy for this: Fast Memory Cards — never miss a burst. (affiliate link)
Advanced Using Capture One Styles In A Professional Workflow
Styles On Layers And Brushes
A powerful feature is applying a style to a layer. You can paint a warm look onto the highlights, a cool tone into shadows, or a soft glow in selected areas. Use a style brush to paint it in, and control opacity to blend the effect. This works well for local sharpening, skin tone refinements and background cleanup. For layer behavior and masks, read Capture One layers.
Creating Modular Styles
Instead of one giant style per look, build small modular ones. A style for contrast, another for color grading, another for film grain and one for black and white conversion. Stack them in the order you like, so each frame can have a custom mix. This provides more flexibility than a fixed look and avoids duplicating many nearly identical styles.
Importing, Exporting And Sharing
Styles are stored as files that you can copy between computers. Back them up with the rest of your settings, and install new ones through the import option in the tool menu. When you receive third-party styles, review them before using. Some set heavy curves or change the base characteristics, and you may need to adjust them to your camera. A consistent approach to color and calibration helps, and you can learn about that in camera matching profiles and color managed workflow.
Sessions, Catalogs And Style Strategy
Where you store styles does not depend on the session or catalog, since they live in the application’s settings. What does depend on structure is how you apply them. In a session, you may set a starting style for an entire shoot at the capture stage. In a catalog, you may apply a style in bulk after import. See sessions and catalogs for how each fits a workflow, and tethered capture for applying a style automatically as images arrive.
Keyboard Shortcuts And Speed
Assign keyboard shortcuts to your most common styles in the keyboard shortcut editor, so you can apply them with a key press while culling. Combine this with copy and apply of adjustments to sync settings across a series. Compare the approach with Lightroom presets, which also build a consistent look.
Testing A Style Across Lighting
Apply a new style to images from bright sun, shade and indoor light. If skin tones shift badly, split the style into a base part and a color part, and apply only the color part where it works. A style that works in all lighting should include few exposure or white balance changes.
Black And White And Film Looks
Styles are a natural home for monochrome conversions and film-inspired grading. A good black and white style sets the color editor channels, a contrast curve and a touch of grain, and leaves exposure alone. Because skin reflects red and orange, lowering those channels darkens skin while raising them lightens it, so test any monochrome style on portraits as well as landscapes. For film looks, keep the grain subtle, since heavy grain at web size turns to noise.
Checking A Style Before Delivery
After applying a style to a batch, scan the whole set at a small size in the browser. Look for frames where skin turns orange, shadows block up or highlights lose color. Fix outliers by adjusting the base tools for that frame, not by editing the style itself. Then export a few files and view them outside the program, since screen calibration and export color space can change how a look appears.
Keeping A Library Tidy
Review your styles every few months. Delete ones you never use, merge near duplicates and rewrite names so they describe the result, not the date. A short, well-named library of ten to twenty styles is faster to use than hundreds of unsorted ones, and it makes handing the set to an assistant or second shooter far easier.
Applying Styles Selectively
When only some frames need a look, select them first with a rating or a color tag. Apply the style to the selection and then use copy and apply to carry any manual tweaks. Remember that a style applied as a base adjustment replaces the settings in the tools it touches, so apply it before fine tuning, not after, or you may lose your own changes.
Try It
- Edit one photo with a color grade, curves and a little grain.
- Save the settings as a user style, leaving out exposure and white balance.
- Apply the style to five other photos from the same shoot and adjust any that look off.
- Apply a second style on a layer with a brush to one area, and adjust the opacity.
Common Questions
What is the difference between styles and presets in Capture One?
A preset saves the settings of one tool, while a style can store settings across multiple tools and layers. Styles are best for a complete look, presets for a single adjustment.
Can I apply a style to part of an image?
Yes. Apply the style on a layer and paint it in with a brush or a gradient mask, and adjust the layer opacity to blend it in.
Do styles work with every camera?
They apply to any supported raw file, but results vary because cameras differ in color and tone. Check and adjust white balance and exposure after applying.
Where should I store my styles?
Keep them in the Styles and Presets tool and back up the style files with your other settings, so you can restore or copy them to another computer.
Related Lessons
- Capture One Layers for applying styles to parts of an image.
- Capture One Sessions And Catalogs to decide where a workflow lives.
- Capture One Tethering for applying looks as images arrive.
- Lightroom Presets to compare another preset system.
- Color Managed Workflow for consistent color from edit to output.
Gear That Helps With This
Hand-picked kit that makes this lesson easier to put into practice.
Some links are affiliate links: if you buy through them we may earn a small commission at no extra cost to you. How this works.