
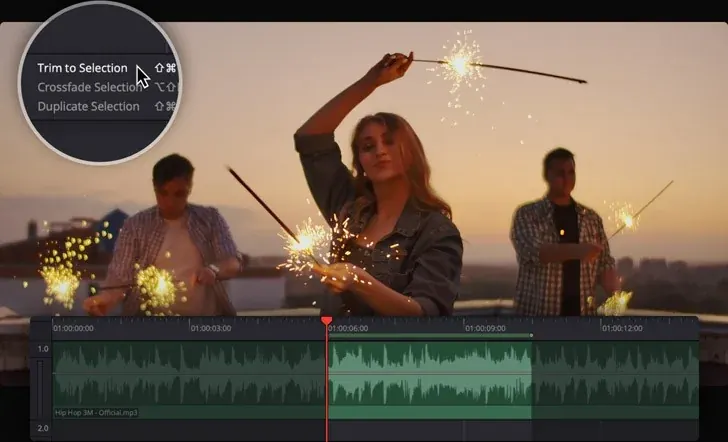
Resolve Fairlight is the audio editing and mixing page inside DaVinci Resolve. It offers multitrack editing, a mixer, equalizer, compressor, noise reduction and loudness metering, so you can clean dialogue, balance music and deliver a finished mix without leaving the same project as your edit and color work.
Why It Matters
Viewers forgive soft video far more than bad audio. Clean dialogue, steady levels and sensible music are what make a video feel professional, and many editors ignore sound until the end.
Fairlight puts a full audio workstation inside the editor. Knowing its basics means you can fix common problems such as noise, uneven volume and harsh voices in the same project instead of exporting to other software.
Beginner Resolve Fairlight Layout And Tools
Click the Fairlight tab at the bottom of Resolve to open the page. The timeline shows audio tracks with waveforms, and the mixer on the right shows a fader for each track plus the main bus. The inspector gives access to EQ, dynamics and effects for the selected clip or track. A meter shows loudness, which is the measure used for delivery to platforms. The Index and Sound Library help you find clips and effects.
Key Parts Of The Page
- Timeline with tracks, clips and waveforms for each audio source.
- Mixer with faders, pan controls, solo and mute for every track and bus.
- Track and clip EQ with several bands, plus dynamics such as compressor, limiter and gate.
- Effects including noise reduction, de-esser and reverb.
- Loudness meter and scopes for checking levels against delivery targets.
Common Problems And Fixes
| Problem | Tool In Fairlight | Typical Approach |
|---|---|---|
| Background hiss | Noise reduction | Capture a noise profile and apply moderate reduction |
| Uneven voice volume | Compressor | Ratio around 3 to 1, adjust threshold until peaks drop 3 to 6 dB |
| Muddy voice | EQ | Reduce low-mid frequencies around 200 to 400 Hz |
| Sharp S sounds | De-esser | Target the 5 to 8 kHz range |
| Music covers speech | Ducking or automation | Lower music while dialogue plays |
A Simple Dialogue Workflow
- Switch to the Fairlight page and play the timeline to find problems.
- Use the clip level to balance dialogue so that speech peaks around negative 12 to negative 6 dB.
- Apply a high-pass filter at about 80 Hz to remove rumble, then use noise reduction as needed.
- Add a gentle compressor and de-esser to even out and clean the voice.
- Lower the music under speech, then check the overall loudness against your target.
Common Mistakes
- Applying heavy noise reduction that makes the voice sound watery.
- Boosting volume until the waveform clips instead of using a limiter.
- Mixing on laptop speakers only, and missing problems that appear in headphones.
- Forgetting to set loudness targets for the platform being used.
A Worked Example
A talking-head video has a hum from an air conditioner and a voice that jumps in level. In Fairlight, you apply a high-pass at 80 Hz, a noise reduction pass, a compressor with a ratio of 3 to 1 and a small boost at 3 kHz for clarity. The music is placed on a separate track and lowered by 12 dB under the voice. The result is clear dialogue with steady loudness.
Understanding Loudness
Loudness is measured in LUFS. Streaming platforms often aim for around negative 14 LUFS, while broadcast standards use values such as negative 23 or negative 24. Peaks should stay below about negative 1 dBTP to avoid distortion. A loudness meter in Fairlight shows integrated loudness across the entire program, which is the number to check before export.
Tracks, Buses And Organization
Organize audio into dialogue, music and effects tracks, then route each group to a bus. Controlling a bus changes everything in the group at once, which saves time and keeps the balance consistent. Label tracks and use colors so a complex timeline remains readable.
Monitoring And Room Considerations
What you hear depends on where you listen. Closed-back headphones show noise and clicks clearly, while speakers show how the mix sounds in a room. Check the mix on both, and also on a phone speaker, since many viewers will watch that way. If voices stay clear on the smallest speaker, the mix is probably balanced. Keep monitoring volume constant while you mix, because louder playback makes everything seem better and hides problems in dialogue.
Recording Better Audio At The Source
No tool replaces good recording. Place the microphone close to the speaker, usually 6 to 12 inches for a shotgun or lavalier, and avoid rooms with hard echoing walls. Record test sounds before the real take and watch the meters, aiming for peaks around negative 12 dB so there is room before clipping. Cleaner source audio means lighter processing in Fairlight, and lighter processing sounds more natural.
Working With Music And Effects
Choose music that sits behind the voice instead of competing with it. Reduce the midrange of the music with EQ around 1 to 3 kHz, where speech lives, so both can be heard clearly. Add sound effects sparingly and keep their level below the dialogue unless they are the focus. Use fades at the start and end of each clip to avoid clicks.
Handy for this: Shotgun Microphone — clean, clear sound. (affiliate link)
Advanced Automation, Processing Order And Integration
Processing Order
The order of effects matters. A typical dialogue chain is high-pass filter, noise reduction, EQ, compression, de-esser, then a limiter at the end. Cleaning noise before compression prevents the compressor from raising the noise floor. Experiment with changes and listen on both speakers and headphones before settling on a chain.
Automation
Fairlight can automate volume, pan and effect parameters over time. Use it to fade music under speech or to ride the level of a quiet word. This is similar in spirit to the Resolve edit page and keyframes in Premiere, and a smooth, gradual curve sounds more natural than abrupt jumps.
Working Between Pages
Because Fairlight shares the project with the edit page, picture changes carry over to audio, and you can move between pages with no exports. Clean your picture on the color page and then return to audio for the final mix. For compared workflows see Resolve free versus Studio, since some noise reduction and voice isolation features depend on the version.
Delivery And Export
Check the audio format in the deliver page, such as AAC for web or linear PCM for broadcast. Match sample rate to the project, usually 48 kHz. Confirm the final loudness once more after export by playing the file. For related video delivery concepts see video codecs and export settings in Premiere.
Try It
- Open a project with dialogue and switch to the Fairlight page.
- Apply a high-pass filter and a gentle compressor to the dialogue track.
- Place music on its own track and lower it under speech.
- Check integrated loudness on the meter and adjust to your target.
Common Questions
Is Fairlight free in DaVinci Resolve?
Yes, the Fairlight page is included in the free version, though some features such as voice isolation and certain effects require the paid Studio version.
What loudness should I aim for?
For online video, around negative 14 LUFS is a common target. Broadcast usually asks for negative 23 or 24 LUFS. Check the requirements of your platform.
Can I clean noise without leaving Resolve?
Yes. Fairlight includes noise reduction and other tools that work directly on clips and tracks.
Do I need to learn all of Fairlight?
No. For most videos, level balancing, a high-pass filter, a compressor and a loudness check cover the majority of needs.
Related Lessons
- Resolve Free Vs Studio to see which audio features need Studio.
- Resolve Color Page for the picture side of the workflow.
- Resolve Fusion Intro for effects and motion graphics.
- Premiere Export Settings for delivery ideas.
- Video Codecs to understand audio and video formats.
Gear That Helps With This
Hand-picked kit that makes this lesson easier to put into practice.
Some links are affiliate links: if you buy through them we may earn a small commission at no extra cost to you. How this works.