
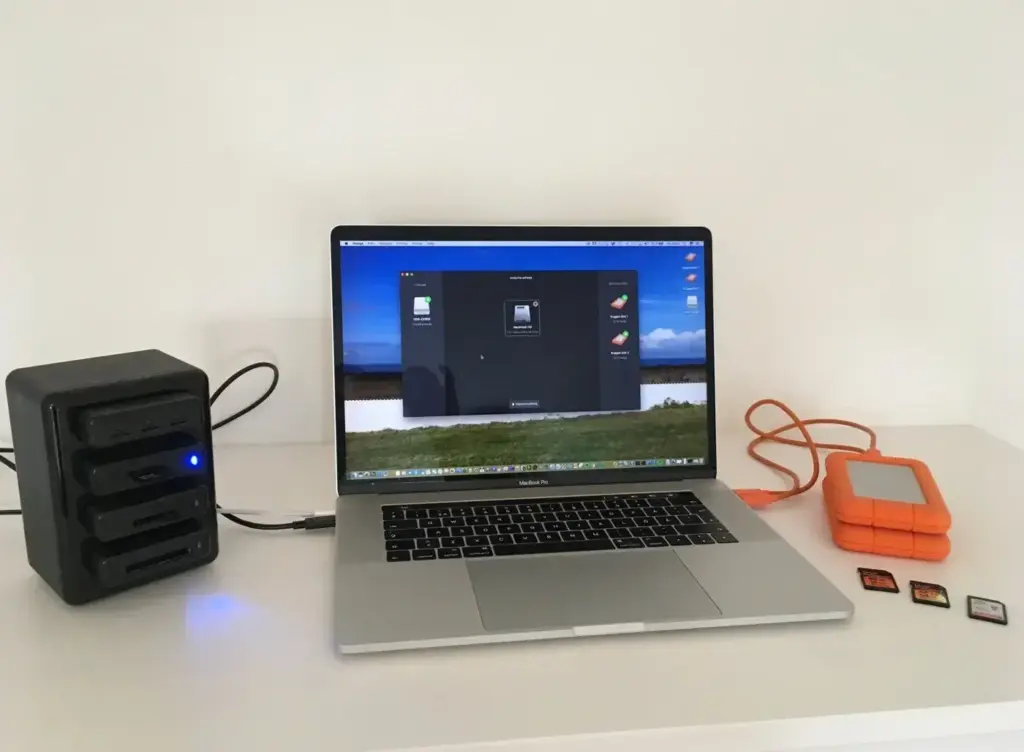
A video offload workflow is the repeatable process of copying footage from camera cards to at least two verified storage drives on a shoot day, labeling it and only then clearing the cards. A good video offload routine protects irreplaceable footage and prevents mistakes such as formatting a card before the copy is safe.
Why It Matters
Video files are large, shoots are rushed and a lost card can mean a lost day of work. Footage is often impossible to recreate, whether it is a wedding, an interview or a documentary.
A clear offload routine removes guesswork. Everyone on the team knows who copies the cards, where files go, how they are checked and when a card can be formatted. A few simple habits prevent most of the disasters that happen on set.
Beginner Planning Storage And Copying
How Much Space You Need
Video size depends on bitrate. Use the table to estimate the storage per hour of footage.
| Bitrate | Approximate Size Per Hour |
|---|---|
| 50 Mbps | 22 GB |
| 100 Mbps | 45 GB |
| 400 Mbps | 180 GB |
| 800 Mbps | 360 GB |
Multiply by the hours you expect to shoot, then by the number of copies. Add a margin of at least 20 percent. See video bitrate for the numbers and video codecs for why sizes differ.
Basic Steps
1. Label the card and its folder with date, camera and card number.
2. Copy the whole card to the first drive, not just the clips.
3. Copy it to a second drive.
4. Verify both copies.
5. Record the card as done in a log.
6. Only then return the card for formatting.
Which Drives To Use
Fast external SSDs are best for working copies because they handle large files and edit smoothly. A larger hard drive can hold the second copy. Learn about speed and sizes in external SSD storage.
Common Mistakes
– Formatting a card before checking the copy.
– Copying only the video files and not the whole folder structure.
– Keeping all copies in one bag.
– Not labeling drives, then mixing days.
Handy for this: Camera Gimbal — smooth handheld footage. (affiliate link)
Advanced A Professional Video Offload Workflow
Use Verified Copies
Dragging files in a file manager is not enough. Use offload software that verifies each file with a checksum, which proves the copy matches the original byte by byte. Many programs create a report for each card. If your budget is small, compare file sizes and open a few clips from each copy, but checksums are far more reliable. Follow the same ideas in the card offload workflow for photos.
Folder Structure
Create a folder for the project, then one for each shoot day, camera and card. Keep the complete card structure, since some cameras store metadata and clip relationships in folders beyond the video files. Use a clear naming scheme, as described in file naming conventions. A layout such as Project, Day 01, A Camera, Card 001 keeps things sorted. See also folder structure for related planning.
Back Up To Multiple Places
Follow the 3-2-1 rule: three copies, on two types of media, with one stored somewhere else. On a shoot day, that might mean the card, two drives and a later copy to a cloud or off-site drive. Details are in the 3-2-1 backup strategy. At minimum, keep the two drives apart and never in the same bag. For field work with limited gear, field backup with phone and SSD shows a lightweight approach.
Dual Card Recording
If your camera supports two cards, record to both at once. This gives a backup before the offload even starts. See dual card slots for settings. It is not a replacement for offloading, but it is an extra safety layer.
Logging And Labels
Keep a simple log with date, card number, clip count, time and the person who copied it. Mark cards with tape: green for backed up, red for not copied. A short checklist for the data wrangler prevents mixing cards. In a small team, make one person responsible for formatting cards.
When To Format
Format cards in the camera, not on the computer, after both copies are verified and a second person confirms if possible. If you are unsure, do not format. A card is cheaper than a lost shot.
Proxies And Editing
For heavy files, generate proxies after offload and edit with them. Keep proxies in a separate folder, and relink to the originals for the final export. Do not edit from the only copy of the footage.
End Of Day Routine
At the end of the day, check that every card has two verified copies, update the log, charge batteries and clean the lenses. Take the drives to separate locations when you leave, such as one in your bag and one in the vehicle or hotel safe.
Travel And Remote Shoots
When flying, carry drives in hand luggage, and avoid shipping the only copy. On remote shoots, take extra cards so you do not have to format until you return. Use a small laptop or portable device to offload at night.
Summary
Estimate storage, copy the whole card twice with verification, log each card and only format in the camera after checking. These steps keep footage safe from the first shot to the final edit.
Working With A Small Crew
On a small shoot, one person can run the whole routine, but they should not also be the camera operator at the same time. Assign the data role, even if it rotates. Give that person a checklist, drives, labels and a quiet place to work. When the day ends, they confirm the number of cards, check each copy and report anything missing before people leave the location.
Cloud And Long Term Storage
After the shoot, upload the footage you cannot replace to a cloud or off-site drive, but remember that large video files take a long time to send. Prioritize selects or the key interviews first. For archive, store the original camera files, proxies if needed, project files and a text file listing what each drive holds. Check the archive drives once or twice a year, since drives can fail without warning.
Common Warning Signs
Slow copy speeds, error messages, drives that disconnect or clips that will not play are warnings. Stop, do not format, and try another cable, port or card reader. A reader that is cheap or old may be the problem, not the card. Keeping a spare reader and cable in the kit solves many of these cases quickly.
Try It
- Estimate the storage you need for a half-day shoot using your camera’s bitrate.
- Copy a test card to two drives using software that verifies checksums.
- Create a folder structure for project, day, camera and card.
- Write a one-page checklist for the offload and tape it to your drive case.
Common Questions
What is a video offload workflow?
It is the steps used to copy footage from cards to verified storage and back it up before the cards are cleared, usually done at the end of each shoot day.
How many copies of video footage should I make?
At least two verified copies on separate drives during the shoot, then a third stored off-site or in the cloud when possible.
Should I format the card in the camera or the computer?
Format in the camera after both copies are verified, since it sets up the correct folder structure for that model.
Is copying files in File Explorer enough?
It works for small jobs, but offload software with checksum verification is safer because it proves the copy matches the original.
Related Lessons
- Card Offload Workflow for the photo version of the process.
- External SSD Storage to choose fast drives.
- 3-2-1 Backup Strategy for a full backup plan.
- Video Bitrate to estimate storage needs.
- File Naming Conventions to label clips clearly.
Gear That Helps With This
Hand-picked kit that makes this lesson easier to put into practice.
Some links are affiliate links: if you buy through them we may earn a small commission at no extra cost to you. How this works.