
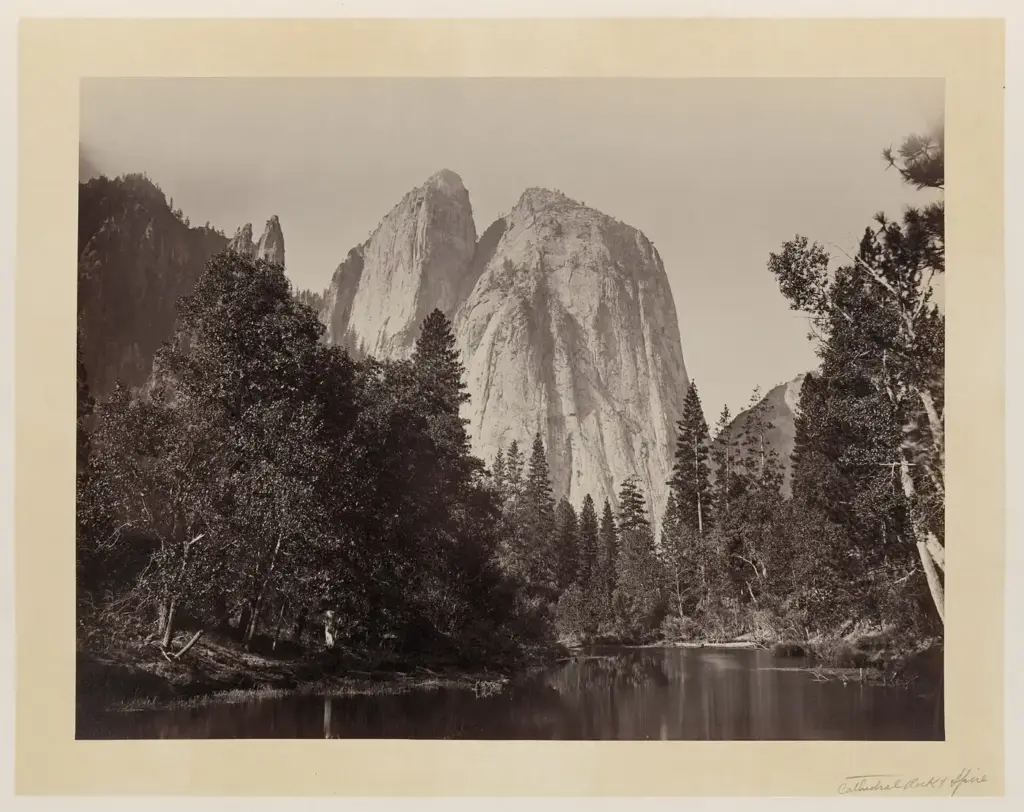
Foreground interest is a strong element placed near the camera, such as rocks, flowers or a path, that anchors the bottom of the frame and creates depth. Combined with a middle ground and a background, it forms three layers that lead the eye into the scene and make a flat photograph feel three-dimensional.
Why It Matters
Photographs of wide scenes often disappoint because the foreground is empty. A big mountain or sunset looks small and distant, and the viewer feels like an outsider. Adding something close to the lens gives scale and a starting point, and the eye can move from the near object to the distant one.
Three layers are a simple structure to aim for. Once you have the habit of looking for them, you will see better compositions in landscapes, city views and even indoor scenes.
Beginner The Three Layers Of A Scene
Think of the frame as divided by distance into three zones.
- Foreground: the closest layer, often just a few feet from the lens. It sets the scale and gives the eye an entry point.
- Middle ground: the connecting layer, such as a river, a field or a line of trees. It leads from the front to the back.
- Background: the farthest layer, such as mountains, a skyline or the sky. It is usually the main reason for taking the picture.
What Makes A Good Foreground
- Rocks, boulders or driftwood on a shore.
- Flowers, grasses or leaves.
- Ripples, tide pools or wet sand that reflect the sky.
- Paths, steps, fences or bridges that lead the eye inward.
- A person or a bench that gives a sense of scale.
Simple Steps
- Find the background that attracted you, then walk toward the scene and look down for something interesting near your feet.
- Crouch or kneel and bring the camera low so the foreground object looks larger and the distance looks greater.
- Use a wide lens, around 16mm to 28mm on a full-frame camera, and move within a few feet of the foreground object.
- Set an aperture of f/8 to f/11 and focus about one third of the way into the scene, so near and far both look sharp. The lesson on hyperfocal distance explains this in more detail.
- Put the camera on a tripod and check the sharpness of the foreground and background on the screen by magnifying the image.
- Reframe so the foreground does not touch the edges awkwardly and the three layers feel connected.
| Layer | Typical distance | Role |
|---|---|---|
| Foreground | 1 to 10 feet | Entry point and scale |
| Middle ground | 10 feet to a few hundred feet | Bridge between near and far |
| Background | Hundreds of feet to the horizon | Main subject or mood |
Making The Layers Connect
Three layers are not enough if they feel like three separate pictures. The eye needs a bridge, and the middle ground provides it. A stream that begins near your feet and winds toward the hills, a path that runs from the near rocks to a distant barn, or a line of waves that travels toward a headland all link the layers into one scene. Look for a shape, a color or a line that repeats from one layer to the next, since repetition ties them together.
The foreground does not have to be the star. Often it is best if it supports the scene by being interesting but quiet, with a tone or color that matches the rest of the picture. A foreground that is more dramatic than the background makes the background feel like an afterthought. If that happens, move the camera so the foreground takes up a smaller part of the frame.
Common Mistakes
- Choosing a foreground that is dull, messy or the same tone as the ground.
- Letting the foreground block the view or crowd the main subject.
- Leaving the foreground out of focus when you wanted it sharp.
- Skipping the middle ground, which leaves the layers disconnected.
Handy for this: Carbon Fiber Tripod — sharp at slow shutter speeds. (affiliate link)
Advanced Focus, Lens Choice And Verifying Foreground Interest
Why Depth Of Field Is A Challenge
When a foreground object is only a few feet away and the background is at infinity, the range of sharpness needed is enormous. At f/8 on a wide lens, focusing at the hyperfocal distance may still leave very close objects soft. Options include a smaller aperture, moving the foreground further away, or focus stacking, a method that blends several frames focused at different distances. See focus stacking for the process and controlling depth of field for the factors involved.
Diffraction And The Smallest Aperture
Closing the aperture too far, for example to f/22, reduces sharpness across the whole frame because of diffraction, which is the bending of light at a small opening. A balance such as f/8 to f/11 is often best, and stacking is a better solution when you need more depth. The lens diffraction limit lesson explains where that point falls for different sensors.
Lens Choice And Perspective
A wide-angle lens exaggerates size differences, so a nearby rock looks large and the mountain looks smaller. This is a strong effect for foregrounds, but it can also distort objects near the edges. A longer lens compresses distance and works for layers that are further apart, such as ridges stacked into the distance, which gives a layered look without a close foreground. See wide-angle lenses for how perspective changes.
Light On The Foreground
A foreground in shadow beneath a bright sky can become a dark mass. Options include shooting at golden hour when light is low and warm, using a graduated filter, bracketing exposures, or lighting the foreground with a small flashlight or flash during a long exposure. At sunrise and sunset, side light across a textured foreground brings out detail. The lesson on golden hour photography covers timing.
Check It Objectively
- Zoom in to 100 percent on the screen of the camera or computer.
- Check the nearest edge of the foreground and the farthest background detail for sharpness.
- Look at the histogram for clipped shadows or highlights.
- If something is soft, refocus and shoot a second frame.
This extra minute saves frames that would otherwise be lost. The same layering idea supports natural framing, where a near object also surrounds the subject.
Try It
- Choose a scenic place with a clear background, such as hills, a lake or a skyline.
- Shoot it once at standing height without a foreground.
- Move close to a rock, flower or path, crouch down, and shoot again with a wide lens at f/8 to f/11.
- Zoom in on both frames and compare the depth, then check whether the foreground and background are both sharp.
Common Questions
What is foreground interest in photography?
It is a strong subject close to the camera, such as rocks or flowers, that gives the viewer an entry point and a sense of scale, and creates layers with the middle and background.
What are the three layers of a photo?
The foreground is nearest the lens, the middle ground connects the scene, and the background is the farthest part. Together they create depth and lead the eye into the picture.
What aperture should I use for foreground and background sharpness?
Start around f/8 to f/11 and focus about one third into the scene. If the foreground is very close, use focus stacking instead of a very small aperture.
Do I always need a foreground?
No. Some scenes, such as an abstract sky or a minimalist view, work better without one. Add a foreground when the scene feels flat or distant.
Related Lessons
- Hyperfocal Distance to set focus for the most depth.
- Focus Stacking to get sharpness from near to far.
- Wide-Angle Lenses to exaggerate foreground size.
- Landscape Planning to pick places and times with strong layers.
- Natural Frames to use foreground objects as a frame.
Gear That Helps With This
Hand-picked kit that makes this lesson easier to put into practice.
Some links are affiliate links: if you buy through them we may earn a small commission at no extra cost to you. How this works.