
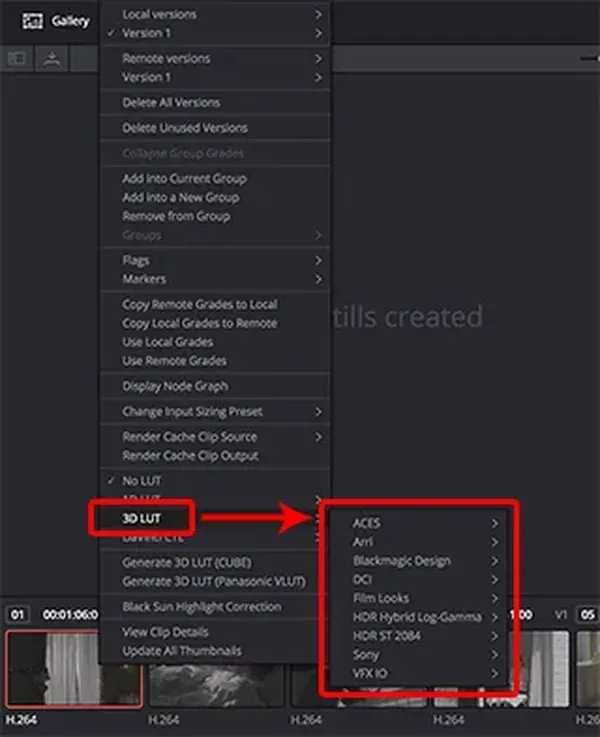
Technical LUTs are lookup tables that convert footage from one color space and gamma curve to another, such as log to Rec.709, without adding any creative look. They give you a standard, predictable starting image for grading, and they are made by the camera maker to match their log format exactly.
Why It Matters
Log footage looks flat and gray on purpose, because it holds as much dynamic range as possible. To judge it or deliver it, you need to transform it into a standard format, and a technical LUT does that reliably.
Using the right technical LUT avoids guessing. It provides a repeatable base so every clip from the same camera starts from the same point, which makes matching shots faster and results more consistent.
Beginner What Technical LUTs Do
A technical LUT, also called a conversion LUT, maps input values to output values using a table. A camera maker such as Sony, Canon, Panasonic or ARRI publishes LUTs that convert their log curve and wide gamut to Rec.709, the standard for most screens. The change is mathematical, not artistic: it preserves the scene as shot and only changes the way tones and colors are encoded. After the LUT, the footage looks normal and ready for creative grading.
Technical Versus Creative LUTs
- Technical LUTs convert between color spaces and gamma curves with no style.
- Creative LUTs add a look such as teal and orange, warmth or film contrast.
- Technical LUTs are matched to a specific camera and log format.
- Creative LUTs are usually applied after correction or conversion.
- Using a technical LUT on the wrong camera gives wrong colors and contrast.
Typical Conversions
| Source | Target | Use |
|---|---|---|
| S-Log3 / S-Gamut3.Cine | Rec.709 | Sony footage for standard delivery |
| C-Log2 or C-Log3 | Rec.709 | Canon footage for standard delivery |
| V-Log / V-Gamut | Rec.709 | Panasonic footage |
| Log C / Wide Gamut | Rec.709 | ARRI footage |
| Camera log | DaVinci Wide Gamut or ACES | Working space for color-managed grading |
Applying A Technical LUT
- Identify the exact camera, log curve and color gamut used to record the clip.
- Download the matching LUT from the camera maker, or use the built-in color managed transform in your editor.
- Apply the LUT in the input stage of your grade, before exposure and color changes.
- Adjust exposure so that skin and midtones sit correctly, since LUTs expect proper log exposure.
- Grade on top of the converted image and apply any creative LUT afterward.
Common Mistakes
- Using a LUT made for a different log curve, which creates crushed shadows or clipped highlights.
- Applying a technical LUT and then a second conversion by mistake.
- Underexposing log footage, which makes the LUT reveal noise.
- Treating a LUT as a finished grade when it is only a starting point.
A Worked Example
You shot a scene in Sony S-Log3 and the clip looks flat. Applying the official S-Log3 to Rec.709 LUT brings back contrast and saturation, and skin looks natural. The sky is slightly bright, so you lower exposure before the LUT, since the correction affects the signal before conversion. From here you can add a creative look or match other shots.
Exposure And LUT Interaction
LUTs assume a specific log exposure level, such as middle gray at a known value. If you underexpose by a stop, the converted image looks dark and noisy, and if you overexpose it may clip. Expose log footage properly, often a little brighter than the meter suggests, and adjust exposure before the LUT in the node tree.
Where Technical LUTs Fit
They belong early in the pipeline, after basic clean up and before creative work. In some workflows they are replaced by color management systems such as ACES or DaVinci Wide Gamut, which perform the same conversions with more flexibility. Choose one approach per project and keep it consistent.
Choosing Between LUTs And Color Management
A LUT is simple and works in nearly every editor, but it is a fixed transform and applies only to one camera and one target. Color management handles many cameras, color spaces and deliverables, and keeps wide gamut data available longer. Small projects with one camera are fine with LUTs, while multi-camera work or HDR delivery benefits from a managed pipeline that can output several formats from one grade.
Testing A LUT On Your Own Footage
Before using a LUT on a full project, test it on a shot with known elements such as a gray card, a skin tone and a bright sky. Check that gray stays neutral on the vectorscope, that skin lands near the skin line and that highlights roll off smoothly. If anything looks off, confirm that the camera settings, such as the gamut and log curve, match the LUT you downloaded.
Keeping LUTs Organized
Store technical LUTs in a labeled folder by camera and version, and note the log format in the file name. When firmware updates change a log curve, download the updated LUT. Keep a note of which LUT each project used, so that you can reopen it years later and get the same result without guessing.
Handy for this: Fast Wide-Angle Lens — gather more starlight. (affiliate link)
Advanced Pipeline, Formats And Pitfalls
LUT Formats And Sizes
Most LUTs use the .cube format, with sizes such as 17, 33 or 65 points per axis. Larger sizes are more accurate. Some LUTs are 1D, which change only tone curves, and others are 3D, which change color relationships too. For the basics, see LUTs explained, which also describes input and output LUTs.
Log Footage Workflow
Technical LUTs make sense only with correctly shot log footage. See log footage and exposing log for recording clean images. For bit depth and noise concerns, review 8-bit versus 10-bit video, because 8-bit log footage can show banding when converted.
Color Management Alternatives
Rather than applying LUTs clip by clip, many colorists use project-level color management so each clip is transformed with the right camera profile. This is the approach in Resolve color management, and similar tools exist in other editors. Understand the principles in color spaces compared.
Checking The Result
After the conversion, check the image on scopes, as explained in Lumetri scopes. The waveform should fill the range without clipping, and skin tones should land on the skin line. Then continue with the grade, and see color grading basics for the next step.
Try It
- Identify the camera and log format of a clip and find the manufacturer technical LUT.
- Apply the LUT at the start of the grade and compare with the original.
- Check the waveform for clipping or crushed blacks.
- Add a basic exposure fix and a creative grade after the conversion.
Common Questions
What is a technical LUT?
It is a lookup table that converts footage between color spaces and gamma curves, such as camera log to Rec.709, without a creative look.
Do I need a LUT for log footage?
You need some transform to view it properly, which can be a LUT or a color managed pipeline.
Can I use any LUT on any camera?
No. A technical LUT is made for a specific log format and gamut, and the wrong one produces incorrect colors.
Are technical LUTs destructive?
No. They are applied non-destructively in your editor and can be changed or removed at any time.
Related Lessons
- LUTs Explained for how lookup tables work.
- Log Footage to understand what they convert.
- Exposing Log to record clean log files.
- Resolve Color Management for a project-level alternative.
- Color Grading Basics for the next step.
Gear That Helps With This
Hand-picked kit that makes this lesson easier to put into practice.
Some links are affiliate links: if you buy through them we may earn a small commission at no extra cost to you. How this works.