
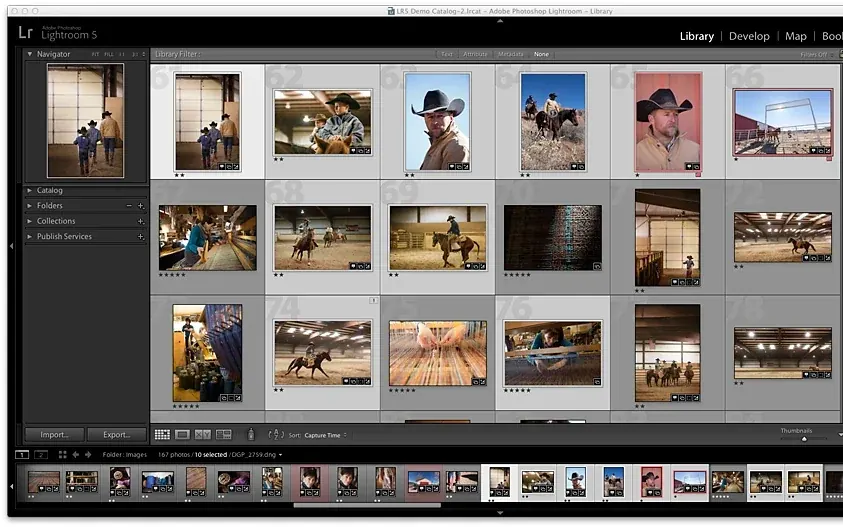
Culling photos means going through a shoot to pick the best frames and set aside the rest. In Lightroom Classic you do it with pick and reject flags, star ratings, color labels and views like Survey and Compare, then filter to see only keepers. Auto-Advance speeds the job by moving on after each decision.
Why It Matters
After a long shoot, a few hundred or several thousand images wait for review. Editing all of them wastes hours. Culling cuts the set down first, so your editing time goes to the pictures that deserve it.
A repeatable routine also makes you more consistent. Without one, you second-guess choices and look at the same frames repeatedly. Passes with a clear purpose, quick keys and a simple filter finish the job in a fraction of the time.
Beginner Culling Photos With A Simple Flag-And-Star Workflow
Culling happens in the Library module of Lightroom Classic. Open the folder or collection you want to review, then press G for the Grid view and E for the Loupe view, which shows one photo at a time. Work in Loupe for a first pass.
The Three Tools
- Flags: Press P to mark a photo as picked and X to mark it as rejected. Press U to remove a flag. Flags are quick yes-or-no marks.
- Star ratings: Press 1 through 5 to rate a photo. Press 0 to clear the rating. Stars let you rank keepers, for example three for good, four for strong and five for portfolio.
- Color labels: Keys 6 through 9 apply red, yellow, green and blue labels. Use them for jobs, such as red for needs retouching.
Turn On Auto-Advance
In the Photo menu, find the Auto Advance option and turn it on. Now each time you apply a flag or rating, Lightroom moves to the next photo. Your hand stays on the keyboard and you can move through a set quickly. If Auto Advance is off, use the right arrow key to move on yourself.
A Fast Two-Pass Routine
- First pass: view each photo in Loupe. Press X on clear failures such as missed focus, closed eyes or bad framing. Do not agonize. If you are unsure, move on.
- Filter the grid to hide rejected photos using the filter bar above the grid and choose the flag filter. Alternatively, delete rejected photos by choosing Photo, then Delete Rejected Photos.
- Second pass: look at what remains and press P on the keepers.
- Filter to picked photos only. You now have a smaller set that is ready to edit.
Compare And Survey
When frames are nearly identical, press C for Compare view. It shows two photos side by side, with one selected as the standard. Press the arrow keys to bring in new challengers. Press N for Survey view when you want to look at several selected photos together and remove the weak ones by clicking the X on each.
Zoom To Check Focus
Press Z to zoom a photo to 100 percent and check sharpness at the eyes or key detail. Build 1:1 previews during import if this step feels slow, as covered in Lightroom import settings.
Common Mistakes
- Deleting photos in the first pass before you have seen the whole set and know what is best.
- Using stars and flags without a plan, so the meaning of each mark is lost by next month.
- Editing photos during the cull, which slows everything down and distracts you from choosing.
- Keeping the Lightroom window small so previews are too tiny to judge sharpness.
Handy for this: Fast Wide-Angle Lens — gather more starlight. (affiliate link)
Advanced Speed, Rules And Review Habits
Write Your Own Rating Rules
Decide in advance what each star means and write it down. A common system is one star for technical keepers, two for decent, three for good, four for strong and five for best of the shoot. Whatever you choose, apply it the same way every time so filters work later. Combined with collections, it lets you find all five-star images across years, as described in collections and keywords.
Use The Filter Bar Well
Press the backslash key to show the filter bar above the grid. The attribute filter combines flags, ratings and color labels. Click the flag icon to show only picks, or click the star rating at a chosen level and above. Attribute filters can be saved as presets on the right side of the filter bar, so a click brings back your preferred view.
Stacks For Bursts
Burst sequences clutter the grid. Select the frames and press Ctrl+G on Windows or Command+G on macOS to group them into a stack. Only the top frame shows, and the stack can be expanded when needed. Stacks by capture time can be created automatically from the Photo menu. Pick the best frame from the stack, flag it, and then collapse it.
Rejects And Deleting
Rejected photos remain in the catalog until you remove them. Deleting rejects only after the whole job is delivered gives you a safety net. When you do remove them, Lightroom can either remove them from the catalog or delete them from disk. Read the prompt carefully, since deleting from disk cannot easily be undone. A routine backup, as outlined in catalog setup, adds protection.
Speed Tips For Large Shoots
- Hide panels you do not need with Tab to give the preview more room.
- Use a second pass only on what remains, never on the whole shoot.
- Set a time limit for each pass, such as one second per frame for the first run.
- Consider looking at weddings or events in smaller chunks by time, so you stay fresh.
Emotional Distance
Photographers tend to keep frames because of the effort of capturing them. Leave the cull for a few hours or overnight when the schedule permits, and choose by what the viewer will see, not what you remember. If a photo does not add something new compared with another frame, reject it.
Syncing Decisions Across Devices
If you use Lightroom on a phone, flags and ratings can be applied in the field and will sync back to Classic through a synced collection. This lets you cull in waiting rooms or on trains. Details are in Lightroom Mobile.
Try It
- Open a folder of at least 100 photos in Library and press E for Loupe view.
- Turn on Auto Advance in the Photo menu, then do a one-second-per-frame pass pressing X on clear failures.
- Filter out rejects, then press P on the best frames and filter to picks only.
- Use Compare view with C on two similar frames and choose a winner.
- Note how many photos remain and how long the entire process took, and aim for a shorter time on the next shoot.
Common Questions
What is the difference between flags and star ratings?
Flags are a quick yes or no, with pick and reject. Star ratings rank keepers from one to five. Use flags for the fast first pass and stars for deciding which frames to prioritize.
How do I make Lightroom move to the next photo after rating?
Turn on Auto Advance in the Photo menu. Each flag or rating then jumps to the next photo, so you can work with the keyboard alone.
Should I delete rejected photos right away?
No. Wait until the job is delivered. Rejected photos stay in the catalog until you remove them, so you keep a safety net in case a client asks about a frame.
What is the fastest way to compare similar shots?
Use Compare view by pressing C, or Survey view by pressing N. Both let you view photos side by side and remove the weaker frames.
Related Lessons
- Lightroom Import Settings to build previews that make culling faster.
- Collections, Keywords, And Finding Photos to group keepers once you have chosen them.
- Smart Collections to gather every five-star photo automatically.
- Lightroom Mobile to cull on a phone and sync decisions back.
- Lightroom Shortcuts to learn more keys that speed up review.
Gear That Helps With This
Hand-picked kit that makes this lesson easier to put into practice.
Some links are affiliate links: if you buy through them we may earn a small commission at no extra cost to you. How this works.