
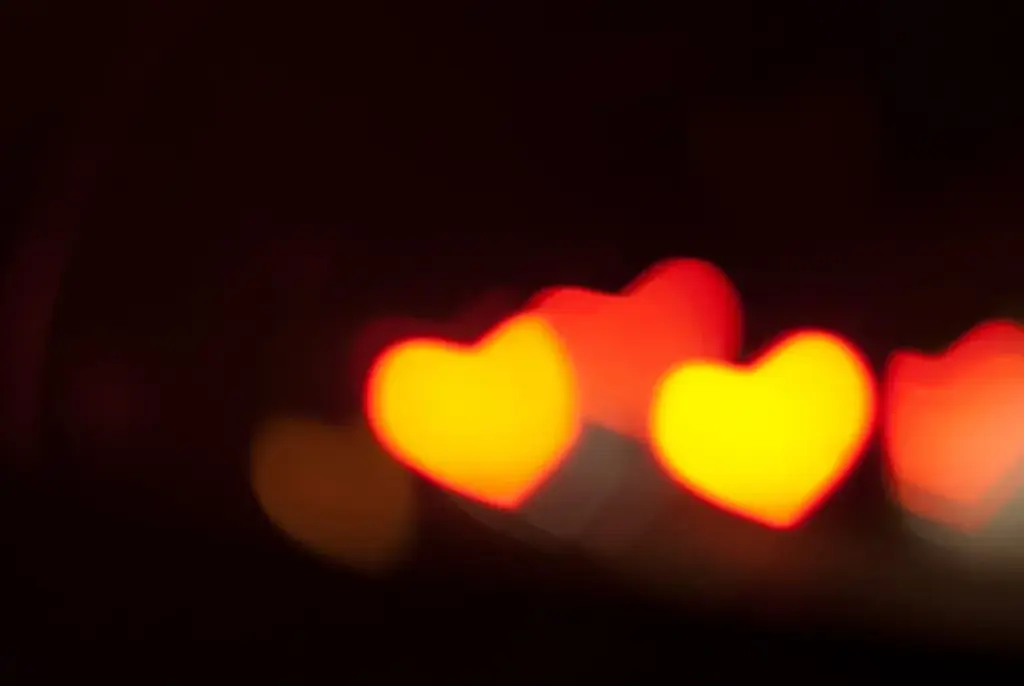
Custom bokeh shapes are made by cutting a small shape, such as a heart or star, in black cardboard and holding it in front of a wide-aperture lens. Out-of-focus point lights then take the shape of the cutout. It works because blurred highlights are images of the aperture opening itself.
Why It Matters
Out-of-focus highlights are not random blobs. They are tiny pictures of the opening that lets light into the lens. When that opening is round, you get round bokeh. When you change the opening to a heart or a star, the highlights copy that shape. It is a cheap, fun effect for portraits, holiday lights and product shots.
Understanding this also makes you better at judging lenses, since blade count and aperture shape affect how highlights look at every setting. Read bokeh explained for the background on how blur forms.
Beginner Cut, Mount And Shoot Custom Bokeh Shapes
What You Need
- A lens with a wide maximum aperture, such as 50mm f/1.8. A shape works best between f/1.4 and f/2.8.
- Black cardboard or thick black paper. Matte is better than glossy, which can reflect light.
- A craft knife, a cutting mat and tape.
- Small bright lights in the background, such as fairy lights, street lights at night or sunlight through leaves.
Step By Step
- Trace the front of your lens onto the cardboard and cut a circle that is a little larger than the lens barrel, or make a square about 3 inches wide.
- In the center, cut a small shape about 3/4 to 1 inch (20 to 25mm) tall. Keep the edges clean and sharp.
- Cut a strip of card to make a sleeve, then tape the cutout card to the front of the lens or to the lens hood, so it stays centered.
- Set the lens to its widest aperture and focus on your subject close to the camera.
- Place bright point lights 10 or more feet behind the subject, and take the picture.
Sizing The Cutout
The cutout must be smaller than the opening of the lens, or the lens will ignore the edges and the shape will look round. On a 50mm f/1.8 lens, the opening is about 28mm across at maximum aperture, so a shape under 24mm tall works. A 35mm f/1.8 has an opening of about 19mm, so the shape must be smaller, roughly 15mm. A smaller shape is cleaner and sharper but lets in less light.
Which Shapes Work
| Shape | Result | Tip |
|---|---|---|
| Heart | Clear and popular for portraits | Keep the point facing the bottom of the cutout |
| Star | Good for holiday lights | Use five or six simple points |
| Circle | Sharp round dots | Good for checking alignment |
| Thin shapes | Hard to read | Make shapes chunky with simple edges |
Common Mistakes
- Cutting the shape too large, so the lens opening is the limit and the highlights stay round.
- Shooting at f/8 or another small aperture, where the lens iris is smaller than your cutout.
- Letting stray light leak around the card, which creates flare and lowers contrast.
- Using lights that are too dim or too close to the focus distance to blur well.
Handy for this: Fast Prime Lens — creamy backgrounds, low light. (affiliate link)
Advanced Sizing The Cutout, Point Lights And Aperture
Why The Shape Appears
A point of light that is out of focus spreads into a disc the same shape as the entrance pupil, or the opening seen from the front. When you put a mask in front, it becomes the limiting opening, so the disc takes the mask’s shape. A lens with more aperture blades gives rounder highlights, and fewer blades or stopped-down blades give polygons. This is the principle in circle of confusion.
Cutout Size By Lens
The entrance pupil diameter equals the focal length divided by the f-number. A 50mm f/1.8 has a pupil near 28mm, an 85mm f/1.8 has about 47mm and a 35mm f/2 has about 18mm. Your cutout must fit inside that width with a safe margin. Longer lenses allow bigger shapes, and they also magnify the bokeh balls, so the shapes read more clearly. Shapes on a wide lens are tiny and hard to see.
Light Loss
The cutout reduces the open area of the lens. If the pupil is 28mm across and your shape covers roughly 20mm by 20mm, the open area drops to about half, which costs about one stop. A smaller cutout costs more. The meter in your camera measures after the card, so exposure adjusts automatically in aperture priority, but your shutter speed may fall. Raise ISO if needed. See stops of light for the arithmetic.
Depth Of Field Changes
A smaller effective aperture increases depth of field. A 28mm opening cut down to 20mm acts like f/2.5 for depth of field, so the background blurs less than you expect. Blurring a background fully needs distance. Keep the subject near the camera and the lights far behind them, 10 to 20 feet, so that the highlights spread into large discs. The relationship is explained in controlling depth of field.
Choosing Point Lights
Bright small sources give the clearest shapes. Fairy lights, Christmas lights, car headlights, street lamps and sun through leaves are good. Large soft sources, such as a window, produce wide blobs that merge. Put lights at different distances for varied sizes. For a full portrait setup, see fairy light bokeh portraits.
Vignetting And Edges
The shape appears whole only near the center of the frame. Toward the corners, the lens barrel clips the opening into a cat’s eye, and your cutout shape becomes cut off. Keep lights toward the middle of the picture, or crop in later. Check lens vignetting for why this happens, and remember a lens hood can help keep the card stable, as discussed in lens hood.
Testing And Refining Your Mask
Make a few masks in different sizes and keep them in a folder, since the best size depends on the lens. Start with a plain circle at the target size to confirm that the cardboard really limits the light. If the circle looks like a normal round bokeh, then the opening is larger than the hole, and you can then trust the result with a heart. Sharp corners and clean cuts give crisp shapes, so use a fresh blade. Paint the cut edges black with a marker to remove shine, and test in a dark room with a single lamp as a point source.
Try It
- Cut a 3/4 inch heart in black card, tape it to a 50mm lens and photograph a friend with string lights behind them.
- Repeat with a circle, then a star, and note which shape reads best.
- Take the same picture at f/1.8 and f/4 and see how the shape disappears at the smaller aperture.
- Shoot a single subject at 6 feet and again at 3 feet and compare how big the shapes appear.
Common Questions
What size should the cutout be?
Keep it smaller than the lens opening, which is focal length divided by f-number. For a 50mm f/1.8 lens, a shape 20 to 25mm tall is a good start. Make it chunky and simple.
Why are my bokeh shapes round and not hearts?
Usually the cutout is larger than the lens opening, or the aperture is too small. Open the lens fully, shrink the shape and check that the card is centered.
Do I need an expensive lens?
No. Any lens with an aperture of f/2.8 or wider can work. A cheap 50mm f/1.8 is ideal, and a longer focal length gives larger shapes.
Does the shape affect sharpness?
A smaller opening reduces light and can add a little diffraction softness, but at these sizes it is usually small. Focus carefully on the eyes of your subject.
Related Lessons
- Bokeh Explained for how blur discs form in a lens.
- Fast Lenses to choose lenses that make bokeh easy.
- Control Depth Of Field to balance blur with sharp subjects.
- Fairy Light Bokeh Portraits for a lighting setup that suits these shapes.
- Lens Hood for a handy base for mounting the card.
Gear That Helps With This
Hand-picked kit that makes this lesson easier to put into practice.
Some links are affiliate links: if you buy through them we may earn a small commission at no extra cost to you. How this works.