
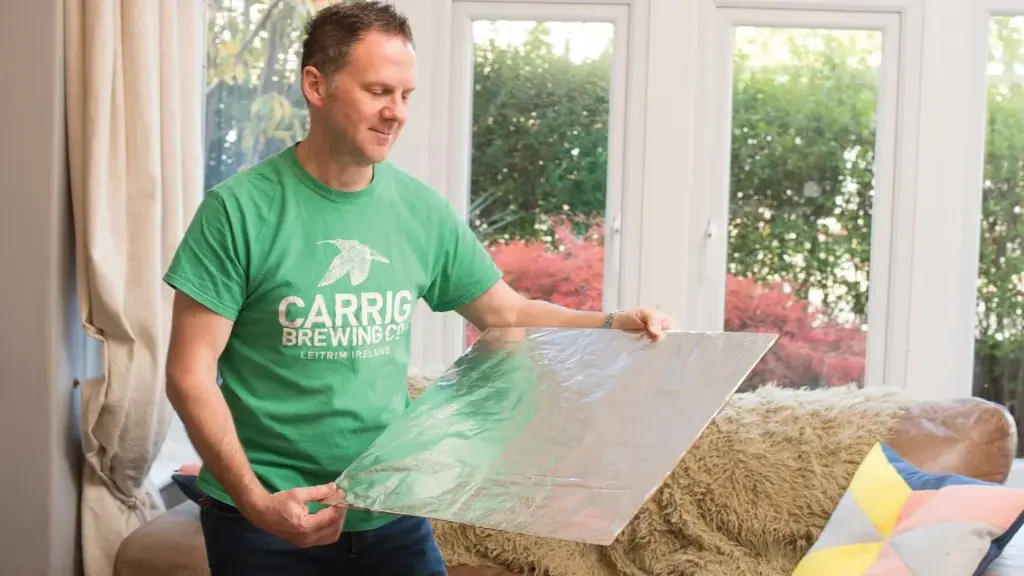
A DIY foil reflector is a piece of cardboard or foam board wrapped in aluminum foil or covered with a car sunshade, used to bounce light into shadows. It costs almost nothing, takes minutes to make and fills dark areas of portraits, food and product shots with soft, controllable light from a window or lamp.
Why It Matters
Shadows on a face or a plate of food often look too dark and heavy. A reflector sends some of the light back, lifting those shadows and adding a catchlight to the eyes, which makes the picture look more polished.
Commercial reflectors are cheap and folding ones are very portable, but a homemade version is a good way to learn how light behaves. You can change its size, texture and angle, and compare the result with the shot without it.
Beginner Build A Foil Reflector From Scrap
The simplest reflector is a flat board with foil on one side. Take a piece of cardboard from a box, foam board from a craft store or even a large book. Wrap a sheet of kitchen foil around it, with the shiny side out, and tape the edges on the back. The whole job takes about five minutes.
What You Need
- A piece of cardboard or foam board, at least 12 by 18 inches.
- Aluminum kitchen foil, standard width.
- Masking tape or packing tape.
- Optional: spray adhesive or glue stick to hold the foil flat.
- Optional: a car windshield sunshade, which already has a reflective surface.
Steps To Make It
- Cut the board to the size you need, for example 12 by 18 inches for portraits or 8 by 10 inches for food.
- Tear off a sheet of foil about two inches larger than the board on each side.
- Lay the foil shiny side up and place the board on top, then fold the edges over to the back.
- Tape the edges down firmly and smooth the surface with your hand.
- Optionally, tape a second color such as white paper or gold wrap to the other side.
How To Use A DIY Foil Reflector
Place the subject near a window or lamp. Hold the reflector on the opposite side of the light, angled so it catches the light and bounces it into the shadow side. Move it closer for a stronger effect and farther away for a subtle one. Check the preview on your camera, and adjust until the shadow looks gentle and not flat.
| Situation | Where To Put The Reflector |
|---|---|
| Portrait by a window | Beside or below the face, on the side away from the window |
| Food on a table | Opposite the window, just outside the frame |
| Small product | Close to the subject, angled up to fill shadow |
| Outdoor portrait in open shade | Below the chin, aimed up and slightly forward |
| Close up of a flower | Held beside the plant, at a low angle |
Common Mistakes
- Using wrinkled foil with sharp creases that create harsh, uneven hot spots.
- Aiming a bright reflector directly at a face, which makes people squint.
- Letting the reflector appear in the frame or cast its own reflection in glass.
- Making the reflection as strong as the main light, which removes the shape of the subject.
Beginners often want the reflector to do too much. A good fill is quiet. If you can tell that a reflector was used, it is probably too close or too bright. The shadows should stay visible but lighter, because a bit of contrast is what gives a face or an object its form.
Handy for this: Softbox And Light Kit — soft, flattering light. (affiliate link)
Advanced Foil Texture, Color And Placement
Smooth Versus Crinkled Foil
Smooth foil acts almost like a mirror. It bounces a narrow, bright, specular beam that reaches far but is harsh, and it must be aimed with care. Crinkled foil that has been flattened out scatters the light in many directions, which gives a softer and wider spread with a lower peak brightness. To make a gentle reflector, crumple a sheet, open it again, press it onto the board and tape it down. The tiny facets spread light across a larger area and reduce the hot spot. Many photographers keep one board with each surface and switch between them. The principle of soft and hard light is explained in hard vs soft light physics.
Silver And Gold Effects
Aluminum foil returns a neutral, slightly cool light. For a warmer look, you can use gold craft foil, gold wrapping paper or a gold sunshade surface. Gold adds warmth to skin and food, much like late sun, but too much looks orange and can fight your white balance. Mix a silver side and a gold side on one board for flexibility, or place white paper for the gentlest fill. See reflectors and diffusers for how commercial 5-in-1 sets organize these surfaces, and color temperature in kelvin to understand why the colors shift.
Placement, Angle And Distance
Light from a reflector follows the rule that the angle of incidence equals the angle of reflection. Think of the light, the reflector and the subject as a triangle, and move the board until its bounce lands where you want it. Distance changes the strength, because brightness drops with distance. Doubling the distance cuts the light to about a quarter, as described by the inverse square law. A larger reflector placed close gives softer light than a small one far away. A board 20 inches wide at two feet from a face is a good starting point.
Placing For Catchlights And Shape
A reflector placed below the face and aimed upward adds a bright catchlight in the lower part of the eye and softens shadows under the nose and chin. Too much fill from below can look eerie, so keep it subtle. For side light, put the reflector level with the face. If you want shadows to stay deep for a dramatic mood, use a black card instead to absorb light, a technique used in low key and high key. Learn more about the bright points in the eyes in catchlights.
Practical Limits
Foil dents easily and loses its flat surface after a few uses, so replace it when it looks beaten up. In wind, a large board acts as a sail, so ask a friend to hold it or clip it to a stand. Be careful in bright sun, because a mirror-like surface can reflect a dangerous glare into eyes. Use a diffuse side outdoors, and keep reflections away from faces until you have checked the strength.
Try It
- Make a 12 by 18 inch foil reflector and tape on a white sheet on the back side.
- Photograph a person by a window with no reflector, then add the foil reflector on the shadow side.
- Compare smooth and crinkled foil for the same shot and check the difference in softness.
- Try the white side, then the foil side, and note which suits skin better.
- Move the reflector closer and farther and watch how the shadow brightness changes.
Common Questions
Does foil make a good reflector?
Yes. Aluminum foil on cardboard is a low cost reflector that bounces plenty of light. Crinkling the foil first softens the result, and a flat surface gives a stronger, more directional bounce.
Which side of foil should face out?
Both sides reflect well, but the shiny side is brighter and more mirror-like, while the dull side is softer and slightly less bright. Use the dull side for a gentler fill on faces.
How big should a DIY reflector be?
Twelve by eighteen inches works for headshots, food and small subjects. Use 24 by 36 inches or larger for full portraits. A bigger reflector close to the subject gives softer light.
What is the difference between gold and silver reflectors?
Silver gives a neutral, slightly cool fill with strong output, while gold adds warmth. White fills with the softest, least intense light. Choose based on skin tone, scene color and mood.
Related Lessons
- Reflectors And Diffusers to see how commercial versions work.
- Hard Vs Soft Light Physics for why surface texture changes the light.
- Inverse Square Law to control the strength by distance.
- Window Light Photography for the natural light to bounce.
- DIY Light Tent for another cheap product lighting tool.
Gear That Helps With This
Hand-picked kit that makes this lesson easier to put into practice.
Some links are affiliate links: if you buy through them we may earn a small commission at no extra cost to you. How this works.