
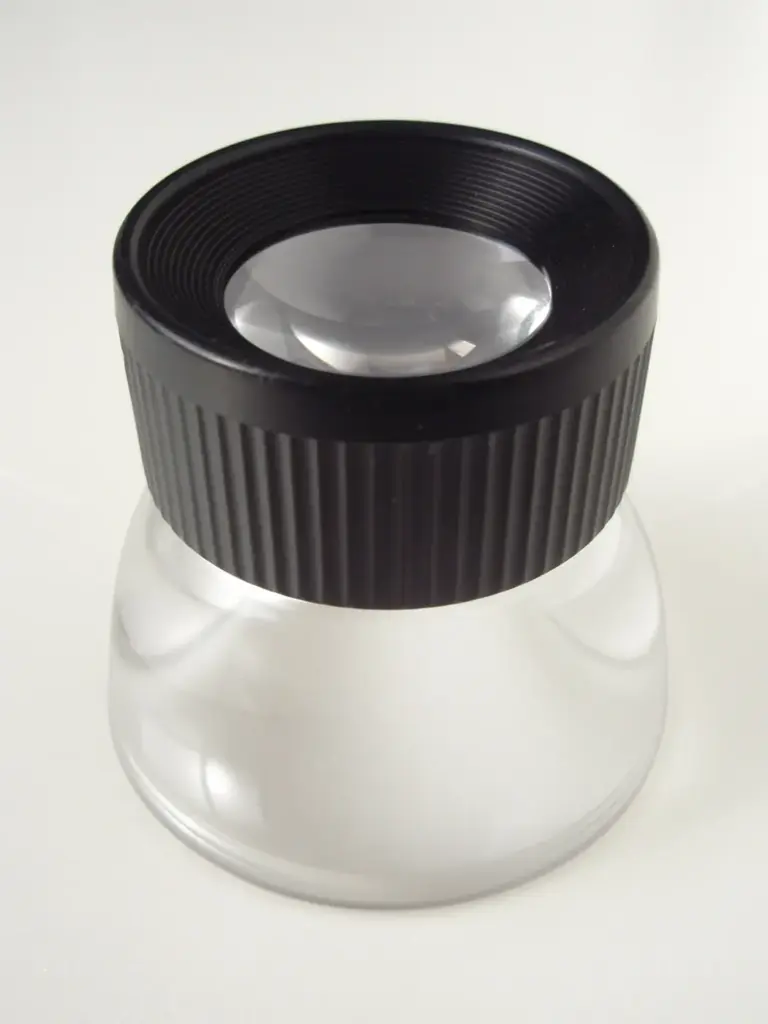
Phone macro with a jeweler’s loupe means holding or mounting a small magnifier directly over the phone’s camera lens so the phone can focus on tiny subjects. The loupe acts as a close-up lens. With steady alignment and good light, you can capture insects, coins, circuit boards and fabric weave in fine detail.
Why It Matters
Most phones focus no closer than a few inches, which limits how small a subject can appear in the picture. Built-in macro modes help, but they are often low resolution crops from an ultrawide camera. A cheap loupe from a hobby shop, around 10 to 30 dollars, adds real optical magnification, and the phone camera does the rest.
The method is also a gentle introduction to true macro photography. You face the same issues as with expensive gear: shallow focus, little light and shaky hands. Learning them with a loupe prepares you for dedicated lenses and extension tubes later.
Beginner Getting Started With A Loupe On Your Phone
Choosing A Loupe
Jeweler’s loupes are labeled by magnification, such as 5x, 10x or 20x. A 10x loupe is the common choice, with a lens about 21mm wide and a working distance of around an inch. A 5x loupe gives a wider view and a more forgiving focus distance, so it suits beginners. Prefer a loupe with a glass lens over plastic. Triplet types correct color fringing better than single lenses.
Simple Method
- Clean the phone lens and the loupe lens with a microfiber cloth.
- Open the camera app and select the main camera, not the ultrawide, unless the phone’s macro mode uses it.
- Hold the loupe flat against the phone, with its lens centered exactly over the camera lens, and the loupe’s eyepiece facing the subject.
- Bring the phone and loupe slowly toward the subject until it comes into focus. Usually that is about an inch from the subject.
- Tap the screen on the subject to set focus and exposure, then take the picture.
Holding It Steady
Your hand will move, and at this magnification a tiny shift ruins focus. Rest your elbows on a table, and brace the hand holding the phone with the other hand. Prop the subject on a stack of books or a flat surface, then slide the phone toward it. A loupe holder, a spring clip or even a rubber band or modeling clay can fix the loupe in place on the phone.
| Loupe | Field Of View | Working Distance | Best For |
|---|---|---|---|
| 5x | Wider, about 30mm or more | Around 2 inches | Beginners, stamps, flowers |
| 10x | About 15 to 20mm | Around 1 inch | Coins, circuit boards, insects |
| 20x | About 8 to 10mm | Under 1 inch | Fine textures, advanced work |
Common Mistakes
- Holding the loupe off-center, which makes one side blurry and dark.
- Casting a shadow with the phone, so the subject is too dark.
- Using digital zoom, which only reduces quality.
- Letting the loupe touch a delicate subject, such as a live insect or a wet surface.
Handy for this: Macro Lens — fill the frame with detail. (affiliate link)
Advanced Optics Alignment, Lighting And Hand-Held Focus Stacking
Why Alignment Matters
A phone lens is tiny, often only 2 to 4mm across. The loupe is a much larger lens, and the phone looks through its center. If the optical axes do not match, the image shows color fringes, soft corners and strong vignetting. Look at the live view while shifting the loupe by fractions of a millimeter until the image is evenly sharp. A ring or cap holder that centers the loupe over the lens helps. See lens aberrations for the faults you will see at the edges.
Magnification And Sensor Size
The loupe works like a close-up lens with a focal length of about 25mm for 10x, because magnification is roughly 250 divided by focal length in millimeters. A phone camera looking through it sees a patch only a few millimeters wide, and the phone’s small sensor makes the effective magnification large. The reproduction ratio is explained in reproduction ratio. Expect strong blur outside the center and very limited depth of field, often under a millimeter.
Lighting Small Subjects
The loupe and phone sit close to the subject and block the light. Use a small LED lamp, a ring light or a second phone flashlight held at an angle. Diffuse harsh light with a tissue or white paper to avoid glare on shiny surfaces such as coins. Side light shows texture and relief. If the phone camera tries to raise ISO, the image gets noisy, so give it as much light as you can. More ideas are in macro lighting.
Focusing By Moving The Phone
Autofocus works poorly at these distances, so lock focus after tapping, then change the focus by moving your body slowly forward and back. Some camera apps offer manual focus and focus peaking, which show sharp edges in color. Do not rely on the phone’s own focus motor, since the loupe puts the focus point at a fixed range.
Hand Focus Stacking
Because depth of field is so thin, a single frame shows only a thin slice of the subject. Take a series of pictures while moving the phone about half a millimeter closer each time, then combine them in software that supports stacking, such as Helicon Focus, Zerene Stacker or Photoshop. Support the phone on a sliding platform if you can, like a book on a smooth table. Handheld stacking needs many frames, around 10 to 30, and some frames will fail, so overshoot. The method is detailed in focus stacking.
Reducing Shake
Use the volume button, a headphone button or a two-second timer to take the picture without touching the screen. Avoid burst mode on iPhones because it can cause small shifts, and keep exposure fixed. See camera self-timer for the delay trick.
Cleaning Up The Result
Raw macro frames usually need work. Crop away the soft edges so the sharp center fills the picture, then sharpen gently and reduce color fringes with the chromatic aberration tool in your editor. Dust on the loupe shows up as dark specks, so clean the glass between shots and use a blower rather than a cloth on a gritty surface. Keep your best frames at full resolution, since small subjects reward close viewing. If the picture is soft overall, check that the loupe is not tilted against the phone, which is a very common fault.
Try It
- Hold a 10x loupe against your phone and photograph a coin, then compare it to the normal close-up photo.
- Try the main camera and the ultrawide camera, and note which gives the cleaner corners.
- Add a lamp from the side and then a tissue diffuser, and see how the glare changes.
- Take 15 frames of a small flower while moving the phone slowly forward, then stack them in a free tool.
Common Questions
Does any loupe work for phone macro?
Most jeweler loupes work. Glass lenses of 5x to 10x are best, because stronger loupes are harder to focus and darker. Choose a loupe with a wide lens, at least 20mm, to cover the phone camera.
Which phone camera should I use?
Start with the main camera, since it has the best light gathering. Some phones focus better through the ultrawide camera, so try both and check the corners.
Why is only the center sharp?
A single lens at this magnification has a very small flat field, and the loupe adds curvature. Fill the center with your subject, and crop the edges if needed.
Do I need a clip or holder?
It is not required, but it helps. A holder keeps the loupe aligned and frees your hands. Modeling clay, a rubber band or a magnetic ring can work as well.
Related Lessons
- Macro Photography for the basics of close-up shooting.
- Focus Stacking to combine frames for more depth of field.
- Reproduction Ratio to understand magnification numbers.
- Macro Lighting for ways to light small subjects.
- Extension Tubes as a camera-based alternative to a loupe.
Gear That Helps With This
Hand-picked kit that makes this lesson easier to put into practice.
Some links are affiliate links: if you buy through them we may earn a small commission at no extra cost to you. How this works.